12 Best Back Squat Alternatives To Develop Leg Strength
In my opinion, Back Squats are the single best exercise for building strength. Back Squats not only build strong legs, but they’ll also help develop a strong back and a strong core.
However, as effective as I believe the Back Squat to be I also understand that there are situations where you might need an alternative.
Maybe you don’t have the necessary equipment or maybe you don’t feel comfortable with your Back Squat technique.
Whatever the reason, if you’ve come here looking for Back Squat alternatives, then you’re in the right place. I’m about to share with you 10 of my favorite alternative exercises for Back Squats.
Alternatives for Back Squat
I’ve tried to include as much variety in this list of alternatives as possible. There are exercises that incorporate different pieces of equipment – barbells, dumbbells and even one that doesn’t require any equipment at all. There are also beginner-friendly exercises and others better suited for more advanced lifters.
Finally, there are traditional exercises as well as a couple that are a little more ‘outside the box’.
Hopefully, at least one of these exercises will be a good fit for what you’re looking for.
Front Squat
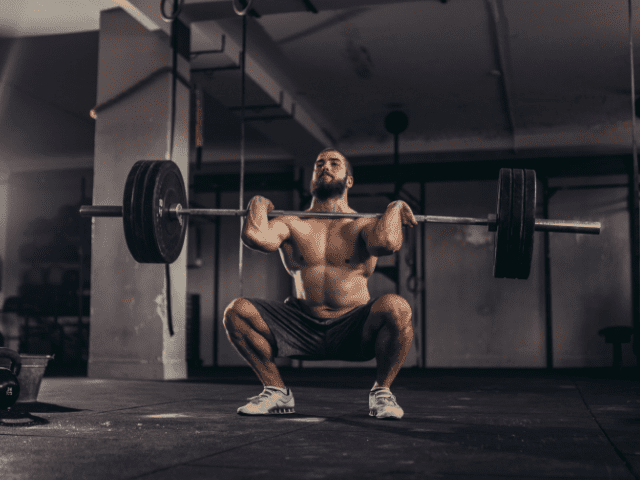
In my opinion, the only Back Squat alternative that is actually going to come close to developing the same amount of strength gains is the Front Squat.
I understand that some situations don’t allow for either to be done (injury, lack of equipment, technique), but if you’re able to at least one of these two squat variations should be in your strength program.
Step-by-Step Instruction
- Set the barbell on a squat rack at chest height. Approach the bar, facing it.
- Use a clean grip or cross-arm grip to hold the bar. Place the bar on your front deltoids, close to your neck.
- Stand up to lift the bar off the rack. Take a step or two back to clear the rack.
- Stand with your feet shoulder-width apart, toes slightly out. Keep your elbows high and chest up.
- Begin by bending your knees and hips, lowering your body towards the ground.
- Continue lowering until your thighs are at least parallel to the floor, keeping your elbows high.
- Push through your heels to extend your knees and hips, returning to the starting position.
Coaching Points
Be patient with your flexibility. Persistence and working hard on your flexibility will pay off with Front Squats. Remember to always warm up prior to any lifting session. Work on flexibility drills during warm-up sets as well. After your session, use cool-down techniques, foam roll, stretch, and hydrate.
Leg Press
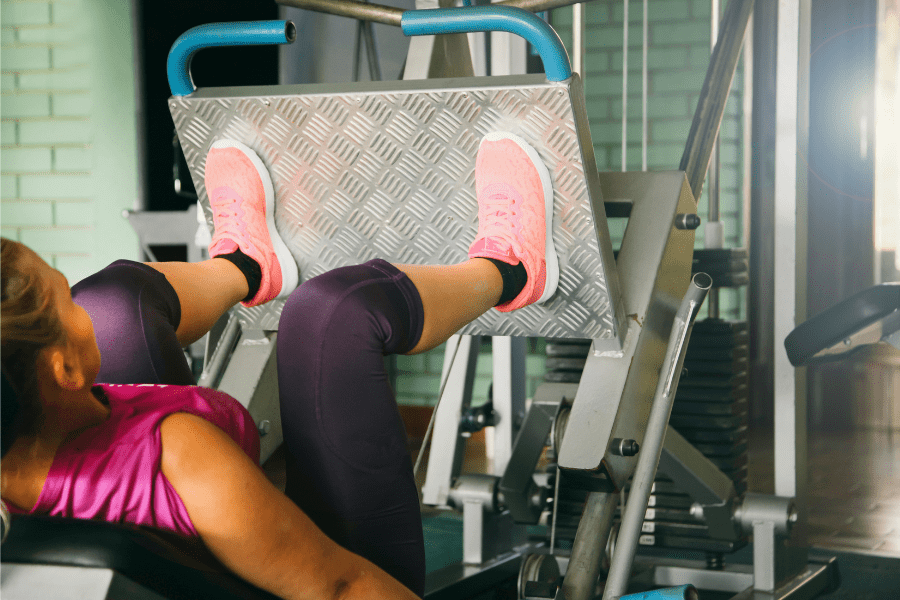
I’m just going to say it, I’m not a huge fan of the Leg Press. I just believe there are so many better options available for developing lower body strength (like Barbell Squat for example).
However, the Leg Press can make a good Back Squat alternative in some situations – if you’re recovering from an injury, can’t axial load or don’t feel comfortable with your technique for squats.
How To / Coaching Points
Instructions on how to do Leg Presses are going to be extremely dependent on the machine itself. All Leg Press machines do not function in the same way. It’s actually quite the opposite. I would guess there are at least a dozen different designs that all work differently.
With that being said, instead of specific instructions, I’m going to give you some somewhat universal tips when it comes to Leg Press.
- If using a Leg Press Machine you’re unfamiliar with, always start with no weight on the machine.
- Make sure you know how to unrack and rack the safeties as well as do a full rep before adding weight to the machine.
- Go up in weight slowly. No need to make a big jump and get yourself pinned and potentially hurt.
- Do NOT overextend your knees. Learn how to fully extend your legs without locking out your knees.
Benefits
The main benefit of a Leg Press is that you can build leg strength without having to load weight on your back (axial load). This is extremely benefit for anyone who may have back issues that prevent them from being able to Back Squat or even Front Squat.
Leg Press can also be beneficial for beginner lifters who are not yet comfortable with their Back Squat technique. I would rather a beginner Leg Press safely rather than Back Squat with improper form.
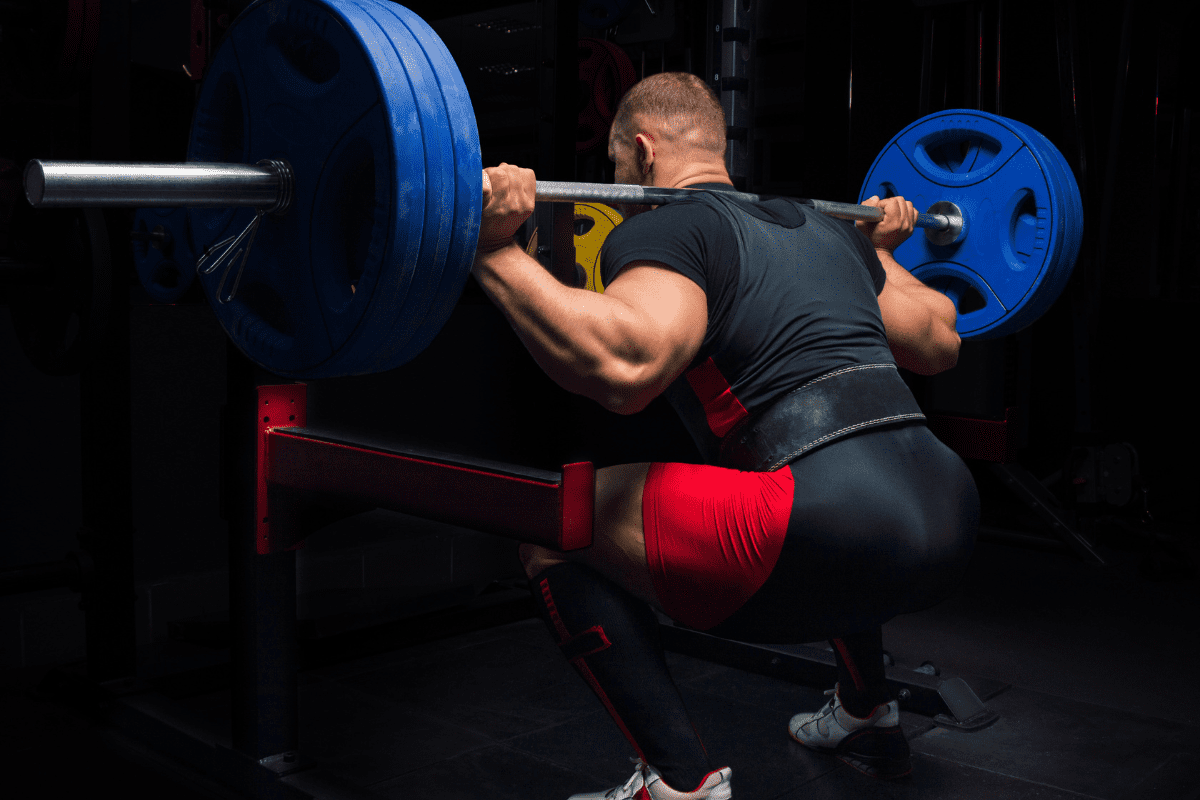
Zercher Squats
If you want to add some variety to your lower-body workouts, consider Zercher Squats. The unique positioning of the bar for Zercher Squats combines the benefits of Squats with many of the benefits you’ll find with a Deadlift.
Step-by-Step Instructions
- Position a barbell at waist height on a squat rack and load it with the desired weight.
- Stand facing the bar, and hook your arms under it, cupping the bar in the crooks of your elbows.
- Lift the bar off the rack by straightening your legs and take a step back.
- Assume a hip-width or slightly wider stance with your toes pointing slightly outwards.
- Begin the squat by pushing your hips back and bending your knees, ensuring your torso stays upright.
- Lower yourself until your elbows reach the inside of your knees, or go as deep as comfortable.
- Drive through your heels, extending your knees and hips to return to the starting position.
Coaching Points
If it’s your first time doing Zercher Squats, you’ll quickly realize just how uncomfortable having a barbell laying across your forearms can be. And, it only gets worse the heavier you get. Use a towel or pad if need be to cushion the bar against your arms.
It cannot be understated how important it is to keep the core braced while doing Zercher Squats.
Trap Bar Deadlift
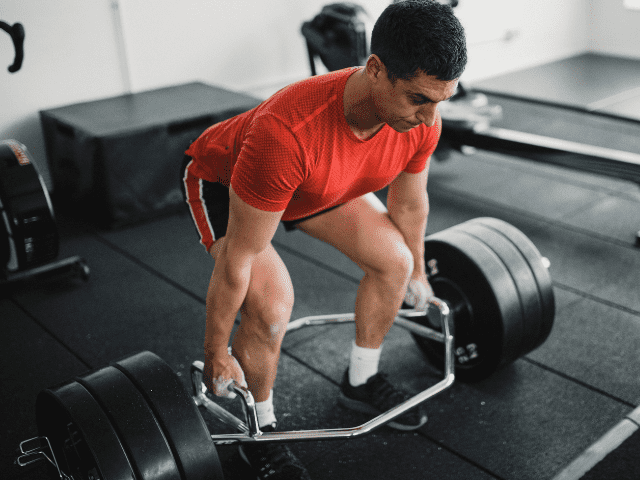
Not a barbell squat, but Trap Bar Deadlifts are a great exercise for developing lower-body strength. If loading the bar on the shoulders is an issue, Trap Bar Deadlifts can make a good Back Squat alternative.
Step-by-Step Instructions
- Load the trap bar with the desired weight and stand inside it.
- Stand with feet hip-width apart, aligned with the bar’s handles.
- Bend at the hips and knees to grab the handles, palms facing your body.
- Take a deep breath and brace your core, keeping your back flat.
- Push through your heels while extending your hips and knees to lift the bar.
- Fully extend your hips and knees, standing upright with the bar.
- Reverse the movement, lowering the bar back to the starting position.
Coaching Points
Easily the most common mistake for Trap Bar Deadlifts is allowing the back to round, placing unnecessary stress on the back. Keep the back flat throughout the movement and the core braced.
Do not bounce the bar off the floor between reps. Yes, bouncing the plates off the floor into the next rep may make the lift easier to do, but it’s also a good way to allow your technique to break down. Reset for each rep.
Unlike barbells which have a standard weight, hex bars weight can vary from one bar to the next. Keep this in mind if using set weights off of your training program.
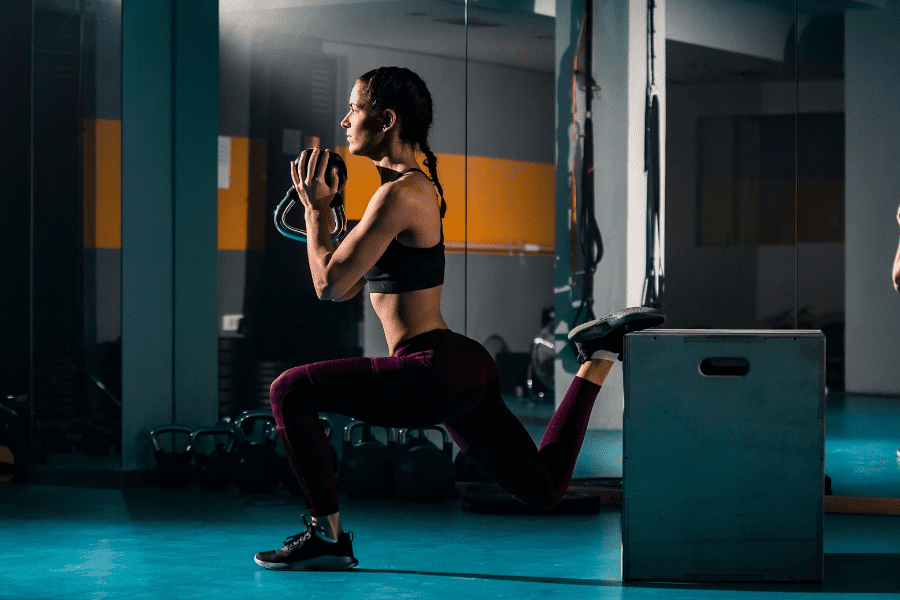
Single Leg Squat Off Box
A Back Squat alternative that barely requires any equipment at all is the Single-Leg Squat off a box. This barbell squat alternative is WAY more challenging than it looks and it a very effective exercise for building isolateral strength.
Step-by-Step Instructions
- Stand tall with one leg down and the other straight drifting off the side of the box.
- Initiate the squat by hinging at the waist and bending at the knee simultaneously.
- Descend until the hip crease is just below the knee.
- Keep the heel flat and center of mass over the mid-foot.
- Keep the torso as vertical as possible. Sometimes holding the arms straight out from here will help with balance and torso positioning.
- Once you reach depth, drive through the heel, keeping the foot flat, and stand tall.
Coaching Points
Single Leg Squat Off a Box is by far one of the most difficult variations of single-leg training. A proper progression needs to be followed in order to prepare the athlete for a movement like this.
Tired of coming up with your own workouts? But don’t want to pay an arm and a leg?
I post workouts 5 days a week right here. (Did I mention they’re free?)
Barbell Step-Up
Barbell Step-Ups are another single-leg exercises that can serve as a quality Back Squat alternative.
Pro Tip: You can alter the emphasis of a step-up by adjusting the height of the box. Use a taller box to target the glutes and hamstrings, use a shorter box to target the quads more.
Step-by-Step Instructions
- Position the barbell across your upper back, securing it with a comfortable grip.
- Select a box or bench at an appropriate height, typically around knee level.
- Stand facing the box, barbell securely placed on your back.
- Place one foot onto the box and powerfully press through that leg, raising your body onto the box.
- Stand tall on the box, the other leg can either be beside the working leg or lifted.
- Control the descent back to the ground, using the same leg that stepped up.
Coaching Points
A stable box cannot be overstated here. If the box is not stable, do not do Barbell Step-ups.
Dumbbell Lunge
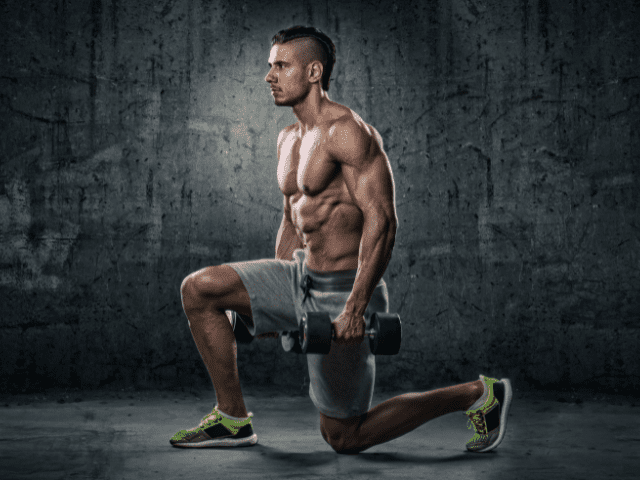
You’re probably already aware of Dumbbell Lunges. Consider this a simple reminder that Lunges are always a good option for a lower-body exercise.
Instructions
- Select appropriate dumbbells and hold one in each hand, arms fully extended, and palms facing your torso.
- Stand upright with feet hip-width apart and gaze forward.
- Take a step forward with one leg, landing with the heel first, and then lowering your body by bending both knees.
- Ensure your front knee is directly above your ankle and the other knee hovers just above the floor.
- Push through the heel of the front foot, returning to the starting position.
Coaching Points
When you step out for Dumbbell Lunges, make sure to keep the feet shoulder-width apart. If you’re feeling very off-balance in your lunge there is a good chance that you are stepping the lead foot directly in front of the back foot (essentially placing yourself on a tight rope).
Bulgarian Split Squats
The final single-leg alternative on the list is Bulgarian Split Squats. Bulgarian Split Squats also add an element of balance and stability which can be a great benefit for athletes.
Instructions
- Grab two dumbbells, one in each hand
- Get set up in front of your bench, reach one foot back and place it on the bench. Make sure you feel comfortable and balanced before proceeding.
- Squeeze the shoulder blades and engage the lats to create a stable back to help with bracing the upper body and to keep the dumbbells from swinging unnecessarily.
- Keep the chest as upright as possible and drop the back knee to roughly one inch from the floor.
- Now drive through the heel and midfoot of the front foot to drive yourself back up tall.
Coaching Points
When you step out, make sure to keep the feet shoulder-width apart. If you’re feeling very off-balance in your set up there is a good chance that you are placing the lead foot directly in front of the back foot (essentially placing yourself on a tight rope).
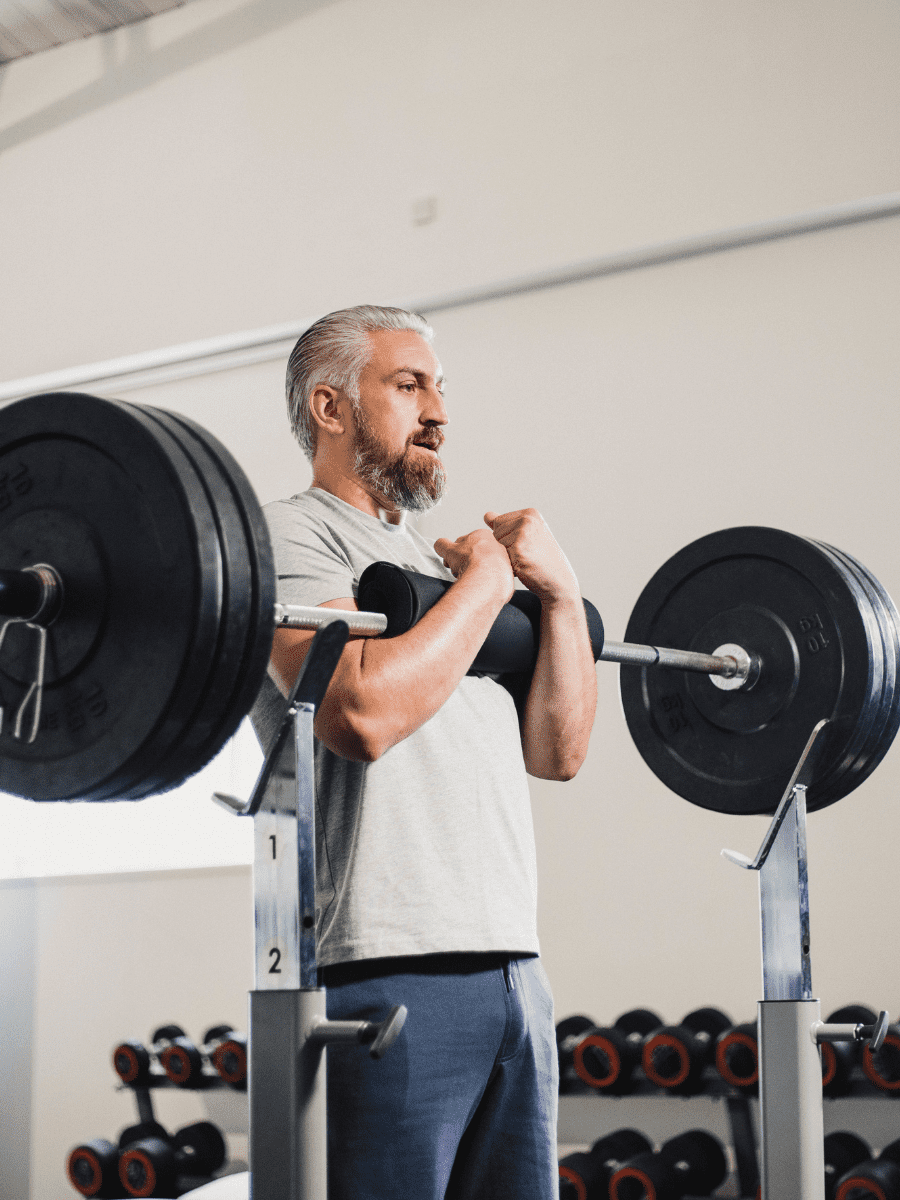
Goblet Squat

Goblet Squats are a beginner-friendly front-loaded squat variation. I love using Goblet Squats with new lifters as a tool to teach technique and proper movement patterns.
Step-by-Step Instructions
- Start by selecting a suitable weight dumbbell or kettlebell and hold it close to your chest.
- Position your feet shoulder-width apart, turning them slightly outward.
- Begin the squat by pushing your hips back and bending your knees, maintaining an upright torso.
- Ensure your elbows travel inside your knees as you lower yourself down.
- Go as deep as comfortable, ideally thighs parallel to the floor or lower.
- Push through your feet, extending your hips and knees, to return to the starting position.
- Check your alignment and prepare for the next repetition.
Coaching Points
As with any squat, the most important aspect of Goblet Squats is to keep the core braced to protect the spine and to maintain proper posture – chest out and lats engaged.
Wall Sit
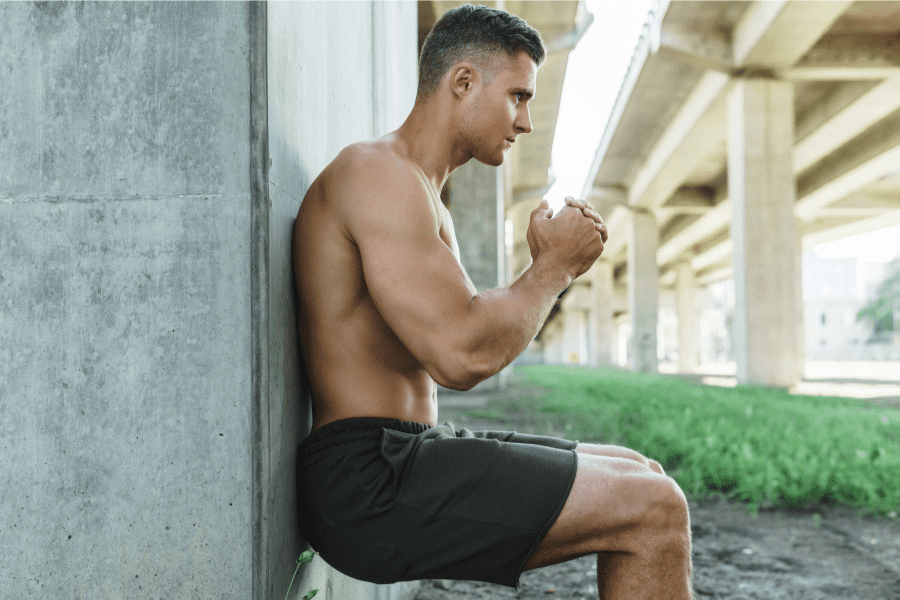
A barbell squat alternative that doesn’t require any equipment (except a sturdy wall) is the Wall Sit. Wall Sits are an isometric exercise that, as anyone who has done them can tell you, can light your quads on fire in a hurry!
Step-by-Step Instructions
- Locate a clear wall space with no obstructions.
- Stand about 2 feet away from the wall, feet shoulder-width apart.
- Lean back until your back is flat against the wall. Slide down until your thighs are parallel to the floor.
- Make sure your knees are directly above your ankles, forming a 90-degree angle.
- Keep your arms at your sides, crossed over your chest, or on your hips.
- Maintain the position for as long as you can, keeping your back flat against the wall.
Coaching Points
The biggest mistakes I see with athletes when doing Wall Sits all come from the setup. The thighs should be parallel to the floor with the ankles directly below the knees.
Having the hips too high or the feet too far in front of the knees will take strain off of the quads. Athletes inherently know this because these are two of the best ways to try to ‘cheat’ if it’s a competition. (If you ain’t cheatin’ you ain’t tryin’, right?)
Tire Flip
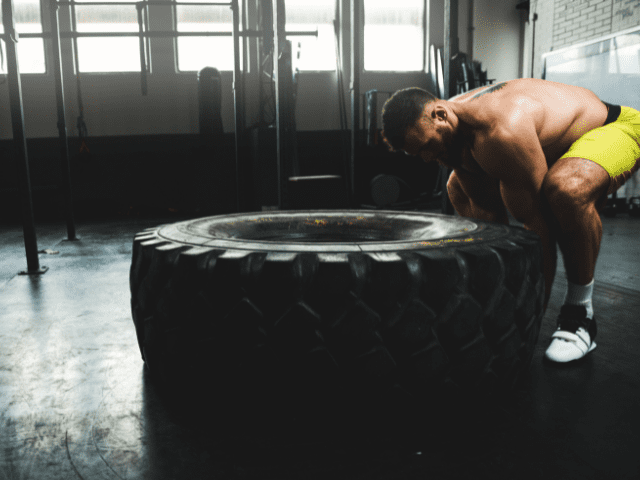
Tire Flips are an ‘out-of-the-box’ exercise that can do a great job of developing lower-body strength. So, if you have a giant tire lying around – put that thing to use!
How To
- Choose an appropriate tire size that you can flip safely.
- Stand facing the tire, feet shoulder-width apart.
- Squat down and grip the tire with your fingers under the edge, arms fully extended.
- Take a deep breath, tighten your core, and keep your back flat.
- Drive through your heels and extend your hips and knees, lifting the tire off the ground.
- As the tire reaches knee height, reposition your hands and push it forward.
- Extend your arms and hips fully to complete the flip.
Coaching Points
The biggest key to Tire Flips is perhaps in finding the right tire.
Every school I’ve ever worked at had big tires that were used for Tire Flips. However, the size and weight of these tires have all been drastically different. They’ve ranged from tires that were barely heavy enough to be worth using to tires that took two and sometimes even three football players to flip.
Just like with Deadlifts and Power Clean, it’s extremely important to drop the hips, use the legs and keep the back flat. Once fatigue starts to set in I generally see athletes resort to using more back than legs. If form reaches this point then it’s time to stop flipping the tire.
Prowler Push

Another ‘out-of-the-box’ lower body exercise is the Prowler Push.
Pro Tip: Use a lighter weight to incorporate more of a conditioning component, use a heavier weight to focus more on building strength.
Step-By-Step Instruction
- Set your prowler in an area where you can push it at least 20 yards without hitting anything.
- Load the prowler with weight.
- Get behind the prowler and grab the high handle position.
- Hinge at the waist, bend the knees and extend your arms.
- Drive your legs and push the sled forward.
Coaching Points
The Prowler Push is a full body movement. Keep the core tight, nice neutral spine, and keep those arms extended (Arms can be bent when focusing on heavier loads).
Focus on a strong knee drive and pushing through your feet to keep the prowler moving. Your body angle will be very similar to how you start a sprint. So the lower body action should be very similar to running.
Get Shredded… For Free
Get a free workout Monday through Friday, posted right here on Horton Barbell. These workouts are designed to help you get strong, in shape and look great at the beach!
Final Thoughts
Barbell Back Squats are an incredible exercise for developing both size and lower body strength. However, sometimes you may need an alternative for Back Squats.
Whether it’s Front Squat, Bulgarian Split Squats or Goblet Squat – hopefully at least one of the exercises that I’ve listed above can work for you as a Back Squat alternative.