
10 Best Exercises for Soccer Players To Maximize Performance
When designing a soccer strength and conditioning program, figuring out what the best exercises are to decrease the risk of injury and improve performance is critical. This is because we’re almost always limited by time.
For collegiate programs, the NCAA mandates how much time is allowed for training each week. But, even if there isn’t a time-limiting rule, we all have things in our life – school, work, family, etc that makes it hard to spend hours on end in the gym.
Figuring out the best exercises that absolutely should be in your soccer strength program can help you maximize your time in the weight room and to make sure your efficiency matches your intensity.
So, which ten exercises do I think are the most important and why should you care? I’ve spent 20 years working as a sports performance coach and I’ve written strength training programs for soccer players at almost every level.
Best Exercises For Soccer
Clean Pulls
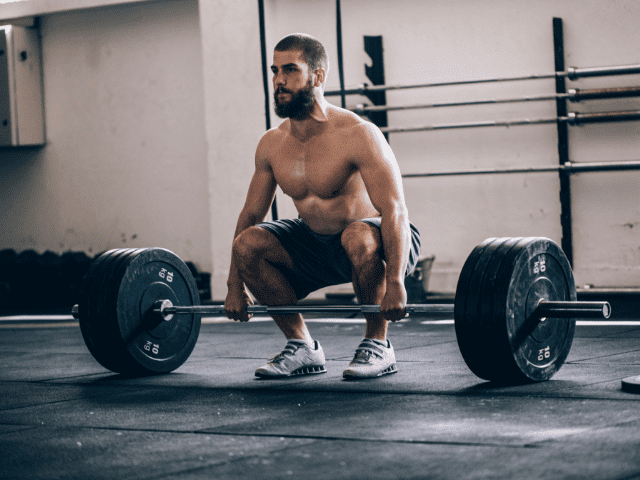
I’m a huge believer in Olympic lifts for athletes to build power and explosiveness. The first Olympic lift variation that I like to introduce to Soccer Players is the Clean Pull.
Clean Pulls are a less technical variation of the full Clean. The starting position is the same as a Clean (and the popular Power Clean variation) but the catch is removed. Instead, the athlete drives up, getting full extension through the hips, knees and ankles but keeps the arms straight throughout.
Clean Pulls allow Soccer Players to start training for power almost right away. As technique continues to become more proficient, players can then progress to more complex variations.
Step-by-Step Instructions
- Bar Setup: Choose a suitable weight on the barbell and position it over your mid-foot.
- Starting Position: With feet hip-width apart, grip the bar with hands slightly wider than shoulder-width, maintaining a flat back and shoulders over the bar.
- First Pull: Lift the bar by powerfully extending the hips and knees, keeping it close to your shins.
- Second Pull: As the bar passes your knees, explosively extend your hips and rise onto your toes, shrugging your shoulders.
- Peak Position: The bar should reach maximum height, with your body fully extended and shrugging upwards.
- Lower: Control the bar back down to the starting position.
Coaching Points
*An easy way to get your grip in a shoulder-width position is to place your hands one thumb length away from the start of the knurling of the bar. This width will work for 90% of lifters. Wider athletes may end up sliding their hands just a bit wider and vice versa for narrow athletes, but it’s a good starting point for anyone.
**One of the biggest mistakes with clean technique is that lifters will shoot their butt up first, locking their knees out and then they end up pulling the bar with their back instead of their legs. This is most often caused by lifters trying to rush the first pull too much. Don’t get ahead of yourself.
Back Squat
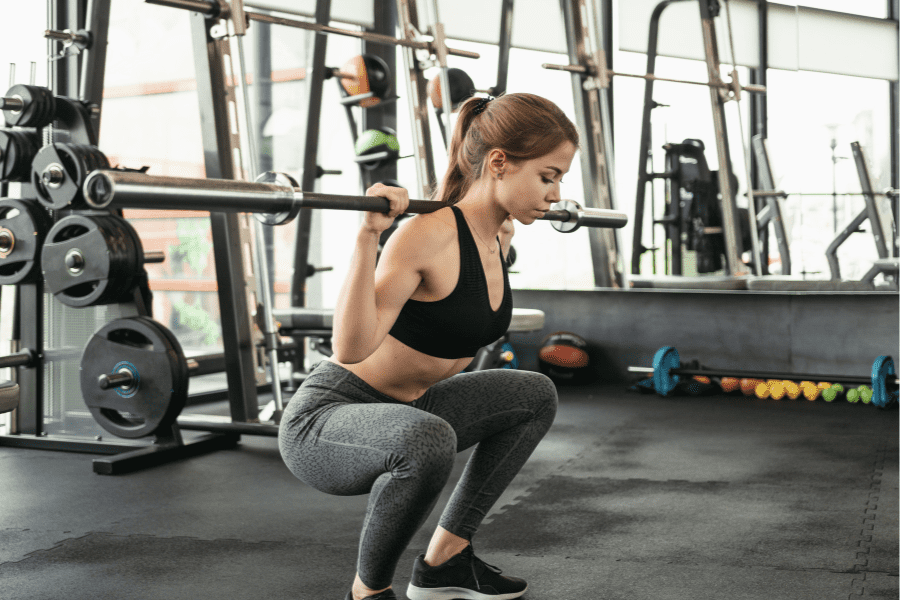
Back Squat is the ultimate lower body exercise to build strength. No other exercise can match it when it comes to developing not just strong quads, hamstrings and glutes but low back, core and even upper back strength.
If you don’t feel you’re ready for Back Squatting with a Barbell just yet, you can try a simpler variation like Goblet Squats while you gain confidence in your technique. Back Squatting with a PVC Pipe is a great way to start learning the movement without having to use any weight.
In case you’re wondering, yes, I’m a big fan of Front Squats as well. In fact, they are worthy of being in this Top 10 by themselves. However, if I can only choose one or the other for my soccer workouts, I’m choosing Back Squats.
How To
- Bar Setup: Place the barbell on a squat rack at chest height. Stand facing the bar.
- Grip and Position: Grip the bar wider than shoulder-width apart and duck under it, placing it on your upper traps.
- Unrack: Stand up, lifting the bar off the rack. Take one or two steps back to clear the rack.
- Starting Position: Stand with feet shoulder-width apart, toes slightly pointing outward. Keep your chest up and eyes forward.
- Initiate Squat: Bend your knees and hips simultaneously, pushing your hips back and down.
- Descending Phase: Lower your body until your thighs are at least parallel to the ground, keeping your knees over your toes.
- Ascent: Push through your heels, extending your hips and knees to return to the starting position.
Coaching Points
There are two bar position options for Back Squat, low-bar and high-bar. I recommend and teach the high bar position when working with athletes, including soccer players.
The most important aspect to watch for when doing Back Squats is the potential rounding of the back. Immediately end any set where form begins to break down and the back begins to round. A rounded back is probably the most common cause of injury with squatting.
One of the most common mistakes is heels coming off the ground. Athletes who are having trouble due to poor ankle dorsiflexion, long femur length relative to their height, or a combination of both, can use a device to elevate their feet such as weightlifting squat shoes, an angled plate, or 2.5lb weights to help address the issue.
Pull-Ups

A strong back is essential for shoulder health and upper body strength. The Pull-Up trains the muscles of the back (Lats, traps, rear delt, rotator cuff) to be strong and resilient. Another added benefit of the pull-up is core and lower back stabilization.
A full range of motion in your pull-ups is critical for success here. I like to progress soccer players into pull-ups. We initially will start with an eccentric phase, followed by an isometric, and finally a concentric one. I sometimes have players use bands to help with their pull-ups initially if necessary.
If you’re not ready for the pull-up, don’t worry! You can start with Inverted Rows and Lat Pulldowns to gain strength. I also recommend straight arm hanging and isometric holds with your chin over the bar. These are great alternatives that will help you in the pull-up progression.
Once you’re able to cruise through sets of 10 to 15 pull-ups, add in extra challenges like a weight vest or pausing at the top of each rep.
Step-by-Step Instruction
- Approach the pull-up bar and grab the bar with a pronated grip (palms facing away).
- Squeeze the bar and engage the core muscles and do not cross your legs.
- Engage the upper back and pull up until your chin is over the bar.
- Pause for 1 second with your chin over the bar.
- Slowly lower yourself back to the starting position.
Coaching Points
By far the biggest mistake I see in the pull-up is lifters not using a full range of motion. Hang all the way down and maintain great tension through the shoulders and abdomen.
Single Arm Dumbbell Bench Press
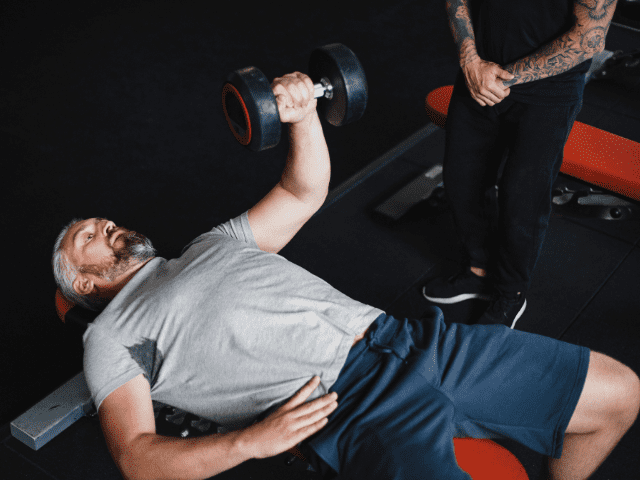
One of my favorite horizontal pressing movements, the Single-Arm Dumbbell Bench Press is a great option for soccer players. This pressing movement is great because it can be overloaded, trains single-arm strength, and is extremely joint-friendly.
It also acts as an anti-rotational movement forcing the core to stabilize with weight only being pressed on one side at a time. This is much more likely how soccer players are going to use their upper body strength on the field fighting for position.
Step-by-Step Instruction
- Choose a dumbbell of appropriate weight and lie back on a flat bench.
- Hold the dumbbell in one hand, extending the arm straight above your chest while the other arm is relaxed beside you.
- Plant your feet firmly on the ground and engage your core to maintain stability.
- Lower the dumbbell by bending the elbow, keeping it slightly angled towards your torso, until it’s just above chest level.
- Push the dumbbell back to the starting position by extending the arm, ensuring your back remains flat on the bench.
Coaching Points
If you’re familiar with Dumbbell Bench Press but are new to this single-arm variation, you’ll probably be pretty surprised by just how much you need to brace your core to keep from literally rotating off the bench. For this reason, start light and then work your way up in weight.
Pistol Squat
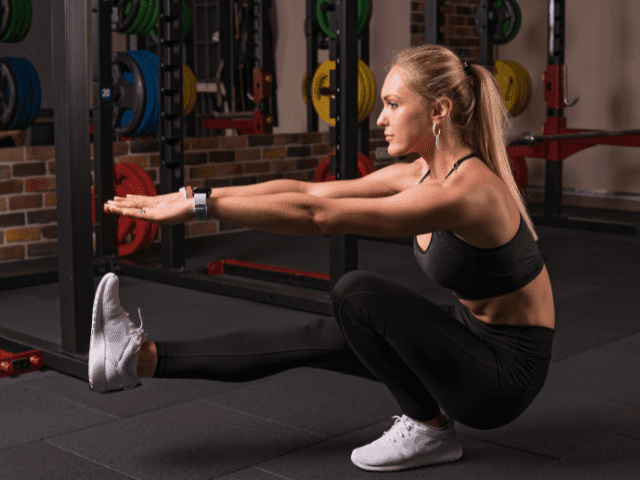
I love Pistol Squats. I love Pistol Squats because they’re a bodyweight movement that will absolutely smoke your legs without putting any added stress on the posterior chain.
If you’re designing a strength training program you have to be really careful with how much you are taxing the posterior chain. So many exercises – Olympic lifts, squats, and hinging movements like RDLs and Bent Over Rows – all stress the posterior chain. This is part of what makes Pistol Squats truly special.
Pistol Squats are also a TRUE single-leg movement. Many single-leg movements like lunges and step-ups can be ‘cheated’ and a soccer player can still compensate for a weaker side. Pistol Squats are one leg and one leg only. No opposite leg to give you a little boost if you need it.
Want to find out if one of your legs is actually stronger than the other? Do Pistol Squats.
How To
- Begin in a standing position, feet together, and arms extended forward for balance.
- Lift one leg off the ground and fully extend it forward.
- Slowly lower your body by bending the knee of the standing leg while keeping the other leg extended.
- Continue lowering until the hamstring of the standing leg is resting on the calf, or as low as your flexibility and strength allow.
- Push through the heel of the standing leg to raise your body back to the starting position.
- Ensure balance and control throughout the movement, then switch to the other leg.
Coaching Points
If you cannot do a Pistol Squat the first time trying, don’t worry, you’re not alone. Most athletes I’ve worked with have to start by using a bench for pistol squats. The first thing you need to do to start progressing is figuring out where your real weakness is: strength or flexibility.
Some lifters simply don’t possess the strength at first to perform a full pistol squat on air. On the other hand, many of the athletes I’ve coached actually have the strength to do a pistol squat, but they lack the mobility to be able to go through the full range of motion without falling or their opposite foot crashing into the ground.
Tired of coming up with your own workouts? But don’t want to pay an arm and a leg?
I post workouts 5 days a week right here. (Did I mention they’re free?)
Nordic Hamstring Curls

Nordic Hamstring Curls are by far my favorite hamstring exercise and it’s not even close.
Why?
Because they work. Scientific reviews like this one constantly prove that including Nordic Hamstring Curls in a training program helps reduce the risk of a hamstring injury.
They also happen to be a really tough bodyweight exercise that if you build it into your team’s culture can become really competitive. Anything that can turn competitive in a weight room is something you want to have in the program.
Finally, seeing a player do their first unassisted rep all the way to the floor and back up is really cool to watch.
How To
- Start on your knees with a partner holding your feet (dorsiflexed, toes in the ground).
- Hold your hands in front of your chest, brace your core and lock in your hips (keep hips forward).
- Now, keep your body in a straight line (shoulders, hips and knees) and lean forward.
- Lower slowly and under control as long as possible.
- Touch your chest to the ground, using your hands if necessary (they will most likely be necessary)
- Finally, give yourself a little push to get started and then use your hamstrings to curl yourself back to the start.
Coaching Points
The ultimate goal is to be able to lower yourself to the floor, touch the ground with your chest, and then curl yourself up without using your hands. However, this takes practice and a ton of hamstring strength. Be patient and focus on your progress each time.
Don’t allow your hips to shoot out. Keep the hips forward and maintain a straight line going through your shoulders, hips and knees.
Only use as much push with your arms coming off the ground as needed. How much is the right amount? Trust me, when you get it just right – you’ll know.
Single Arm Dumbbell Snatch
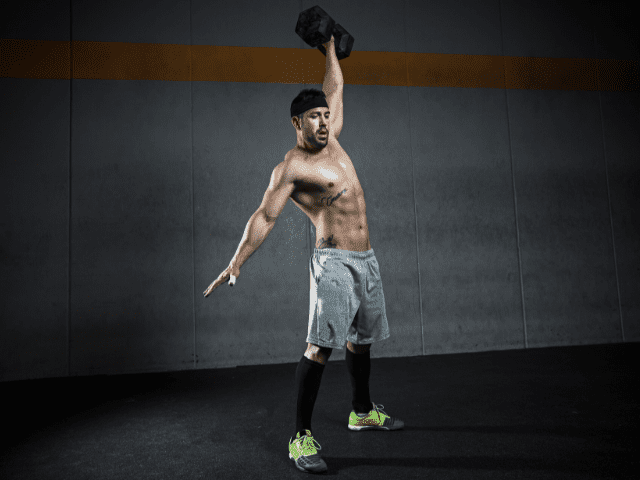
Another explosive exercise that I love for soccer players is the Single Arm Dumbbell Snatch.
It’s easy to learn, it’s unilateral (one side working at a time) and is a great Olympic lift variation to develop power that can help improve your explosiveness. It’s also a total body movement working both the upper body and lower body.
Step-by-Step Instructions
- Choose Your Weight: Select a dumbbell that is appropriate for your strength and experience level.
- Starting Position: Stand with feet shoulder-width apart, holding the dumbbell in one hand, positioned between your legs.
- Hip Hinge: Begin with a slight bend in the knees and hinge at the hips, lowering the dumbbell towards the ground.
- Explosive Pull: Powerfully extend your hips and knees, pulling the dumbbell upwards in a straight line.
- Transition: As the dumbbell ascends, begin to pull your elbow underneath it.
- Catch: Fully extend your arm overhead, catching the dumbbell in a locked-out position.
- Lower: Control the dumbbell back to the starting position, maintaining good posture.
Coaching Points
The dumbbell should travel close to the body all the up until it gets about head height, then rotate the elbow, drop the hips and catch. Don’t allow it to swing forward out away from the body.
The second technique flaw is not staying braced through the return of the dumbbell to the starting position, oftentimes from being in too big of a hurry to knock out reps. Letting the dumbbell, especially the heavier you get, yank the shoulder down at the bottom of the rep is asking for trouble.
Push-Ups
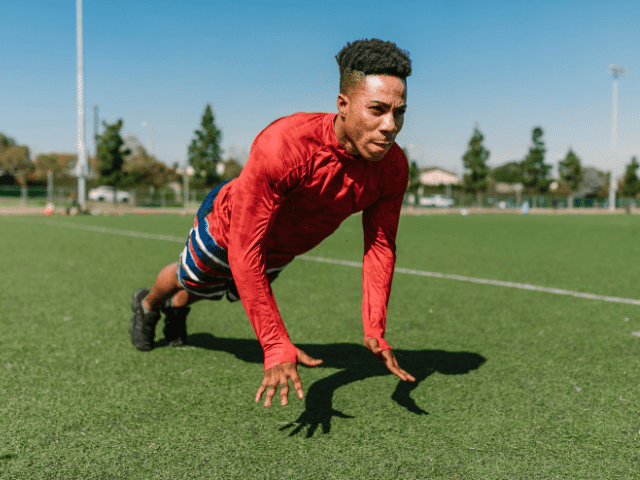
Push Ups get a bad wrap sometimes because they’re looked at as, well, not “advanced” enough. However, there are very few exercises that are as effective at building upper body strength and muscle mass as Push-ups.
I love the push-up for soccer players because it is a horizontal push, that can be overloaded, and is very shoulder-friendly. Because the scapula is free to move, you will find the weighted push-up to be very shoulder-friendly.
Once you’re able to do sets of 25 quality push-ups, load this movement with bumper or iron plates along the midback (Chains work well too if you have some) to increase the challenge. Another option once you’ve become proficient with regular push-ups is an explosive variation – clapping push-ups (pictured above).
Step-by-Step Instruction
- Starting Position: Begin in a plank position, hands slightly wider than shoulder-width apart, and feet together or slightly apart. Your body should form a straight line from head to heels.
- Descend: Bend your elbows, lowering your body towards the floor while maintaining a straight spine.
- Bottom Position: Get as close to the floor as possible without touching it with your chest.
- Push Up: Extend your elbows, pushing your body back to the starting position.
Coaching Points
Keep the elbows at a 45-degree angle. For maximal chest, shoulder, and rotator cuff engagement, do not let the elbows flare out away from the middle. Also, do not let the elbow hug right next to the torso.
Single Arm Farmer’s Walk
Single Arm Farmer’s Walk, also known as a Suitcase Carry, is a unique core stability exercise that emphasizes stabilization in the frontal plane. As you walk, the core has to continuously work to stabilize an upright torso, not allowing the body to bend to one side.
Want to not get pushed over by a defender on your side? This is the exercise that helps address that.
How To
- Grab a single kettlebell or dumbbell.
- Brace the core and begin walking in a slow, controlled manner.
- As you walk, focus on keeping the core braced and the shoulders and hips square and level.
- Once you cover the assigned distance (or time), switch hands and repeat on the opposite side.
Coaching Points
You do not need to grab the heaviest kettlebell you can find. Find a weight that you can walk with and maintain proper form.
Don’t rush through. Single Arm Farmer’s Walk can be done for time or for distance. If going for distance, it should not be a speed walk to cover the ground as fast as possible. Stay under control and focus on form.
Sprint

You may not have expected to see sprinting on a list of “weight room” exercises, but that’s just how important I believe sprinting is for soccer players. This sprinting can be part of a full program complete with sprinting drills, but it can also be as simple as just getting out and sprinting.
I think too many soccer players have gotten away from doing sprints in their training programs. I see so many players lift, condition and do far too many ladder drills. However, going out, lining up and running as fast as possible is neglected far too much.
If you want to run fast, you need to run fast. Even more, if you want your hamstrings to be prepared (and not pull) to do a full sprint once you’re in a breakaway on the field – then you better be doing that in your training.
Online Strength Programs
- 1-on-1 Online Coaching
- Sports Performance Programs for Football, Basketball, Soccer & More
- Programs for Former Athletes (Legends) Who Still Want to Train Like Athletes
- Programs for Adults Who Want to Get Healthy (and look great at the beach!)
- Use Code “HB10” to Get 10% Off Today
Final Thoughts
Are these the only strength training exercises soccer players can do to improve their performance on the field? Of course not.
But, in my opinion, your strength training program should have all (or at the very least, most) of these exercises incorporated into it at some point.
Just make sure to focus on technique, don’t try to use more weight than you can safely handle and don’t slack on your nutrition and recovery. Do all of these things and you should see a big-time improvement in your on-field performance!
Finally, if you found this article helpful, then you may also enjoy checking out all my favorite core exercises for soccer players.