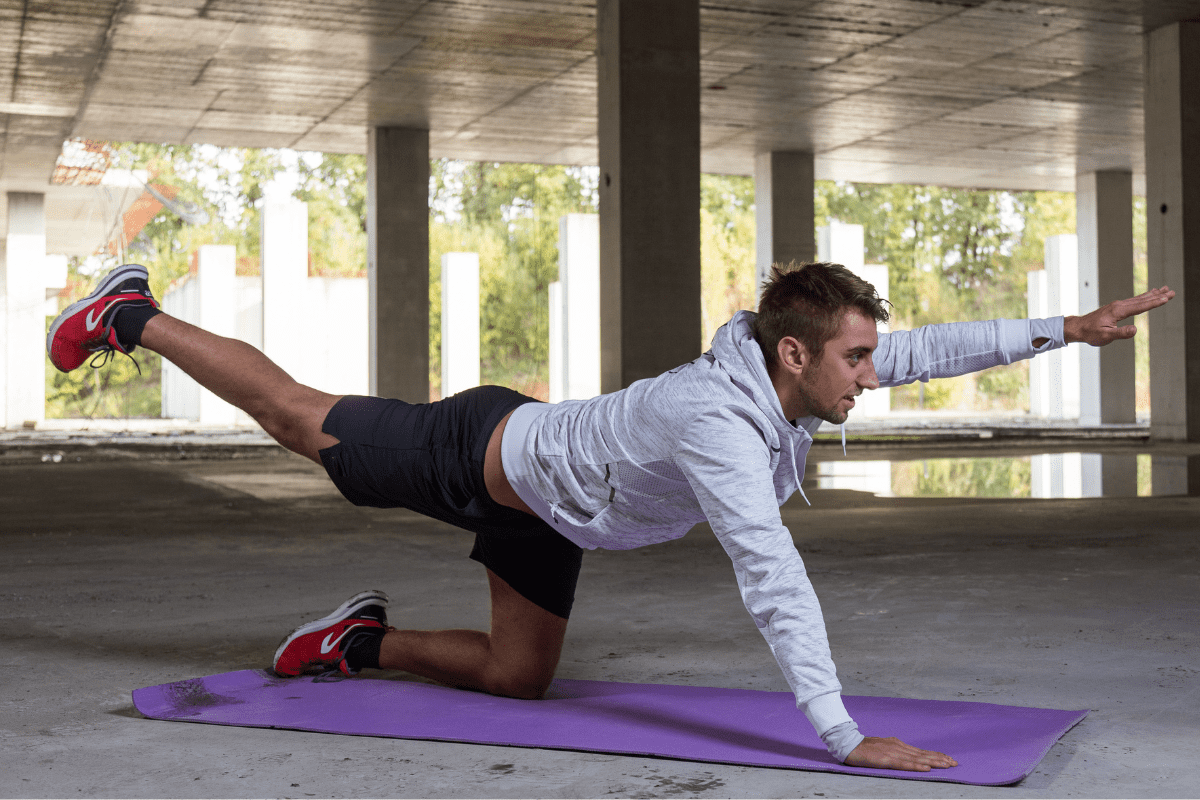
10 Bird Dog Alternatives for the Core and Glutes
Bird Dogs are a great exercise that can provide a ton of benefits. Core strength, stability, glute activation and thoracic mobility can all be improved with Bird Dogs.
However, if you’re here, you’re looking for an alternative for Bird Dogs. Maybe an injury is restricting your ability to do them or maybe you’re just looking to add some variety to your training.
Whatever the reason, you’re in the right place. I’m going to share 10 Bird Dog alternatives that you could potentially use as a substitute, all of which provide at least some of the same benefits.
Alternatives for Bird Dogs
I’ve tried to include as much variety in this list as possible. There are beginner-friendly exercises and a couple that are a bit more advanced. Some have more of a core emphasis, while others focus more on the glutes.
Hopefully, at least one fits what you’re looking for to replace Bird Dogs in your workout.
Plank Leg Lifts

Equipment Needed
- None
Muscles Worked
- Rectus Abdominis
- Transverse Abdominis
- Obliques
- Glutes (Maximus and Medius)
Step-by-Step Instructions
- Start by getting into a plank position on your forearms and toes, with your elbows directly under your shoulders and your body in a straight line from head to heels.
- Engage your core muscles and flex your glutes.
- Lift one leg off the ground, keeping it straight and raising it up as high as you can without letting your hips sag or twist.
- Hold for a second or two, then lower your leg back down to the starting position.
- Repeat with the other leg, lifting it as high as you can without letting your hips sag or twist.
- Continue alternating legs, lifting each leg for a few reps before switching to the other leg until all reps are complete.
Coaching Points
Keep your core and glutes engaged throughout Plank Leg Lifts to maintain good form and prevent your hips from sagging or twisting.
Focus on lifting your leg as high as you can while maintaining a straight line from head to heels.
Keep your neck and shoulders relaxed and avoid letting your head drop or your shoulders hunch up towards your ears. Breathe deeply and steadily throughout the exercise, exhaling as you lift your leg and inhaling as you lower it back down.
You can quickly increase the difficulty of this movement by adding an ankle weight to each leg.
Dead Bugs
Equipment Needed
- None
How To
- Begin by lying on the floor on your back.
- Raise both arms straight up toward the sky.
- Bend both knees at a 90-degree and raise the legs until the knees are directly vertical of the hips.
- Tuck the hips and flatten the low back against the ground.
- Brace the core and simultaneously lower the right leg and left arm toward the floor.
- The arm should end up six inches from the ground directly overhead.
- The leg should end up six inches from the ground directly below the hip.
- Return both back to the starting position and then lower the opposite arm and leg.
- Continue alternating back and forth, pausing and ‘locking-in’ each rep.
Coaching Points
The back will naturally want to arch as you do Dead Bugs. Try not to let it. Keep your hips rolled up and your low back flat against the ground.
Don’t rush through this exercise. Stay nice and slow and under control. Pause each rep at full extension before returning to the starting position.
Supermans
Equipment Needed
- None
Step-by-Step Instructions
- Lay on your stomach with arms stretched out overhead.
- Contract the low back and glutes and raise the chest, arms and legs (thighs) off the ground.
- Squeeze and hold for a one count and then lower back down to the ground.
- Repeat until all reps are completed.
Coaching Points
Take your time and don’t rush through the movement. Squeeze the top of each rep and lower yourself back to the ground under control. Too often I see athletes just quickly go through the motions with Supermans – focus on each rep to get the max benefit.
Quadruped Rock Backs
Equipment Needed
- None
Muscles Worked
- Glutes (Maximus and Medius)
- Hamstrings
- Lower back (Erector Spinae)
- Abdominals (Rectus Abdominis and Transverse Abdominis)
- Shoulders (Deltoids and Rotator Cuff)
Step-by-Step Instructions
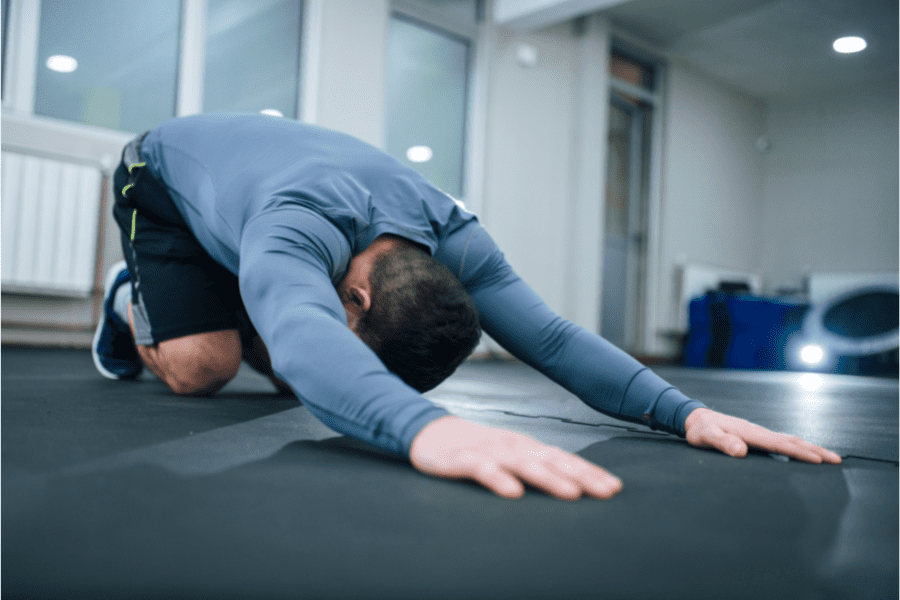
- Start on your hands and knees with your wrists directly under your shoulders and your knees directly under your hips.
- Engage your core and tuck your toes under.
- Begin to rock back towards your heels by shifting your weight backward, pushing your hips towards your heels, and extending your arms out in front of you.
- Continue to rock back until you feel a stretch in your hips and lower back, and then rock forward again to return to your starting position.
- Repeat the movement until all reps are complete, moving slowly and with control.
Coaching Points
Focus on form and control. Don’t rush through Quadruped Rock Backs.
Inhale as you rock forward and exhale as you rock back. Using your breath can help you maintain a steady pace and stay focused on your movements.
Stability Ball Hamstring Curls
Equipment Needed
- Stability ball (Diameter is based on height but a 65 cm diameter should be good)
Step-by-Step Instruction
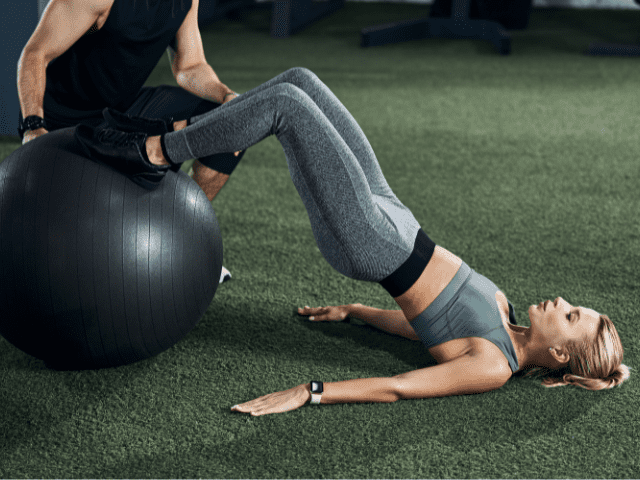
- Lie down on your back and almost fully extend your legs.
- Place your heels on the ball.
- Drive your elbows into the floor and keep your abdomen tight. Drive your heels into the ball.
- Drive your hips to the ceiling and engage your glutes.
- Keeping your core nice and tight, pull the ball under your butt as much as possible.
- At the top of this movement, keep the glutes engaged and core tight.
- Engaging the hamstrings, roll the ball back until your body is almost fully straight.
Coaching Points
Make sure the stability ball is properly inflated. If it is not, the muscles we are training will not engage fully.
Remember to always squeeze with the glutes and actively engage the hamstrings. Do not round the back and push your belly to the sky. Keep the anterior core locked in throughout the movement.
Controlling the eccentric portion of Stability Ball Leg Curls is critical. Your hamstrings will engage and get a good stretch at the end range of this movement, so go slow, pause, and then curl back.
Remember during the concentric movement, keep the hips up as you curl your heels in. Quality movement is better than exhausting quantity here (This applies to many exercises across many disciplines).
Stability Ball Knee Tucks
Equipment Needed
- Stability Ball
Step-by-Step Instructions
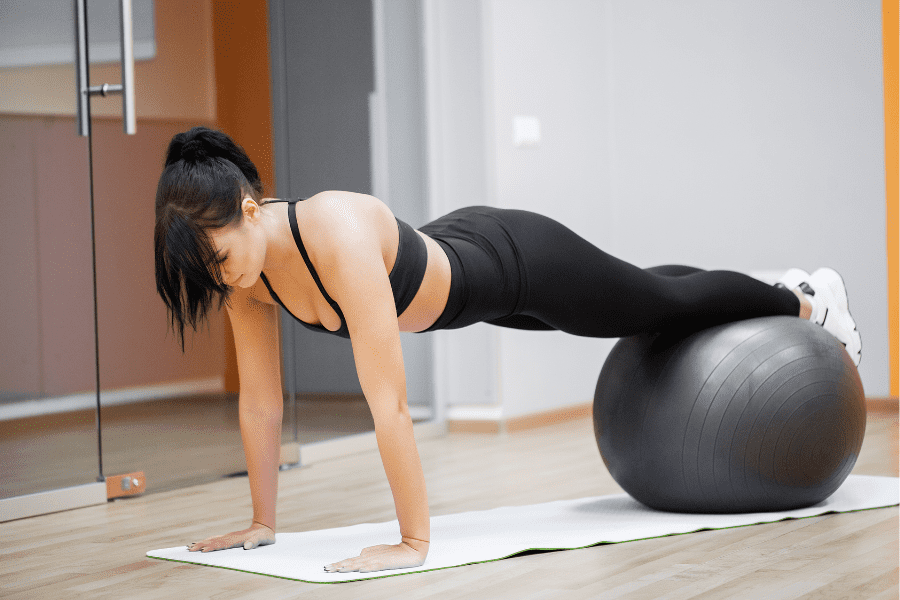
- Place a stability ball on the floor and kneel in front of it.
- Put your hands on the floor, shoulder-width apart, and extend your legs onto the ball behind you.
- Keep your back straight, engage your core muscles, and draw your shoulder blades down and back.
- Brace your abs and pull your knees towards your chest, rolling the ball forward.
- Pause for a second at the top of the movement, then slowly roll the ball back to the starting position, straightening your legs.
- Repeat for your desired number of reps.
Coaching Points
When doing Stability Ball Knee Tucks, keep your back straight, engage your core muscles, and avoid sagging your hips or arching your back. Be deliberate with your movements and focus on controlling the ball’s motion. This will help you stabilize your body and target the core effectively.
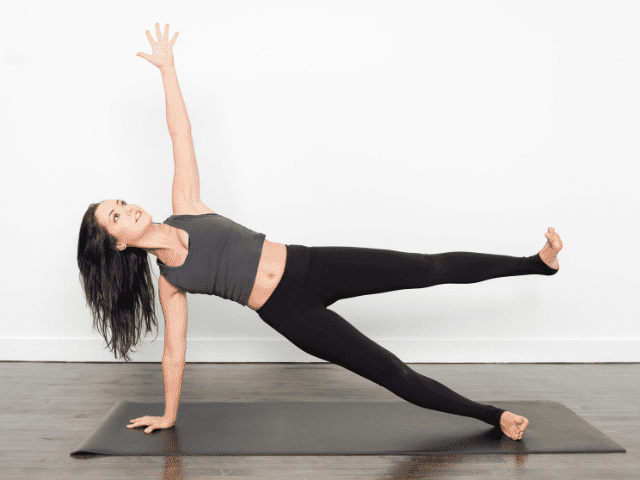
Side Plank with Leg Lift
Equipment Needed
- None
Step-by-Step Instructions
- Lay on your side, one elbow down and feet, hips and shoulders stacked vertically above one another.
- The opposite hand (non-support arm) can be placed on the hip or held up in the air.
- From this position, raise the top leg in the stack until it is roughly parallel to the floor.
- This exercise can either be done for time (holding the position for a set time like regular Lateral Planks), or for reps (lifting the leg up and down)
Coaching Points
The biggest mistake I see with athletes with Side Plank plus Leg Lift is allowing the top shoulder to hunch forward. Both shoulders (along with hips and feet) should be stacked directly above each other. If you allow yourself to twist forward toward the ground lifting the leg will be extremely difficult to impossible.
The other aspect of Lateral Planks to be mindful of is keeping the hips elevated and the body in a straight line. When fatigue starts to set in, the first thing that will happen is the hips will being to sag down toward the floor. Try to keep those hips high and fight through until the end.
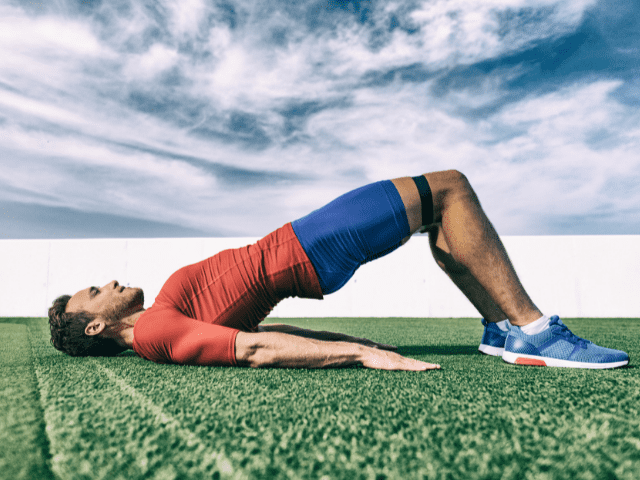
Glute Bridges
Equipment Needed
- None
Step-by-Step Instructions
- Start by laying on your back on the ground.
- Bend both knees to about a 90-degree angle and place both feet flat on the floor.
- Begin the rep by driving your hips up into the air. Try to attain a straight line from the shoulders through the hips and knees.
- Squeeze the glutes at the top of the rep and then lower back down to the starting position.
- Continue until all reps are completed.
Coaching Points
As you raise the hips up, try to drive the knees slightly forward. This can help with getting a strong glute contraction and a full extension of the hips. Don’t rush through Glute Bridges. Make sure to pause and squeeze at the top of each rep.
Pallof Press
Equipment Needed
- Resistance Band (Preferably a thin one)
- A Band Anchor (A squat rack works perfectly)
Instructions
- Start by looping a band around the vertical beam of a squat rack.
- Stand* far enough away from the rack to get proper tension on the band and face perpendicular to the rack.
- You should feel the band pulling and trying to rotate you, but not so much that you cannot maintain your balance.
- Grab the band with one hand and then place the other hand over top.
- Start with your hands right in front of your sternum.
- The feet should be shoulder-width apart with a slight bend in the hips and knees.
- Now, in a controlled tempo, press the band straight out in front of you and then return it to the starting position.
- Repeat for the required amount of reps.
Coaching Points
*Pallof Press can also be done kneeling or on a single leg. Check the variations listed below for more info.
Keep the movement slow and controlled. Don’t rush through the exercise.
Try to keep the opposite foot off the ground for the duration of the set. Touch the ground only if necessary to regain balance.
Press straight out in front of the sternum. Don’t allow the path of your hands to drift off in one direction or the other.
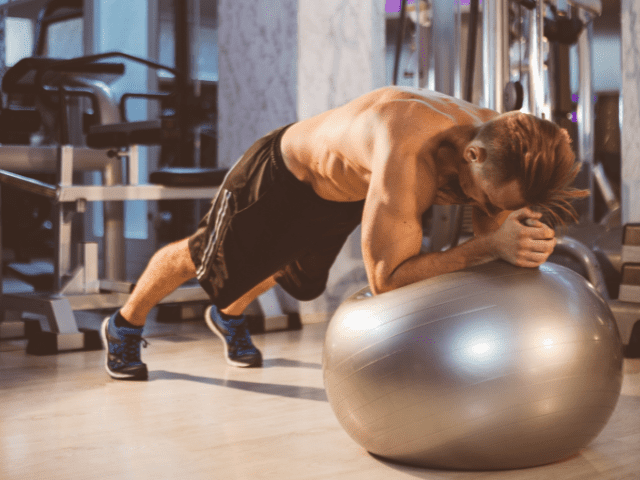
Stir the Pot
Equipment Needed
- Stability Ball (also sometimes called a Physio Ball)
Step-by-Step Instructions
- Start on your knees with the Stability Ball directly in front of you.
- Place your forearms on the ball and clasp your hands together.
- Now slowly lift up off of your knees, balancing yourself with your forearms on the ball and toes on the ground.
- You should now basically be in plank position, but with your forearms on a stability ball instead of the ground.
- Now work your hands into small circles. This should simulate, you guessed it, stirring a pot with a big wooden spoon.
- Work clockwise until all reps are completed and then switch and go counter-clockwise as well.
- Once all reps are completed lower back down to your knees.
Coaching Points
Take your time getting properly set up! If you’ve never done Stir the Pot before it can be surprising just how hard it is to balance yourself on a stability ball in this manner let alone shift in circles.
Make SMALL circles. Trying to go too big with your circles is a good way to end up lying on your back.
Final Thoughts
Bird Dogs are one of my favorite movements to incorporate into a warm-up because they can provide so many benefits in a single exercise.
However, I understand that sometimes you may find yourself in a position to want (or need) an alternative exercise. I hope one of the Bird Dog alternatives that I’ve listed above was just what you were looking for.

