11 Best Deadlift Alternatives To Build Size and Strength
Deadlifts are an extremely popular exercise for building strength (both lower body and upper body), and for good reason. Deadlifts are hands-down one of the most effective exercises for developing size and strength. But, what if you need an alternative for Deadlifts?
Maybe you don’t have access to a barbell or maybe you’re just looking to add some variety to your strength program.
Whatever the reason, in this guide, I’m going to give you 10 of the best Deadlift alternatives.
This post may contain affiliate links. If you use one of these links to buy something I may earn a commission. Thanks.
Deadlift Alternatives
In this list of Deadlift alternatives, I’ve tried to include as much variety as possible. There are exercises that use all different kinds of equipment – barbells, dumbbells and even (spoiler alert) giant tires.
There are also exercises that are more beginner-friendly and exercises better suited to more advanced lifters.
Hopefully, no matter what equipment you have access to or what your level of experience is, at least one of these Deadlift alternatives will be a good fit for you.
Sumo Deadlifts
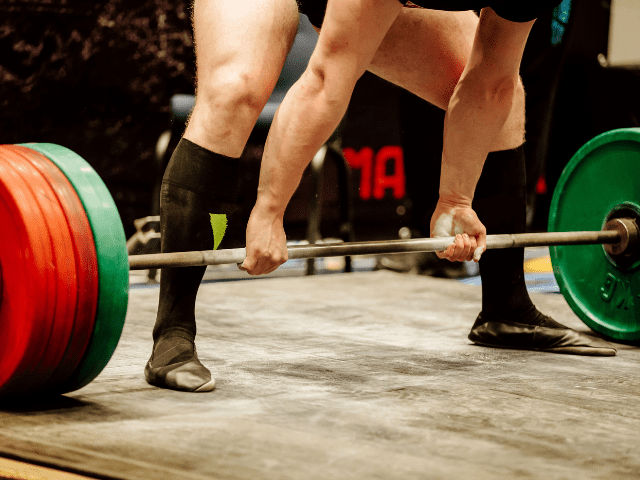
Perhaps the most obvious Deadlift alternative is really more of a variation than an alternative. By widening out your feet, you can try Sumo Deadlifts in place of Conventional Deadlifts.
Now, whether or not you’ll be judged by Conventional Deadlifts is a topic for another day.
Equipment Needed
- Barbell
- Bumper or Iron Plates
Step-by-Step Instructions
The deadlift is a very basic movement; there is a setup, a concentric movement (pulling the bar off the ground), an isometric hold (locking the repetition in), and an eccentric movement (lowering the bar back to the ground before the start of the next repetition).
Setup
- Place feet slightly wider than shoulder-width (The exact width of a stance for an athlete choosing a wide stance will vary based on height and comfortability).
- Slightly turn their feet outward (engaging the glutes).
- Take a deep breath to brace the abdominal muscles.
- The athlete should hinge at the waist and bend at the knee simultaneously until they can comfortably squeeze the barbell with both hands pronated (I will talk more later about mixed grips later in the article).
- As the athlete pulls themselves down into their setup position, they should maintain a neutral head posture, with their eyes fixed on something about 1-2 feet in front of them.
- In the final setup position, the athlete should pull their chest up, and shoulder blades back, while still maintaining a brace in their abdominal muscles and ready to lift.
The Movement
- The lifter needs to create tension by slightly pulling into the barbell and pushing their feet into the floor before maximal contraction/attempts. (This is referred to as “pulling the slack out of the bar”)
- Once this tension is created, the lifter drives their feet through the floor, drives the hips forward, keeping tension in the abdomen and upper back (DO NOT ROUND YOUR BACK), maintaining the barbell over the midfoot, the lifter stands tall with the barbell, and locks the repetition in.
- It is important that each repetition is locked in and controlled at the top of the movement. This is considered an isometric hold. This hold generally only needs to be about 1 second.
- After locking in the repetition for about 1 second, the athlete is ready to lower the weight. The athlete will take in a big breath, maintaining a braced core and shoulder blades pulled together. The hips will push back and the knees will bend simultaneously.
- The bar should maintain a position over the midfoot and should never rest on the thighs during this movement. The athlete will continue to lower the barbell until the weights rest on the floor and prepare for the next repetition.
Grip
Now, let’s talk about gripping the bar. For most field and court sports athletes, gripping the bar with an overhand grip is what I would recommend. The main reason I recommend this grip is that the athlete is deadlifting to gain strength and athletes should be training symmetrically as much as possible.
This is not to say that a mixed grip is bad for lifters. A mixed grip in some cases will help the lifter pull more weight. But again, I must stress, that lifting more weight for “more weight’s” sake is not a good reason.
Some lifters may switch which grips they mix (right-supinated, left pronated and vice versa) but this will be hard to track after hundreds of reps and sets over the course of a lifter’s career. Obviously, a powerlifter will be training with the grip that they see that helps them pull the most weight.
Coaching Points
In regards to your Sumo Deadlift setup and form; treat every rep like it’s a 1 rep max. Put a tremendous amount of detail in your setup (Do it the exact same way, every rep) Make small gains in weight over time. Deadlifting is not a race.
Trap Bar Deadlifts
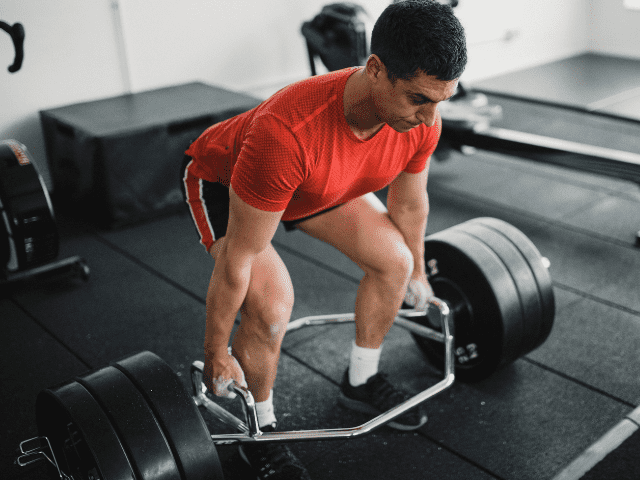
Trap Bar Deadlift is a more beginner-friendly alternative to a barbell Deadlift. Using a trap bar has a few advantages over a traditional deadlift with a barbell that can be especially helpful for beginners including:
The raised handles can be more forgiving to lifters with poor mobility. Being able to stand in the middle of the bar shifts the resistance slightly more to the hips and away from the low back. And, finally, it can be easier to stand with the bar without worrying about it scraping up the shins or hitting the knees.
Equipment Needed
- Trap Bar (also known as a hex bar)
- Plates (Preferably bumper plates, but iron plates can also be used if necessary.)
Step-by-Step Instructions
Setup
- Step inside the trap bar.
- Place feet roughly shoulder width apart.
- Slightly turn their feet outward (engaging the glutes).
- Take a deep breath to brace the abdominal muscles.
- Hinge at the waist and bend at the knee simultaneously until you’re able to grab the bar handles.
- As you pull yourself down into the setup position, maintain a neutral head posture, with eyes fixed on something about 1-2 feet in front of you.
- In the final setup position, pull the chest up, and shoulder blades back, while still maintaining a brace in the abdominal muscles and get ready to lift.
Lift
- Start by pulling the “slack” out of the bar. This is where the lifter needs to create tension by slightly pulling into the bar and pushing their feet into the floor before maximal contraction/attempts.
- Once this tension is created, the lifter drives their feet through the floor, drives the hips forward, keeping tension in the abdomen and upper back (DO NOT ROUND YOUR BACK), maintaining the hand position over the midfoot, the lifter stands tall with the barbell, and locks the repetition in.
- It is important that each repetition is locked in and controlled at the top of the movement. This is considered an isometric hold. This hold generally only needs to be about 1 second.
- After locking in the repetition for about 1 second, the lifter is ready to lower the weight. Take in a big breath, maintaining a braced core and shoulder blades pulled together. The hips will push back and the knees will bend simultaneously.
- The weight should be maintained in a position over the midfoot. The athlete will continue to lower the barbell until the weights rest on the floor and prepare for the next repetition.
Coaching Points
Easily the most common mistake for Trap Bar Deadlifts (or Deadlifts of any kind) is allowing the back to round, placing unnecessary stress on the back. Keep the back flat throughout the movement and the core braced.
Do not bounce the bar off the floor between reps. Yes, bouncing the plates off the floor into the next rep may make the lift easier to do, but it’s also a good way to allow your technique to break down. Reset for each rep.
Unlike barbells which have a standard weight, hex bars weight can vary from one bar to the next. Keep this in mind if using set weights off of your training program.
Rack Pulls / Deadlift From Blocks
Another Deadlift alternative that is really more of a variation, Rack Pulls are Deadlifts that are done with the bar starting elevated on safety bars or boxes. This limited range of motion can be beneficial to working on weak areas, or sticking points, of your Deadlift.
Equipment Needed
- Barbell
- Weight Plates (either iron or bumper will work okay)
- Power Rack (or lifting blocks)
- Lifting Straps (optional)
How To
- Set a barbell on the power rack safety pins set up around mid-shin*.
- Place the feet roughly shoulder-width apart.
- Slightly turn their feet outward (engaging the glutes).
- The athlete should hinge at the waist and bend at the knee simultaneously until they can comfortably squeeze the barbell with both hands pronated**.
- As the athlete pulls themselves down into their setup position, they should maintain a neutral head posture, with their eyes fixed on something about 1-2 feet in front of them.
- Take a deep breath to brace the abdominal muscles.
- In the final setup position, the athlete should pull their chest up, and shoulder blades back, while still maintaining a brace in their abdominal muscles and ready to lift.
- Start the pull by driving the feet through the floor and driving the hips forward, keeping tension in the abdomen and upper back (DO NOT ROUND YOUR BACK), maintaining the barbell over the midfoot, the lifter stands tall with the barbell, and locks the repetition in.
- Lower back down to the starting position under control. Make sure to maintain your braced core while lowering as well.
Coaching Points
*Rack Pulls are generally done with the bar starting around mid-shin, although technically the bar can be placed anywhere up or down the leg and it would still be a Rack Pull.
**An alternated grip – one hand pronated, one hand supinated – can also be used when doing Rack Pulls to help aid the grip. Using lifting straps is another option if grip is becoming a limiting factor when using heavy weight.
Because the plates are not actually touching the ground during Rack Pulls, there is no difference regarding what kind of plates you use. Lifting blocks, used more commonly by Olympic weightlifters, is an acceptable substitution for a power rack when doing Rack Pulls.
Kettlebell Deadlift
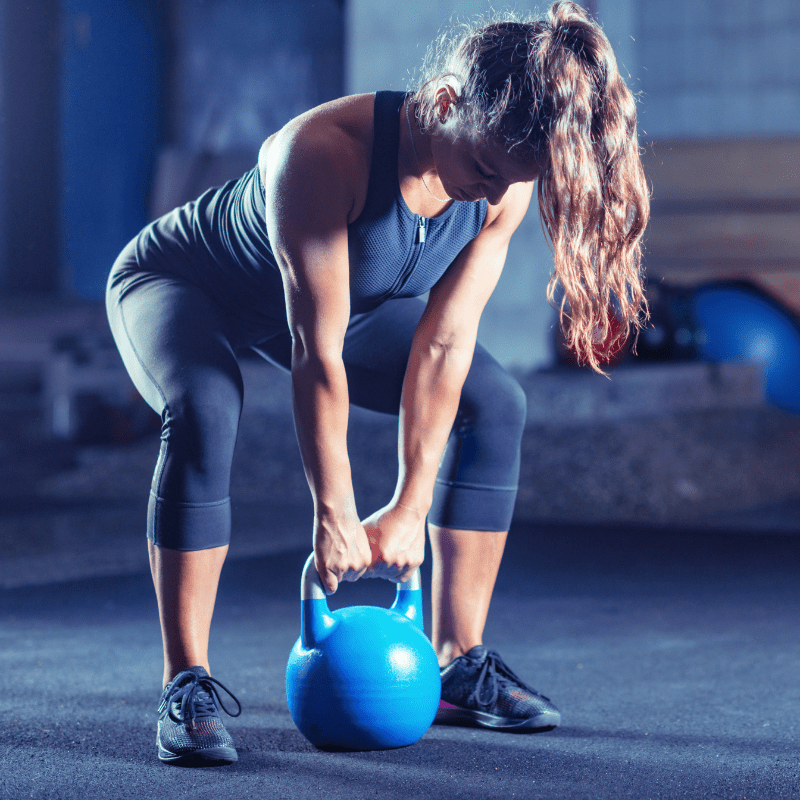
Using a kettlebell for Kettlebell Deadlifts is another great alternative, especially for beginners and/or young athletes. Not only will Kettlebell Deadlifts work the same posterior chain muscles, but they can be done with light weight and a focus on technique.
Using one kettlebell on the floor between the feet, get into a good starting position by bending the hips and knees and maintaining a good flat back. Grab the kettlebell with both and then deadlift – no different than you would with a barbell.
If you don’t have a heavy enough kettlebell where deadlifts make sense, consider Kettlebell Swings. Kettlebell Swings are essentially a lighter, more explosive version of a deadlift that provides a lot of the same benefits.
Kettlebell Swings
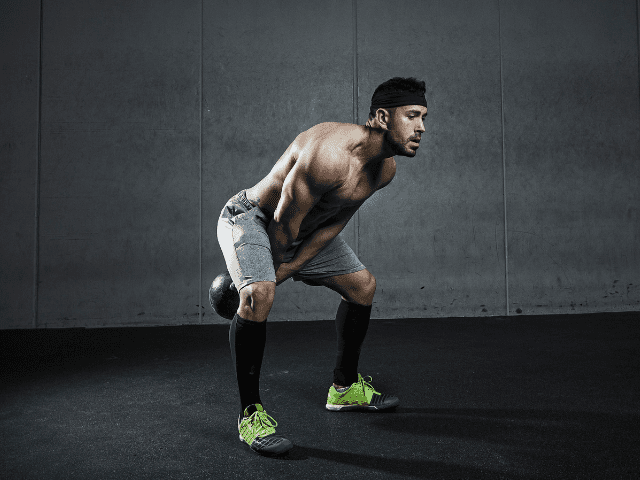
Kettlebell Swings emphasize the posterior chain muscles just like a deadlift does, but they do so in a much different way. Kettlebell Swings are more similar to an Olympic lift than they are a deadlift.
They’re generally done with much lighter weight and the focus is on driving the weight explosively using power generated from the hips. They may not pack on muscle mass quite as well as deadlifts, but a kettlebell can be taken on a road trip much easier than a barbell and 400 pounds.
Equipment Needed
- Kettlebell (you can also use a dumbbell by grabbing the end of it)
Step-by-Step Instruction
- Approach the kettlebell with a stance slightly wider than shoulder width.
- Take a deep breath, slightly bend the knees, hinge at the waist, and squeeze the kettlebell with both hands.
- Maintain a neutral spine, eyes focused on something just in front of you.
- Initiate the movement by pulling the dumbbell off the ground and into the “power position”.
- The power position is where the hips are flexed (loaded), knees are slightly bent, and you are now going to drive the kettlebell forward.
- Extend the hips and knees, driving the kettlebell forward.
- The kettlebell will drift from the hip extension to about shoulder height but should not go any higher.
- Gravity will bring the kettlebell back down.
- Actively “pull” the kettlebell back to the power position. You should never feel loose or out of control as you swing.
- As you pull the kettlebell and prepare for the next rep, remember to keep a tight abdomen and upper back.
- This movement is fast and works on rapid force development via hip and knee extension.
Coaching Points
The kettlebell swing is a great movement to train rapid hip extension and flexion. Remember to always keep a neutral spine. Choosing the proper kettlebell weight is important. Heavier is not always better.
Because of the rapid nature of the kettlebell swing, the emphasis should be on velocity, speed, and power. I would recommend starting light and you will be able to increase weight easily as you get more comfortable with the movement.
Barbell Hip Thrust
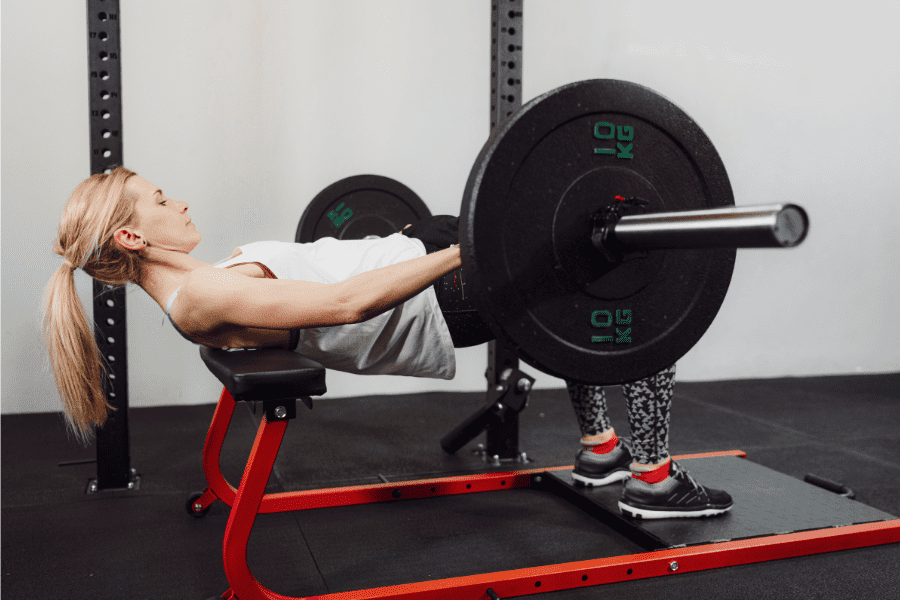
Barbell Hip Thrust is another great Deadlift alternative that focuses purely on hip extension and developing strong glutes and hamstrings. It won’t work the upper body like a Deadlift will, but if you need Deadlift alternatives to target the glutes Barbell Hip Thrust is about as good as you can get.
Equipment Needed
- Bench Press (or another stable object like a plyo box)
- Barbell or Dumbbell
How To
- Start by sitting on the ground with your feet flat on the floor and your upper back resting on a bench or other stable surface.
- Hold a weight, such as a barbell or a dumbbell, across your hips.
- Engage your core and glute muscles, and push through your heels to lift your hips off the ground until your body forms a straight line from your shoulders to your knees.
- Hold for a moment at the top of the movement, then slowly lower your hips back down to the starting position.
- Repeat for the desired number of reps.
Coaching Points
If holding a barbell across your hips is uncomfortable when doing Barbell Hip Thrust, try using a folded-up yoga mat, towel or an Airex Pad. These are all viable options to use as padding to make the exercise more comfortable.
Romanian Deadlifts
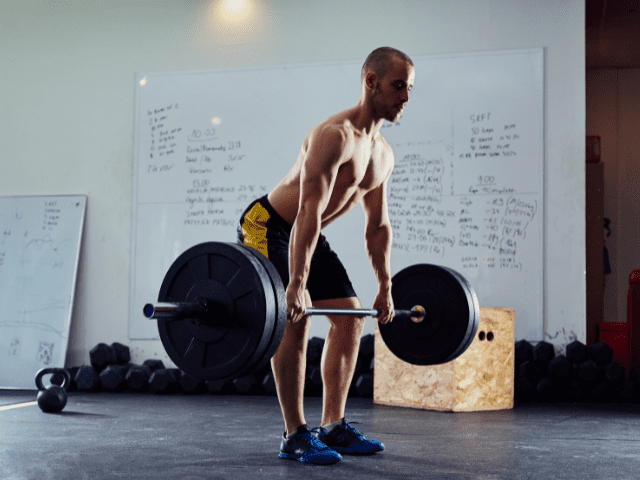
Romanian Deadlifts, or RDLs for short, are a deadlift alternative that takes some of the focus away from the quads and overemphasized the posterior chain – the erectors, the glutes and the hamstrings.
I use Romanian Deadlifts all the time in my programming on lower body days when there has already been a sufficient amount of quad work already done (squats, single leg exercises, etc).
Equipment Needed
- Barbell
- Weight Plates (Bumper or Iron)
How To
- Address the bar with feet shoulder-width apart, and toes straight ahead.
- Use a pronated grip about a thumb length from the start of the knurling.
- Now, with a good flat back, pick the bar up to a standing position.
- From here, put a slight bend in the knees and ‘set the back’ by squeezing the shoulder blades and engaging the lats.
- Brace the core and hinge forward by pushing the hips back.
- The bar should almost drag right down the legs, across the knees and straight down the shins. The whole foot should stay flat on the ground, but the weight should be on the mid-foot to heel.
- Maintain the neutral spine position throughout the descent and once you feel a good stretch in the hamstrings, drive the hips forward (hip extension) and return to the starting position.
Coaching Points
The ‘depth’ that each person gets will be different and absolutely solely dependent upon hamstring flexibility. Do NOT try to ‘reach’ the barbell toward the ground because you believe the plates should touch the floor.
If you have tight hamstrings you may be doing well to get the bar to mid-shin. Trying to reach the bar to the floor will result in the lifter losing their neutral spine and rounding their back, allowing the back to round is the most common mistake I see with RDLs and can lead to injury.
Use less weight if necessary and work on being able to keep the back engaged and the spine in a neutral position throughout the entire exercise.
Clean Pulls
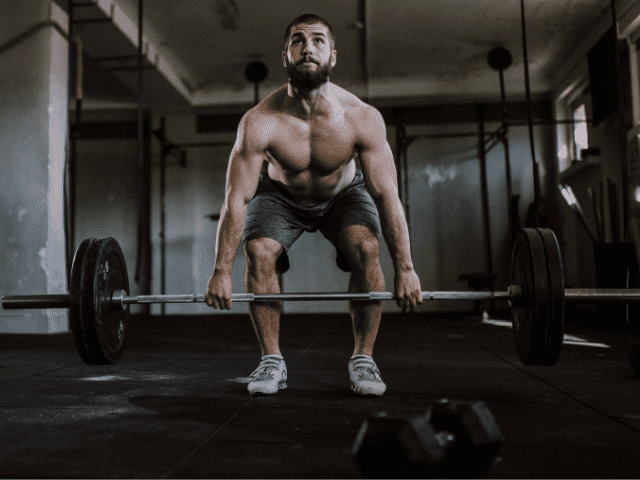
I love deadlifts and think they are one of the best exercises for building strength and muscle mass. However, I don’t use them very often in my programming for athletes.
Why?
I usually opt for Clean Pulls with athletes.
They’re the same basic movement, but Clean Pulls are a lighter, more explosive version. A Clean Pull is an Olympic lift variation that focuses only on the pull and the triple extension – no high pull with the arms and no catch. This explosive triple extension has a better carryover to sport and that is why I often use it in place of deadlifts.
Equipment Needed
- Barbell
- Bumper Plates
Step-by-Step Instructions
Starting Stance
- Start with feet hip-width apart with toes straight ahead (or ever so slightly pointed out).
- The bar should be over the middle of the feet. I always used the knot in your shoelace as a visual cue, but essentially the bar is close to (but not touching) the shins.
- Grip should be slightly wider than shoulder width.*
- The grip is a pronated grip (both palms facing down) and the lifter can choose, although highly recommended, to use a hook grip. A hook grip is where the thumb is wrapped around the bar first and then the fingers are wrapped over the thumb.
- The wrists should be slightly curled so that the knuckles are pointed straight down to the ground. This will also naturally rotate the elbows, pointing them laterally away from the body.
- Shoulders slightly over the bar, arms straight, hips slightly higher than the knees. Because of differences in body composition, torso lengths and limb lengths, every lifter will not look exactly the same when it comes to the starting body position.
- Back should be flat or have a slight arch. Shoulder blades should be pulled back and the upper back including the lats should be engaged.
First Pull
The ‘First Pull’ simply refers to the portion of the movement that involves moving the bar from the floor to the knee.
- The last thing that should happen as the lifter is setting up in their starting stance is to take a deep breathe in and engage, or brace their core. This helps the lifter both protect their back as well as aid in the transfer of power from their legs to the bar.
- Raise the bar off the floor at a constant speed using the legs by driving the feet through the ground. Arms should stay straight and the barbell shouldn’t be ‘yanked’ off the ground.
- Hips and shoulders rise at the same time (torso angle remains constant)**.
- As the bar comes up, keep the bar close to the shins and the feet should remain flat, driving the feet hard into the floor.
- Finally, as the bar passes knee level, wrists remain curled and elbows rotate out to the side, core and back should still be tight and engaged.
Second Pull (and finish)
The second pull involves getting the bar from just above the knee to the power position. The power position is the point where the athlete is nearly vertical and where the final triple extension of the hip, knees and ankles will occur followed immediately by the shrug and pull from the arms.
- Once the bar crosses the knees, the bar is then pulled explosively, bringing the shoulders back and up.
- As the lifter continues to drive vertically, the shoulders will end up slightly behind the bar and the hips, knees slightly bent and the ankles will have just a bit of flexion left in them.
- From the power position, this is where the final explosive hip extension occurs along with the full extension of the knees.
- The foot drive shifts from the whole foot to now extending up through the balls of the feet.
- The triple extension of the hip, knees and ankles is followed instantaneously by a quick, aggressive shrug.
- Bar is pulled vertically close to the body as the traps shrug to elevate the bar.
- Now, either retrace back to the floor or drop the bar and then reset.
Coaching Points
*An easy way to get your grip in the right position is to place your hands one thumb length away from the start of the knurling of the bar. This width will work for 90% of lifters. Wider athletes may end up sliding their hands just a bit wider and vice versa for narrow athletes, but it’s a good starting point for anyone.
**One of the biggest mistakes with clean technique is that lifters will shoot their butt up first, locking their knees out and then they end up pulling the bar with their back instead of their legs. This is most often caused by lifters trying to rush the first pull too much. Don’t get ahead of yourself.
Dumbbell Deadlift
The DB Deadlift wouldn’t be one of my first choices to replace Deadlifts, but if dumbbells are all you have to work with then they can do the job. Deadlifting with dumbbells can be done one of two ways. First, you can use a single dumbbell, grabbing it by the head and using it exactly as you would a kettlebell.
The other way is to use two dumbbells and either hold them by your side or in front of you as if you were holding a barbell. Hinge down until the dumbbells get to about mid-shin and then stand back tall.
The reason I’m not personally a huge fan of Dumbbell Deadlifts is I find holding them while deadlifting to be cumbersome and awkward. However, as I said before, if dumbbells are what you have you can definitely make them work.
Hammer Strength Squat Lunge Machine
The Hammer Strength Squat Lunge Machine (we always called it the Hammer Pull) is the machine that is most like the Deadlift itself. The handles sit laterally of the body and are more elevated off the ground than a barbell.
However, the reason I don’t have it listed higher on the list is that most of us probably don’t have access to a Hammer Pull machine. I’ve had them in a few of the college weight rooms I’ve worked in, but not all.
Some commercial gyms may have one if you’re lucky and they’re extremely expensive to buy for a home gym. But, if you do happen to have access to this machine, I’d highly recommend giving it a try.
Tire Flips
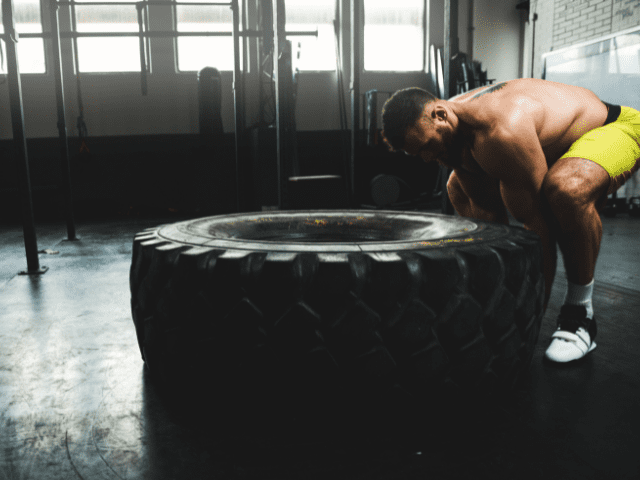
This last suggestion is admittedly a little more creative than the rest, but I believe Tire Flips can also work as a solid alternative for Deadlifts.
After all, picking up a tire from the ground uses the same body position and the same movement pattern. So, if you don’t have a barbell, but you do have a tire that you workout with – put that thing to use!
Equipment Needed
- Tire
Muscles Worked
- Tire Flips are a true total body movement. Almost every major muscle group is at work at some point during Tire Flips.
How To
- Make sure you have plenty of space to be able to safely flip the tire.
- Start with the tire laying on the ground on its side.
- Stand with toes almost against the tire, feet roughly shoulder-width apart.
- Drop the hips and reach under the tire.
- Once you have a good grip under the tire flatten your back and brace your core.
- Drive the feet through the ground and aggressively begin to extend the hips.
- If the tire is heavy, you can slide one knee under the tire to help with leverage once the tire is high enough.
- When the tire gets above stomach height, flip your hands around so you can begin to push the tire.
- Push the tire forcefully forward – extending with both your arms and legs.
- The tire should land on its side. Repeat for the designated amount of distance or reps.
Coaching Points
The biggest key to Tire Flips is perhaps in finding the right tire. Every school I’ve ever worked at had big tires that were used for Tire Flips. However, the size and weight of these tires have all been drastically different. They’ve ranged from tires that were barely heavy enough to be worth using to tires that took two and sometimes even three football players to flip.
Just like with Deadlifts and Power Clean, it’s extremely important to drop the hips, use the legs and keep the back flat. Once fatigue starts to set in I generally see athletes resort to using more back than legs. If form reaches this point then it’s time to stop flipping the tire.
Final Thoughts
For any exercise or piece of equipment, there are almost always alternatives you can use as a substitution. Don’t get frustrated if you’re not able to do an exercise listed in your workout program, just figure out how to adapt the movement.
There are always other movements that will work the same muscle groups, oftentimes just as effectively.
This is why I list alternatives for every exercise in my Exercise Library. So, if you’re wanting to do Deadlifts, but you find yourself without a barbell, I hope one of the Deadlift alternatives I’ve listed in this guide works well for you.

