DIY Horizontal Bumper Plate Storage (How To w/ Pics)
My philosophy on equipment for my garage gym is pretty simple. Spend money where it counts and save money when it makes sense. To give you an example, I have a Uesaka Barbell that is one of the most expensive barbells you can buy. To me, a barbell matters.
On the other hand, a commercial horizontal bumper plate rack is going to run you well over $100. To me, this is an insane way to spend your money.
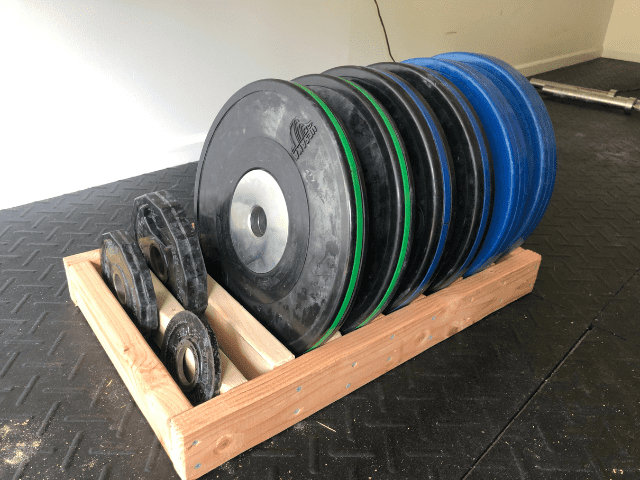
I built a DIY Horizontal Bumper Plate Storage Rack for about $12. Yes, you read that right. I built a storage rack for $12 with 2x4s, nails, a hand saw and a drill. It looks great and functions even better.
Interested? Let me show you how the easiest thing you’ve ever built will save you over $100 (per box) and get compliments from your friends.
Links on this page may be affiliate links. If you use one of these links I may, at no extra cost to you, earn a commission.
Materials

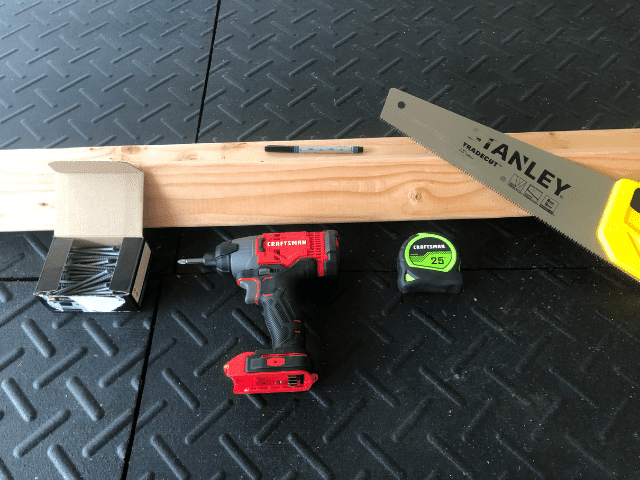
- 3 – 2x4x8s (You can actually get this done with 2 2x4x10s but those don’t fit in my vehicle)
- 36 – 3″ Wood Screws
- Saw
- Measuring Tape
- Drill
A couple of notes when it comes to the materials you need.
First, when it comes to the wood, you will end up cutting and using two 31″ pieces for the two long sides and 9 17″ boards for the cross pieces. This ends up coming up to a little less than 18 total feet.
Getting two ten-foot boards will save you an extra dollar or two, but those don’t fit in my vehicle so I had to get the 8 footers. Either way, you’re not exactly breaking the bank.
I used a hand saw I picked up from Lowe’s for less than $10 when I built my Squat Stand. If you have a saw that uses electricity (a circular saw or a table saw), even better. If you really examine my box and my cuts, you’ll notice they’re not perfect.
But, I was more than satisfied with how mine turned out. The point is you don’t need a fully stocked wood shop to put this thing together.
What you will want is a power drill though. You’ll also want a drill bit to make pilot holes before drilling in your wood screws. Without pilot holes, the wood screws will cause your boards to splinter pretty badly.
Cost of Materials
The 2x4s cost $3.84 a piece. The wood screws I had left over from my squat stand. I originally paid $9 for the 3″ screws and I still have some leftovers after this project.
Assuming you already own a drill, measuring tape and a saw you can make this box for around $12. That’s pretty dang good if you ask me. It also only took me a couple of hours to put it together.
I also have very little “talent” when it comes to building things. I could see someone with actual skill putting this together in about an hour.
Building the DIY Bumper Storage

First, make your cuts. As I mentioned earlier I used two 31″ pieces for the sides and 9 17″ boards for the cross pieces.
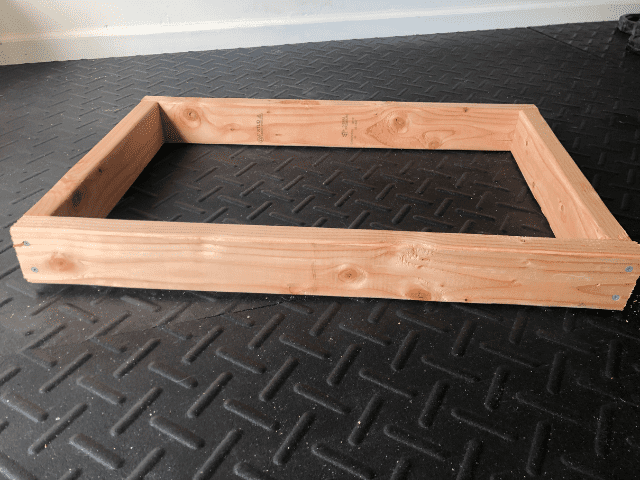
Once you’ve made all your cuts, assemble your frame.
Now, if you used a table saw or circular saw to make your cuts you should have 8 perfectly even 17″ pieces of wood. If you’re like me and you’re sawing like it’s 1799, there’s a chance not every one of your pieces is exactly the same.
If that’s the case, try to find the two longest pieces to make your frame.
To make your frame, simply line up one of your long pieces with a cross piece into an L. Drill two pilot holes, each about a half-inch from what will be the top and bottom of your frame. Finally, drill in your wood screws.
Repeat this process for the other 17″ end piece and finally attach the opposite long side.
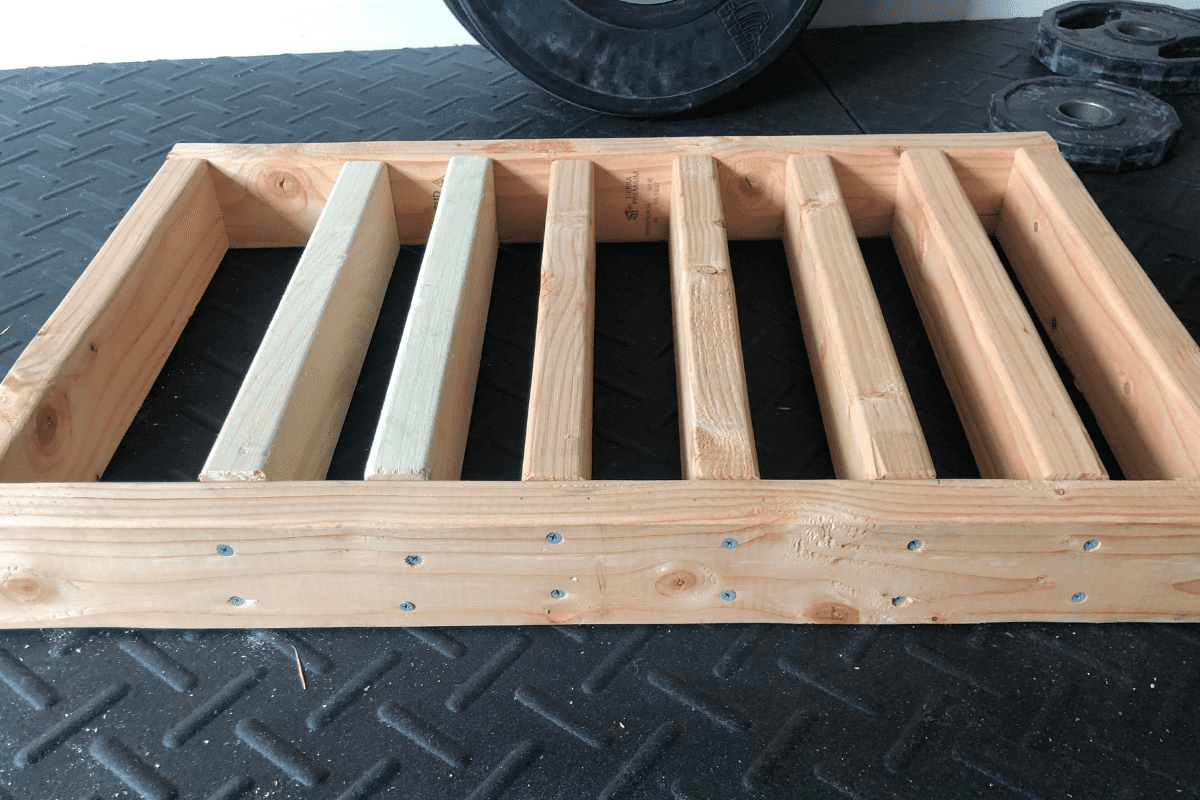
Now, all you need to do is add in your other cross pieces. To know the distance you want between each cross piece you need to check the width of your plates. I personally only use 20kg and 10kg plates. Two reasons. One, I typically find using 15kg and 25kg plates ends up being more of a hassle than a convenience when it comes to changing plates when adding weight to the bar.
Second, I find it to be more cost-efficient to only buy 20kg and 10kg plates. I then use smaller plates to fill in the gaps when adding weight.
My 20kg plates are all 2″ wide and my 10kg plates are 1 1/2″ wide. While this is pretty common, double-check your plates before building your rack.
My back four ‘slots’ are all spaced 2 1/2″ apart. These are for the 20kg plates. This gives the plate enough room to easily fit, but not too much space so it stays secure in it’s place.
The front four ‘slots’ are all 2″ wide. These are for the 10kg plates along with any smaller plates like 10s, 5s and 2 1/2s.
To build out the slots, simply mark off the distance for the slot and mark the width of the wood board itself. Then slide the cross piece into the frame and drill it into place. Don’t forget to drill your pilot holes first. Rinse and repeat until all your boards are in place.

That’s it. Like I said at the beginning, it might be the simplest (and cheapest) thing you’ll ever build in your life. And yet, it works just as well, and in my opinion, looks just as good as a metal one. It’s also super lightweight and portable if you ever need to move it.
Now take that $200+ you just saved and get some really good bumper plates to go in them. That is where your money can make a big difference in the quality of what you actually get to train with each day.
Paint It?
Personally, I like the look of the unpainted wood, but you can always paint your storage rack if it’s a better look for your gym.
If you do decide to paint it, the easiest way to go is to spray paint it like you would outdoor wooden furniture (how to spray paint wooden furniture).
Use something heavy-duty like Rust-Oleum Painter’s Touch 2X Ultra Cover. Remember your rack is going to take a lot of punishment with plates constantly being thrown in them. You need a paint that’s going to be able to stand up to that level of wear and tear.
Do I Even Need a Bumper Storage Rack?
Are you still on the fence about whether you even really want a storage rack?
If you’ve been leaning your plates against the wall or against your rack and you’re happy with that then keep doing it. There is no real need to have a storage rack.
I leaned my plates against the wall and a support beam for about the first three months. I ended up wanting something a bit more ‘organized’ and for $12, how could I not?
Final Thoughts
Lifting equipment can be expensive. Like really expensive. What started out as your budget for your garage gym can evaporate pretty quickly. Because of this, I highly recommend trying to pick your spots where you can build something yourself and save some money.
Especially when the thing that saves you money looks so good that your friends steal the idea from you and make their own. Well, now you can steal the idea too and make your own DIY Horizontal Bumper Plate Rack.
While you’re at it, here are a couple more DIY Garage Gym Ideas you can steal from me as well.
Stay Strong!

