10 Best Face Pull Alternatives and Variations (2024)
Face Pulls are an extremely popular supplemental exercise for shoulder development. They’re easy to learn, beginner-friendly and are one of the most effective exercises for focusing on the posterior deltoid.
However, sometimes you may need an alternative for Face Pulls.
Maybe you don’t have a cable machine or resistance band or maybe you’re just looking to add some variety to your workouts.
Whatever the reason, if you’re looking for an exercise to substitute for Face Pull then you’re in the right place. I’m about to share with you 11 of my favorite Face Pull alternatives.
Keys to Good Face Pull Alternatives
When looking for a good alternative to Face Pulls, it’s crucial to find an exercise that still targets the right muscle groups to ensure balanced shoulder development.
Here’s what you should look for:
Muscle Engagement
Ensure the alternative exercise effectively targets the rear deltoids, rhomboids, and traps. These muscle groups are essential in enhancing shoulder stability and reducing the risk of injury.
Equipment Availability
Sometimes the available equipment can limit the choice of exercises.
Opt for alternatives that are feasible with the equipment you have at hand, be it resistance bands, cables, or dumbbells.
Technique and Form
A good alternative should be one that you’re capable of performing with the proper technique.
It should also facilitate scapular retraction and protraction, which is a key movement in Face Pulls.
Aligns with Training Goals
The Face Pull alternative should be aligned with the objectives of your training plan, whether it is building strength, enhancing mobility, or improving stability.
Face Pull Variations
Before we jump into Face Pull alternatives, there are two different variations of Face Pulls that utilize different pieces of equipment.
I want to make sure you’re aware of both before we start discussing alternatives.
Cable Face Pulls
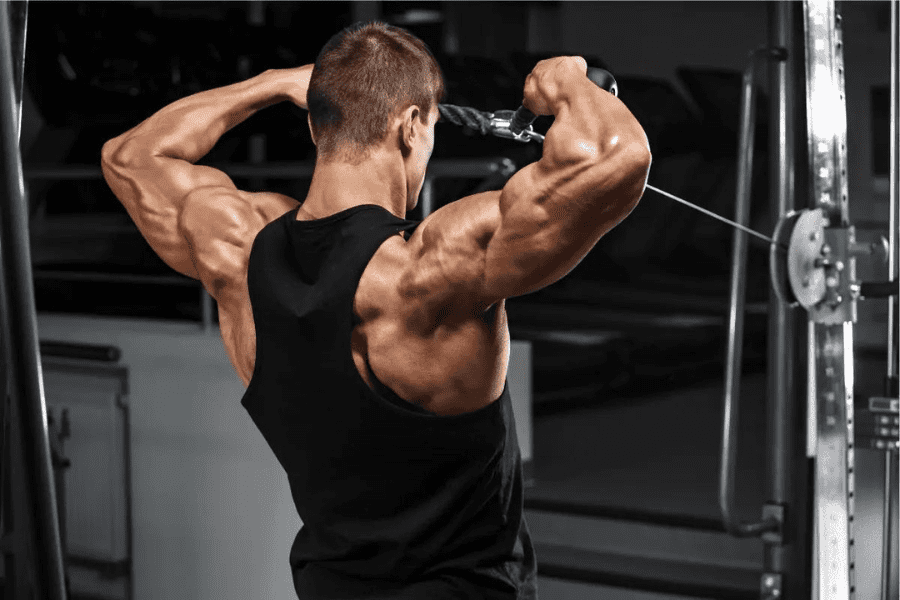
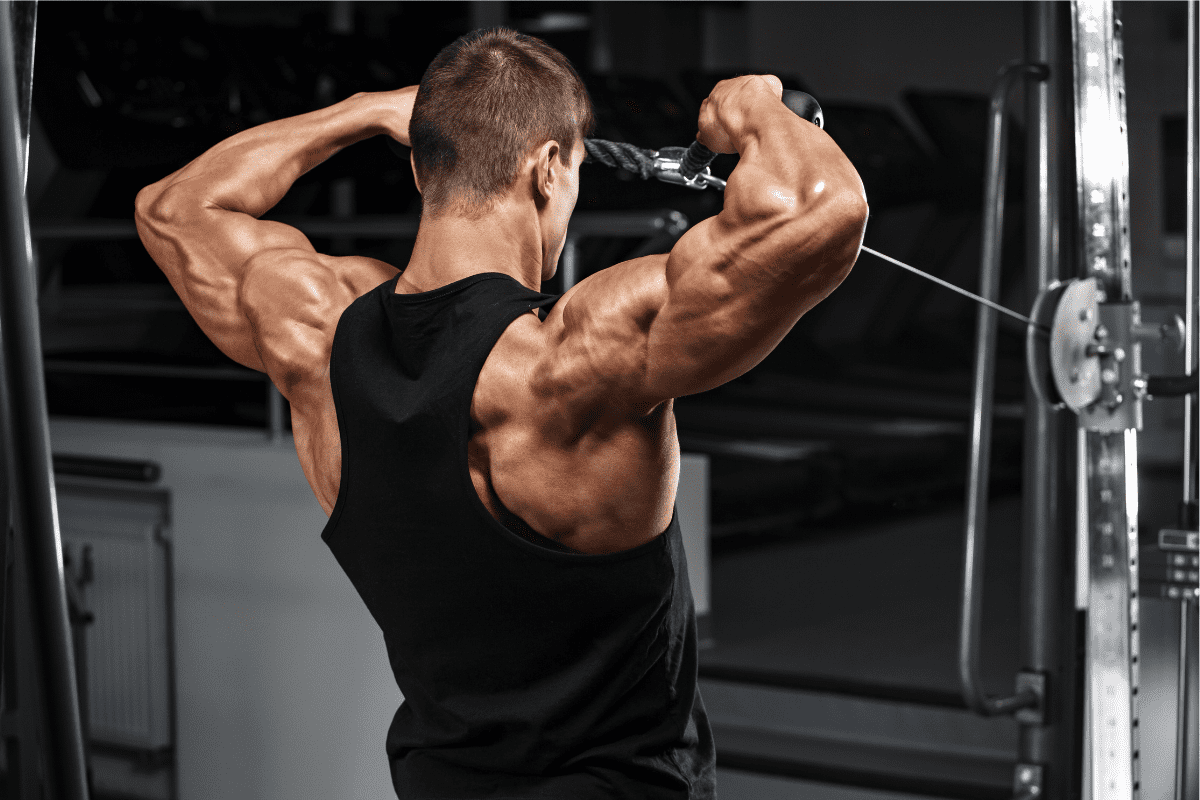
Cable Face Pulls are probably the more well-known of the two variations. This involves using a cable machine, raising the pin up to shoulder level, using the rope attachment and then pulling the rope toward the face.
Cable Face Pulls are a staple of my hotel gym workouts when oftentimes you don’t have much else to work with other than a universal cable machine.
Band Face Pulls

If you’re working out at home, chances are you don’t have a cable machine. However, there is a good chance you have a resistance band.
Band Face Pulls are just as effective as Cable Pulls.
Loop a resistance band around a rack, or another sturdy object, at around face height. Grab the band and step back to get tension on the band and then pull it toward the face.
Alternatives for Face Pulls
I’ve tried to include as much variety in this list of Face Pull alternatives as possible.
There are exercises that utilize all kinds of different equipment – dumbbells, resistance bands and even one that doesn’t require any equipment at all.
What all these exercises have in common, though, is that they are all target and emphasize the rear delt and rotator cuff muscles.
Dumbbell Rear Delt Raise
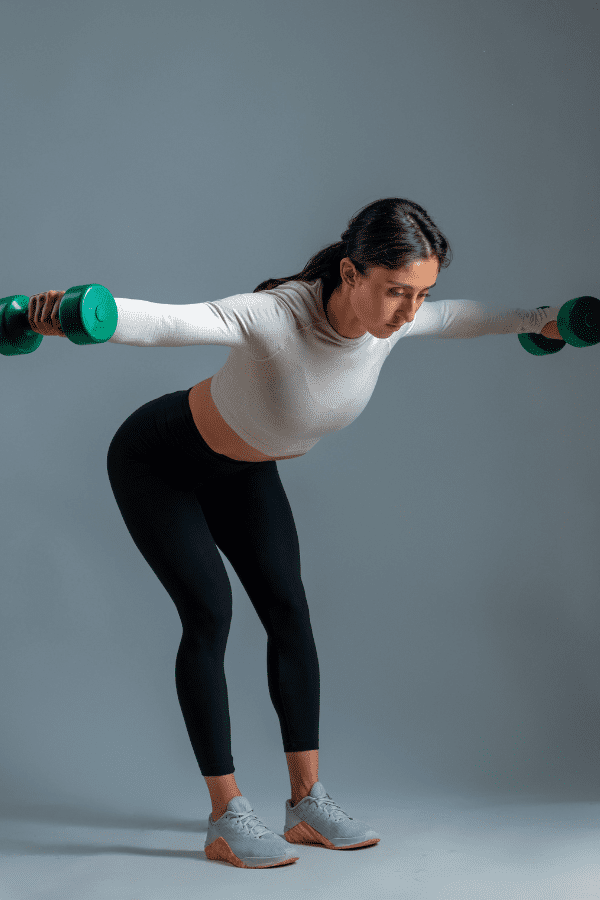
Rear Delt Raises are one of my favorite Face Pull alternatives because they’re effective and all you need is a set of light dumbbells, something most of us (even if we’re working out from home) have access to.
Equipment Needed
- Dumbbells*
- 5 or 10-pound iron plates*
*Either is fine for most lifters. Advanced lifters may want dumbbells heavier than 10 pounds.
Step-by-Step Instruction
- Grab your dumbbells (or plates) and bend at the waist until you are close to perpendicular to the floor.
- I recommend slightly bending the elbow and keeping your palms facing each other. As you execute the movement, the palms will face the floor.
- Initiate the movement by bringing your arms out to the side and squeezing the shoulder blades.
- Pause at the top of the movement for about 1 second.
- Slowly lower your arms back to the starting position.
Coaching Points
In the setup, be sure to bend at the waist enough so that you are perpendicular as much as possible.
When doing Rear Delt Raises, the burn should be felt in the upper back and rear shoulders. If your setup is too vertical, you may feel the burn in the traps or medial delts.
Don’t hitch (bounce) into lockout. If you find yourself using your torso to hitch, go down in weight. The emphasis here is on time under tension and quality movement still matters.
Cable Rear Delt Raise
Equipment Needed
- Cable Machine
- Single Handle Attachment
Step-by-Step Instruction
- Grab the single handle attachment with the hand away from the machine and bend at the waist until you’re torso is close to perpendicular to the floor.
- I recommend slightly bending the elbow and keeping your palm facing in. As you execute the movement, the palm will face the floor.
- Initiate the movement by bringing your arm out to the side and squeezing the shoulder blades.
- Pause at the top of the movement for about 1 second.
- Slowly lower your arms back to the starting position.
Coaching Points
Cable Rear Delt Raise can be done with one arm at a time or, if you have a double tower, both arms at the same time.
In the setup, be sure to bend at the waist enough so that you are perpendicular as much as possible.
In this movement, the burn should be felt in the upper back and rear shoulders. If your setup is too vertical, you may feel the burn in the traps or medial delts.
Band Pull Aparts
Equipment Needed
- Resistance Band (optimally a thin red band)
Step-by-Step Instructions
- Start in a standing position, feet shoulder-width apart and knees slightly bent.
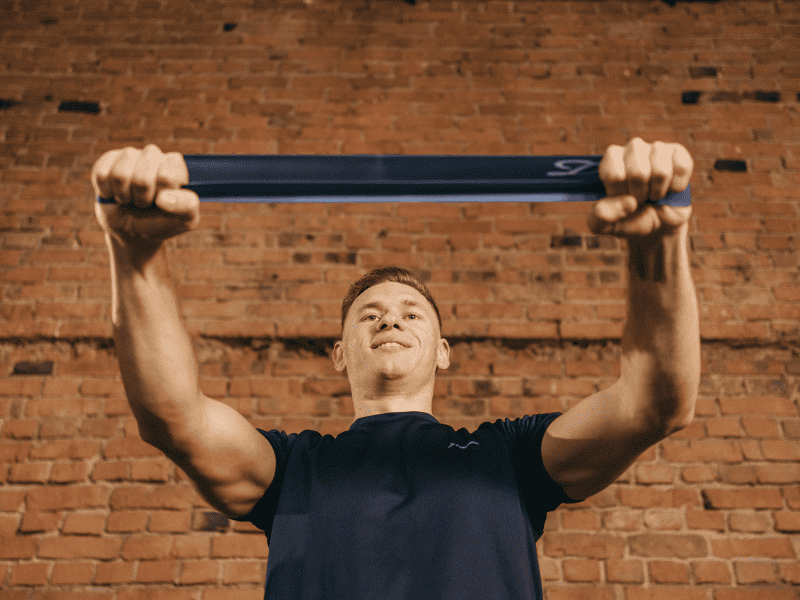
- Grab a resistance band, one hand on each end of the band.
- Hold the band out in the front of the chest.
- Now pull back and directly out to the side, as if you are trying to ‘tear’ the band in half.
- Pull back until the band hits the chest.
- Let the band retrace back to the starting position under control.
- Repeat for the designated number of reps.
Coaching Points
The biggest key to Band Tears is choosing the proper band.
Too thick of a band will make the movement almost impossible to do with proper form and too thin of a band won’t give enough resistance.
Scap Pushups

Equipment Needed
- None
Step-by-Step Instructions
- Scap Pushups begin with the athlete in a push-up position.
- Hands should be directly under the shoulders. The body should be in a straight line, core engaged.
- Retract the shoulder blades by actively lowering the chest and allowing the shoulder blades to slide together.
- Now protract the shoulder blades by elevating the chest, essentially trying to ‘reach’ the upper torso toward the sky.
- Arms should stay straight throughout the movement.
Coaching Points
Do NOT rush through Scap Pushups.
Yes, the longer you hold the position the more challenging it is on not only your shoulders, but your core as well. This is part of the point of the exercise is to continue forcing the body to stabilize once fatigue starts to set in.
Embrace that aspect of the movement.
Keep arms straight! Easily the biggest mistake I see with athletes with Scap Pushups is wanting to bend the arms on the scap retraction. Keep the arms straight and focus on the movement of the shoulder blades.
A, Y, Ts
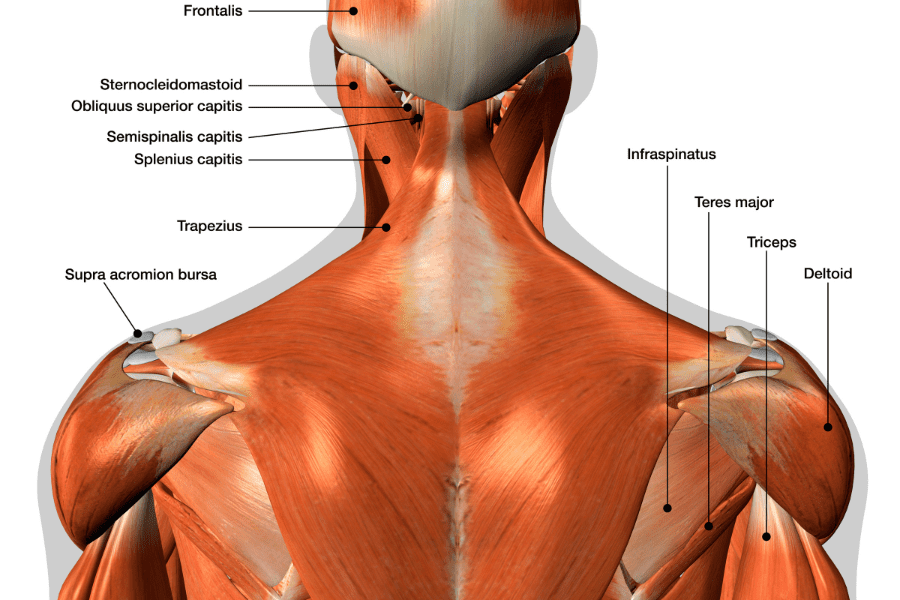
This is one of my favorite combos to use with athletes that I refer to as shoulder pre-hab.
By strengthening the muscles of the rotator cuff you can reduce the likelihood of shoulder injuries.
Equipment Needed
- Very light dumbbells (typically 3lb or 5lb) OR Weight Plates (typically 2.5lb or 5lb)
- Adjustable Bench
How To
- Adjust a bench up to about 30 degrees and grab two light weight plates.
- Lay on your stomach with your head hanging off the top of the bench.
- Set up in the starting position by engaging the lats and pulling the shoulder blades together.
- Now, keep the arms straight and raise the plates overhead (like the A in YMCA).
- Lower back down under control and complete 10 reps.
- Once all reps are done immediately begin doing Ys by raising the plates at a 45-degree angle, thumbs pointed toward the ceiling.
- Once you’ve completed ten Ys, finish with 10 Ts.
- Ts are done by raising the arms straight to the side, thumbs still pointing up.
Coaching Points
Keep the shoulder blades pulled back, but do not shrug up. Shrugging up takes the emphasis away from the focus of A, Y, Ts.
Stay in control of each rep. Do not allow weights to be swung up and down.
Cable Upright Row
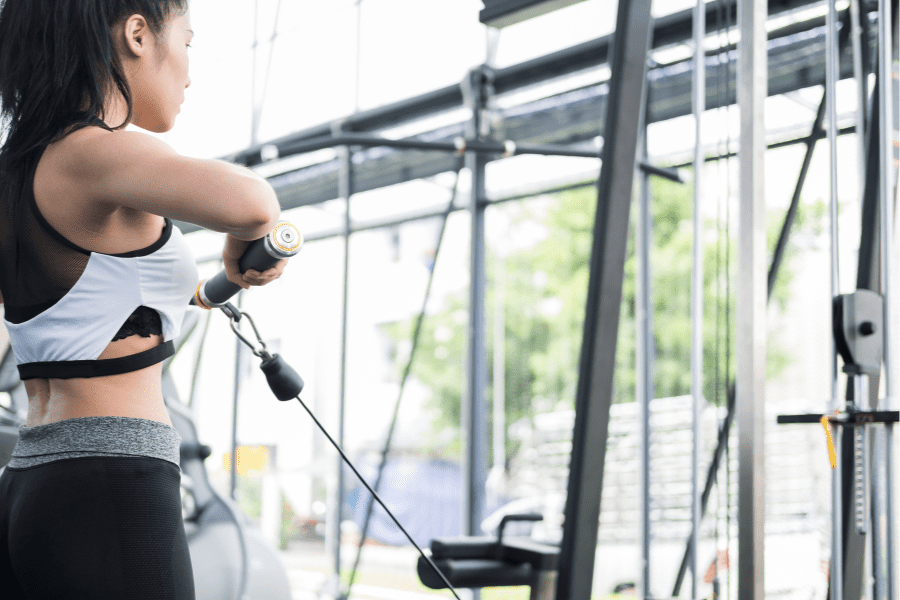
The Cable Upright Row is actually my favorite variation of Upright Rows.
Cable Upright Rows are going to hit many of the same upper back muscles as Face Pulls will.
Equipment Needed
- Cable Machine
Step-by-Step Instructions
- Attach a straight handle* to a cable machine and lower the attachment pin to the bottom of the beam.
- Grab the handle with an overhand grip and stand tall, handle starting right in front of the thighs.
- Flex knees slightly and stand upright with feet shoulder width apart.
- Pull the cable handle upward along the abdomen and chest toward the chin.
- At the top, the elbow should be higher than the wrist, and above the shoulders.
- Lower the handle under control back to the front of the thighs.
- Do not ‘jerk’ or ‘rock’ the weight up and keep the handle close to the torso throughout.
Coaching Points
*You can use multiple different attachments other than a straight handle. The Rope Attachment is another popular attachment for Cable Upright Rows.
Band Upright Row
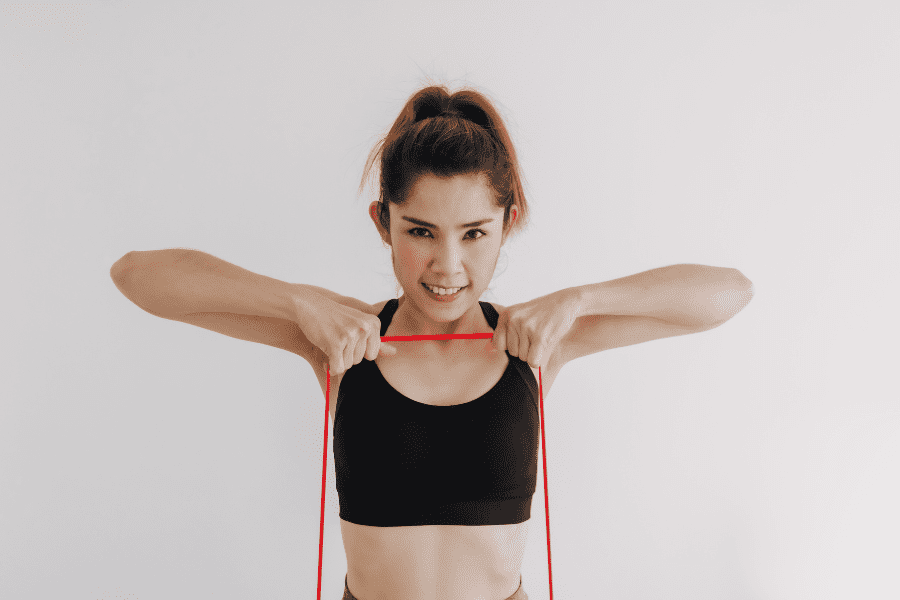
Equipment Needed
- Resistance Band
Step-by-Step Instructions
- Grab a resistance band, slight a foot inside and stand on it*.
- Place your hands on the opposite side of the band about six inches apart with an overhand grip.
- Flex knees slightly and stand upright with good posture.
- Pull the band upward along the abdomen and chest toward the chin.
- At the top, the elbows should be higher than the wrist, and above the shoulders.
- Lower the band under control, hands back to the front of the thighs.
- Repeat for the designated number of reps.
Coaching Points
*How you stand on the band is a great way to adjust the overall difficulty of the movement.
Standing on the band with one foot will make Band Upright Rows the easiest.
Standing on the band with two feet will make the exercise harder and the wider you place your feet will continue to increase the tension and make them more challenging.
Big 30
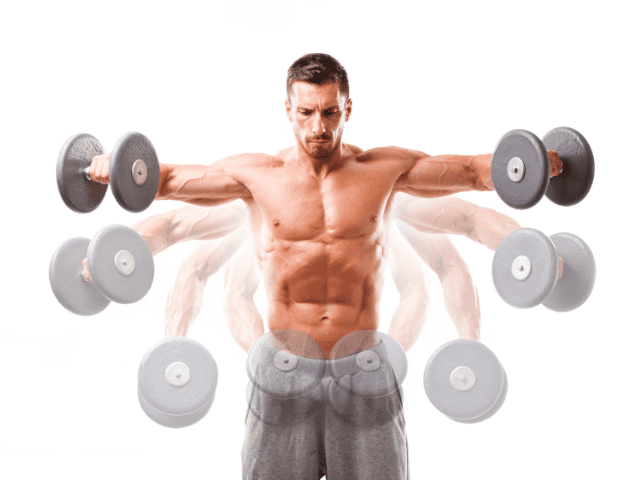
Equipment Needed
- Dumbbells
Step-By-Step Instructions
- Start in a standing position, feet shoulder-width apart, dumbbells in hand.
- Begin by doing 10 Dumbbell Front Raises.
- Once those reps are completed immediately transition into 10 Dumbbell Lateral Raises.
- Once those reps are completed immediately transition into 10 Rear Delt Raises.
Coaching Points
The key to the exercise is to do each exercise back-to-back-to-back with no rest in between and without sitting the dumbbells down until all reps are completed.
Because all three exercises are done in a row you’ll need to use a lighter weight than you would doing each individually.
Get Shredded… For Free
Get a free workout Monday through Friday, posted right here on Horton Barbell. These workouts are designed to help you get strong, in shape and look great at the beach!
Final Thoughts
Face Pulls, whether Band Face Pulls or Cable Face Pulls, are an excellent exercise for shoulder development as well as targeting the muscle groups of the upper back.
But, sometimes Face Pulls are simply not an option.
You may not have the proper equipment available to you or at other times you might just be looking to add some variety to your shoulder routine.
In these situations, you’ll need a Face Pull alternative and I hope that one of the exercises I’ve listed here fits what you were looking for.

