
10 Mountain Climber Alternatives to Shake Up Your Workouts
Mountain Climbers are an extremely effective and oftentimes underrated warm-up exercise. I believe we often dismiss Mountain Climbers because they’re one of the staple exercises most of us remember from elementary gym class.
However, as effective as Mountain Climbers may be, sometimes you may find yourself wanting an alternative for them.
Maybe an injury doesn’t allow you to brace on your hands or maybe you’re just wanting to add some variety to your workout routine.
Whatever the reason, you’re in the right place. I’m about to share with you 10 of my favorite alternatives for Mountain Climbers which you can use in your warm-up or even in your core routine.
Mountain Climber Alternatives
I’ve tried to include as much variety as possible in this list. There are exercises that are more warm-up focused and some that are more core focused and more than a few that, like Mountain Climbers, do a good job at both.
The equipment needed for these alternatives is varied as well (most require no equipment at all).
My goal is that no matter what equipment you have or what your situation is, at least one of these exercises will fit what you’re looking for.
High Knees
High Knees are a great Mountain Climber alternative because the two movements are very similar. High Knees is just done on the feet instead of a push-up position.
High Knees can work great as part of a general movement prep warm-up or for athletes to work on sprinting mechanics.
Equipment Needed
- None
How To
- Stand with your feet hip-width apart and your arms by your sides.
- Lift one leg off the ground and bring your knee up towards your chest, keeping your foot dorsiflexed (toe pointed up), your heel tucked under the hamstring and your core engaged.
- As you bring your knee up, bring your opposite arm up to just in front of the face with the elbow at roughly a 90-degree angle.
- The arm on the same side as the knee that is up should be placed just behind the hip with the elbow at roughly a 90-degree angle.
- Lower your foot back to the ground and repeat the movement with the opposite leg and arm.
- Continue alternating legs and arms, lifting your knees as high as you can while keeping your balance and form.
- As you get more comfortable with the movement, you can increase the speed and intensity.
Coaching Points
Keep the shoulders relaxed. Many athletes will tense up through the shoulders in an effort to move faster. Always remember – tight is slow.
The arms should maintain a roughly 90-degree angle at the elbow throughout the movement. Hands should alternate from “cheek-to-cheek”.
Try to stay as tall as possible. Do not bend at the hips and hunch forward. Also, do not lean back in an attempt to raise the knees higher. Stay extended and make yourself as tall as possible.
Benefits of High Knees
High Knees are an incredibly good exercise to either introduce on reinforce speed mechanics. Knee lift, arm action and body angles are all things that can be taught and coached when doing High Knees.
This makes them a great movement to do when transitioning from a general warm-up to more complex speed drills.
They can also be used as a part of a general movement prep warm-up as they can quickly raise the heart rate and don’t require any equipment or a lot of room to perform.
Mountain Climber Crossovers
Want to increase the challenge of your regular Mountain Climbers?
Add in a twist… literally.
Equipment Needed
- None
Muscles Worked
- Core Abdominals (Rectus Abdominis, Obliquus Externus Abdominis)
- Tensor Fasciae Latae
- Quadriceps, Rectus Femoris
- Shoulders (as a stabilizer)
How To
- Begin in a push-up position – hands under shoulders, core engaged, body in a straight line.
- Now drive the right knee across the body toward the opposite elbow.
- As you bring the right foot back to the starting position, begin to drive the left knee toward the opposite elbow.
- Continue alternating back and forth until all reps are completed. (count moving left and right legs up as one rep)
Coaching Points
Keep hips down throughout Mountain Climbers Crossovers. Don’t allow the hips to start to raise if you begin to tire. Also, work to maintain the same range of motion throughout the entire set.
Jumping Jacks
Jumping Jacks are a simple exercise that most of us probably remember from grade school PE class.
We did them back then because they’re simple and effective – the same reason I would suggest doing them now.
If you need a basic movement to raise core body temperature and elevate the heart rate during a warm-up, keep it simple and do Jumping Jacks.
Equipment Needed
- None
Muscles Worked
Jumping Jacks are a total body exercise, utilizing almost every muscle group in the body. This is one of the main reasons they are such an effective warm-up exercise.
Step-by-Step Instructions
- Start in a standing position, feet side by side and arms down by your sides.
- Begin by jumping your feet out to about shoulder-width apart.
- At the same time you move your feet – raise your arms out to your sides until they meet directly overhead.
- Now, simultaneously bring your feet and arms back to the starting position.
- Repeat for the designated number of reps.
Coaching Points
To be perfectly honest, the biggest mistake for Jumping Jacks I’ve seen over the years with athletes is just laziness. Whether it’s perceived as an exercise for little kids or just not that important, athletes can get really sloppy with technique just from lack of caring.
If Jumping Jacks are included in a workout program, they should be there for a reason. And if they are there for a reason then they should be done with the same attention to detail as any other exercise in the program. Just my two cents.
Burpees

The exercise that fills many CrossFitters with dread is a solid Mountain Climber alternative.
Burpees are great as part of a warm-up (in small doses) or as part of a high-intensity circuit (in larger doses).
Equipment Needed
- None
Muscles Worked
Burpees are a total body exercise involving almost every muscle group in the body. This is a big part of what makes Burpees such a good warm-up exercise.
How To
- Stand with your feet shoulder-width apart and your hands by your sides.
- Lower your body into a squat position by bending your knees and hips. Place your hands on the ground in front of you, just outside shoulder-width apart.
- Jump your feet back into a plank position, with your hands still on the ground and your body in a straight line.
- Do a push-up by lowering your chest towards the ground, then pressing back up to the plank position.
- Jump your feet back towards your hands, then stand (or jump) up and reach your arms overhead.
- Continue until all reps are completed.
Coaching Points
Remember to keep your core engaged and your body in a straight line when you jump into the plank position and then as you continue through the push-up.
If you’re new to Burpees, it may be helpful to practice the separate steps (squat, plank, push-up) before putting them all together. As you become more comfortable with the movement, you can try adding variations such as jumping higher, adding a tuck jump, or doing a plyometric push-up.
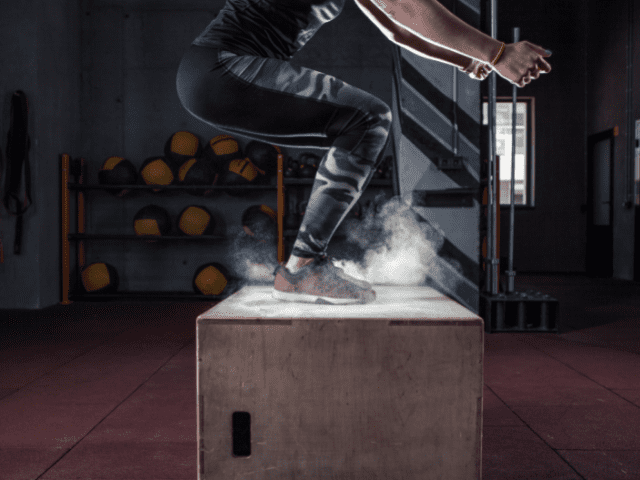
Box Jumps
Equipment Needed
- Plyo Box
Step-by-Step Instructions
- Grab a box that is the proper height for your jumping ability
- Start just far enough away from the box so that your hands will not hit the box when you swing them.
- Once you’re in position, stand tall with feet hip-width apart.
- Now raise your arms overhead and extend up onto the balls of the feet.
- Start your countermovement by hinging at the hips, bending the knees and throwing the hands down and back behind the body.
- Immediately redirect by driving the feet through the floor, throwing the hands up and triple extending through the hips, knees and ankles.
- Land softly on the box by bending the knees upon landing and absorbing the force of impact.
- Step down off the box and repeat.
Coaching Points
When doing Box Jumps, pick a box that is an appropriate height. You should land on the box in roughly a quarter-squat position. All too often I see athletes jump on a box that is way too high, causing them to have to land in a full squat position.
This is wrong for two reasons. First, picking your feet higher so you can land in a full squat doesn’t actually mean you jump any higher. Second, having to land in a full squat to make it onto the box eliminates any room for error. If you jump perhaps even an inch not high enough you could end up missing the box.
Don’t stand too far away from the box or you’ll end up jumping at the box instead of up onto the box. This horizontal trajectory can make landing and stabilizing on the box tricky.
Always land with your feet completely on the box. If you get in the habit of landing on the edge of the box and you miss a little, you’ll end up with your shins into the edge of the box.
If you haven’t bought a box yet for your home gym, you’ll have to decide whether you want a soft foam box or a wooden box. Both have their pros and cons. It just depends on which is the better fit for you and your gym.
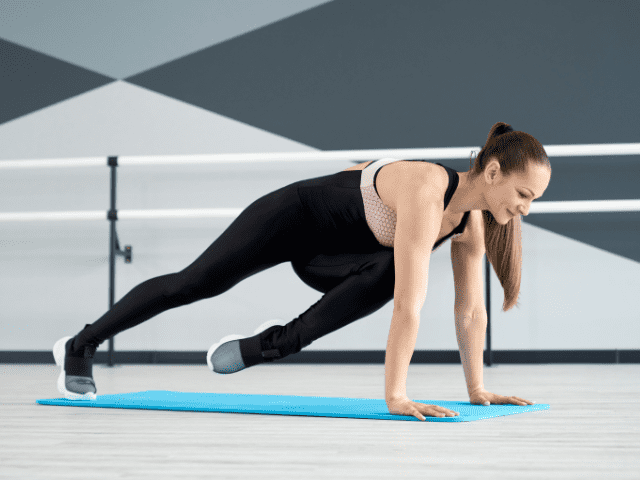
Plank Jacks

Equipment Needed
- None
Muscles Worked
- Core (Abdominals and Erector Spinae)
- Adductors and Abductors of the legs
- Shoulders (stabilizers)
How To
- Start in a plank position with your hands placed slightly wider than shoulder-width apart on the ground.
- Make sure your body is in a straight line from your head to your heels, and engage your core to keep your body stable.
- From this position, jump your feet out to the sides, landing with your feet slightly wider than shoulder-width apart.
- Without letting your hips sag or rise up, quickly jump your feet back together again.
- Continue jumping your feet out and in at a steady pace, keeping your core engaged and your body in a straight line until all reps are completed.
Coaching Points
If you need to modify the exercise, you can do Plank Jacks with your elbows on the ground (wrist injury for example). You can also step your feet out and in instead of jumping if you need to make the exercise a bit easier.
The most important thing to focus on is keeping your core braced and your body in a straight line throughout the movement. Don’t rush and get out of control and sloppy with your technique.
Squat Jumps
Equipment Needed
- None
Muscles Worked
- Quads
- Hamstrings
- Glutes
- Calves
Step-by-Step Instructions
- First, make sure you have enough clearance to safely do Squat Jumps (no low ceilings!)
- Start in a shoulder-width with toes either straight ahead or turned slightly out.
- Squat down, exactly how you would with a normal Bodyweight Squat.
- As you squat down, cock your arms back so that they are down and slightly behind the hips.
- When you get to the bottom of the squat, explosively drive yourself up – hips and arms – into the air as high as possible.
- Land softly by bending the hips and knees to absorb force when contacting the ground.
- Repeat for the designated number of reps.
Coaching Points
Go for MAXIMUM height for each jump. Reset and reload each repetition – don’t rush through.
Don’t forget to use your arms! Your arms can help you generate power on your jumps – utilize them!
Dumbbell Lunges

Equipment Needed
- Dumbbells
Instructions
- Grab two dumbbells, one in each hand
- Squeeze the shoulder blades and engage the lats to create a stable back to help with bracing the upper body
- Once you’ve created enough room for yourself from the dumbbell rack (or wherever you pulled them from) you can begin the movement.
- Step forward with one leg, giving yourself enough room to drop into a lunge comfortably without feeling overextended.
- Keep the chest as upright as possible and drop the back knee to roughly one inch from the floor.
- Now drive through the heel and midfoot of the front foot to drive yourself back up tall.
- Repeat on the opposite leg and alternate back and forth until all reps have been completed.
Coaching Points (Fixes to Common Mistakes)
When you step out, make sure to keep the feet shoulder-width apart. If you’re feeling very off-balance in your lunge there is a good chance that you are stepping the lead foot directly in front of the back foot (essentially placing yourself on a tight rope).
Keep the front foot flat on the floor when in the lunge position. One of the most common mistakes is raising up onto the ball of the front foot. One of the reasons for this is often the next most common mistake that I see with Dumbbell Lunges…
Make sure to take a big enough step. Often times I see athletes take way too small of a step. This leads to lunge being extremely cramped and can lead to a whole host of other issues (like coming up on the ball of the foot as mentioned above).
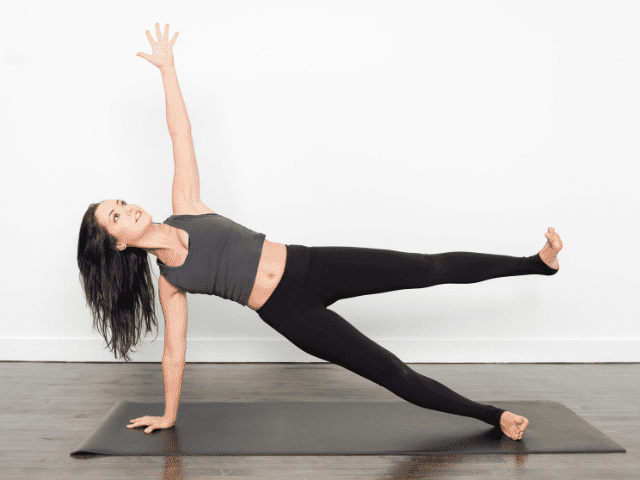
Side Plank with Leg Lift
Equipment Needed
- None
Step-by-Step Instructions
- Lay on your side, one elbow down and feet, hips and shoulders stacked vertically above one another.
- The opposite hand (non-support arm) can be placed on the hip or held up in the air.
- From this position, raise the top leg in the stack until it is roughly parallel to the floor.
- This exercise can either be done for time (holding the position for a set time like regular Lateral Planks), or for reps (lifting the leg up and down)
Coaching Points
The biggest mistake I see with athletes with Lateral Plank plus Leg Raise is allowing the top shoulder to hunch forward. Both shoulders (along with hips and feet) should be stacked directly above each other. If you allow yourself to twist forward toward the ground lifting the leg will be extremely difficult to impossible.
The other aspect of Lateral Planks to be mindful of is keeping the hips elevated and the body in a straight line. When fatigue starts to set in, the first thing that will happen is the hips will being to sag down toward the floor. Try to keep those hips high and fight through until the end.
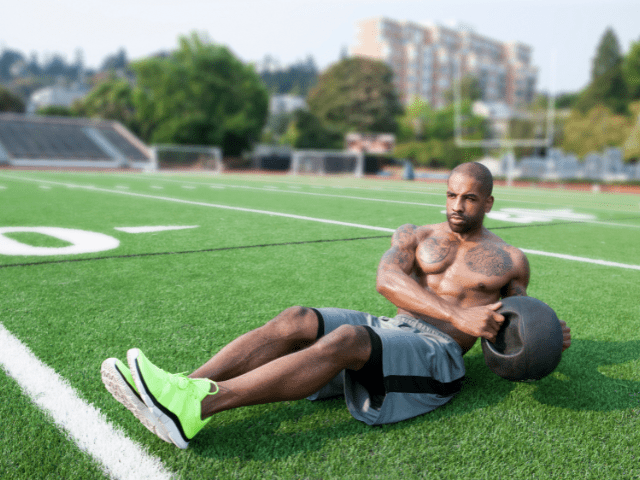
Seated Med Ball Twists
Equipment Needed
- Medicine Ball
Muscles Worked
- Obliques Externus Abdominis
- Rectus Abdominis
Step-by-Step Instructions
- Start by grabbing a medicine ball and taking a seat on the floor.
- Slightly bend the knees and raise your feet roughly six inches off the floor.
- Start by rotating your torso to the left and lightly tapping the med ball against the ground.
- Now turn your shoulders and rotate your torso to the right and, again, lightly tap the ball against the ground.
- Keep legs mostly still and maintain the feet off the floor throughout the movement.
- Continue rotating back and forth until all reps are completed.
Coaching Points (Common Mistakes)
The biggest mistake I see with athletes when doing Seated Med Ball Twists is moving the ball back and forth primarily with their arms instead of rotating through the core. The focus should be on the rotation. The ball touching the ground is simply an added bonus to the movement.
Speaking of the ball touching the ground – there is no need to bang the ball off the ground as hard as possible each rep. Stay in control of the movement and the med ball and lightly tap it on the ground.
Get Shredded… For Free
Get a free workout Monday through Friday, posted right here on Horton Barbell. These workouts are designed to help you get strong, in shape and look great at the beach!
Final Thoughts
Mountain Climbers are an excellent exercise that can be used as part of a warm-up or as part of a core circuit (or as part of a core circuit inside of a warm-up).
However, as good as Mountain Climbers are, sometimes you may want (or need) an alternative to do in their place. In these situations, you’ll need a Mountain Climber substitution and I hope that at least one of the alternative exercises I’ve listed here fits what you were looking for.