12 Renegade Row Alternatives To Work Your Back and Core
Renegade Rows are one of the toughest exercises you can do in a gym. There, I said it. Renegade Rows will challenge your back, your core and your shoulders and will leave almost anyone humbled after a set of 10.
Sometimes, though, you may want an alternative for Renegade Rows. Maybe you don’t have dumbbells or maybe you just want to change up your workout a bit (definitely not because you fear them though, right?).
Whatever the reason, you’re in the right place. In this guide, I’m going to go over 10 of the best Renegade Row alternate exercises.
Alternatives to Renegade Rows
I’ve tried to add as much variety to this list as possible.
Some exercises closely mimic Renegade Rows. Some are core or back exercises that use different pieces of equipment. Hopefully, no matter the reason you’re looking for a replacement for Renegade Rows, you’ll find what you’re looking for here.
Plank Pull Throughs
A “harder-than-it-looks” movement that will light your core and shoulders on fire.
Equipment Needed
- Kettlebell or Dumbbell
How To
- Start on your stomach with a kettlebell sitting just to the right side of the body.
- Raise up into a push-up position – hands under the shoulders and body in a straight line.
- To begin, brace on the right arm and reach under the body with the left hand and grab the kettlebell.
- Pull the kettlebell through under the body to the opposite side.
- Now, brace on the left arm and reach under the body with the right hand and pull the kettlebell back.
- Continue alternating back and forth until all reps are complete.
Coaching Points
For Plank Pull Throughs, keep the core braced as you pull the kettlebell from one side to the other. Try to not rotate and twist through the torso as you move the weight. Try to stay square and maintain core stability.
Shoulder Taps

Another good stabilizing movement to challenge the core muscles is Shoulder Taps. A simple, yet effective exercise that fits perfectly in most upper-body warm-ups.
Equipment Needed
- None
Step-by-Step Instructions
- Shoulder Taps begin with the athlete in a push-up position.
- Hands should be directly under the shoulders. The body should be in a straight line, core engaged.
- Raise the left hand up, reach across the body and tap the right shoulder.
- Replace the left hand back to the ground.
- Now raise the right hand up, reach across the body and tap the left shoulder.
- Continue alternating back and forth in this manner until all reps are completed.
Coaching Points
Try to limit the amount of side-to-side rocking. It’s natural for you to shift your weight to the side of the arm still holding you up, but try to limit excessive rocking side to side as you switch which arm you are stabilizing on.
Plank to Push-up
Equipment Needed
- None
How To
- Start in a plank position, elbows under the shoulders, body in a straight line.
- Now raise to a push-up position by placing your hands (right hand first) in the same spot your elbows were just in.
- Do one full push-up.
- Finally, lower yourself back to a plank position by placing your elbows back in their starting positions.
- On the next rep, raise yourself into a push-up position with your left hand first.
- Continue to go up and down in this manner until all reps are completed.
Coaching Points
As you move up and down keep the core braced and your body in a straight line. Don’t lose focus on maintaining core stability throughout the entire Plank to Push-up movement.
Landmine Single Arm Row
Equipment Needed
- Barbell
- Weight Plates
- Landmine Attachment
Step-by-Step Instructions
- Setup your landmine attachment.
- Load the open end of the barbell with the desired amount of plates.
- Grab the barbell toward the plate side using your hands or a cable attachment.
- Use a shoulder-width stance, bend the knees, braced core and flat back.
- Pull the plates up off the floor and begin rowing by pulling the bar toward you.
- Most often you will be able to row until the weight plates touch your chest.
- Control the eccentric portion of the lift back to arms extended and repeat.
Coaching Points
Using a cable machine attachment on the bar (like a V Bar) for Landmine Rows has its pro and cons. It makes the setup more comfortable and convenient to row, but if you place metal straight on your barbell it can scratch it up. Keep that in mind if you’re planning on using one.
Lateral Bridges

Equipment Needed
- None
Step-by-Step Instructions
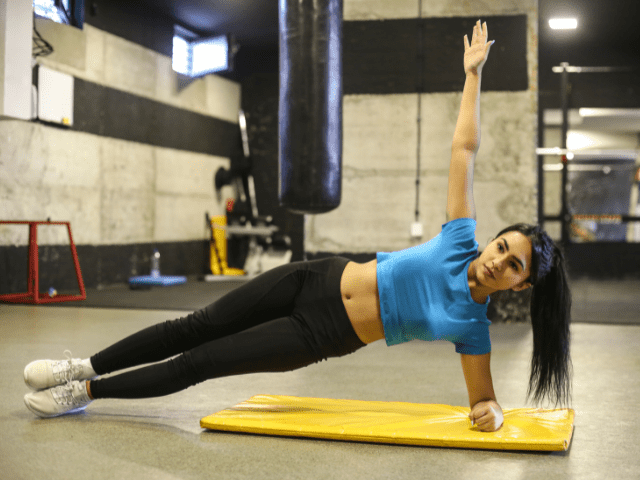
- Start on the ground in a Lateral Plank position – on your side, one elbow down and feet, hips and shoulders stacked vertically above one another.
- The opposite hand (non-support arm) can be placed on the hip or held up in the air.
- From this position, lower the hips down and lightly tap the floor.
- Drive the hips back up to the starting position and repeat for the designated number of reps.
Coaching Points
The biggest mistake I see with my athletes with Lateral Bridges is allowing the top shoulder to hunch forward. Both shoulders (along with hips and feet) should be stacked directly above each other. Do not allow yourself to twist forward toward the ground with your upper body.
Chest-Supported Dumbbell Rows
Equipment Needed
- Adjustable Bench
- Dumbbells
How To
- Set up an adjustable bench at a 45-degree angle.
- Lay on your stomach with your head hanging just above the edge of the bench.
- Grab a dumbbell in each hand and set up with a good posture – core and lats engaged and shoulders neutral.
- Row the dumbbells toward the top of the stomach and squeeze the back at the top of the rep.
- Finally, lower the dumbbells back to the starting position and repeat until all reps are completed.
Coaching Points
Make sure to maintain good posture through the movement. Oftentimes I see athletes doing Chest Supported Rows who allow their shoulders to slouch forward and drape over the edges of the bench.
Dumbbell One Arm Row

Less awkward than Chest-Supported Rows, One Arm Rows are the best Renegade Row alternative if your focus is on moving heavier weight and building strength.
Equipment Needed
- Dumbbells
- Bench (optional)
A bench is helpful, but not totally necessary. Bracing one arm against the rack or even on your leg can work as well.
Step-by-Step Instructions
- Grab a dumbbell and a bench*.
- Place the dumbbell next to the bench and set yourself up.
- If rowing with the right arm, place the left knee and left hand on the bench. Keep the right foot flat on the ground.
- Make sure the back is flat (neutral) to slightly arched.
- Brace the core and pick the dumbbell up.
- Row the dumbbell up, keeping the elbow close to the body as the dumbbell raises.
- Squeeze the back at the top of the rep and then lower the dumbbell down until the arm is fully extended.
- Repeat for the designated number of reps and then switch sides.
*One Arm Rows do not have to be done with one knee on a bench. You can keep both feet flat on the ground and lean forward and brace yourself with your off hand on something sturdy. You can even lean your off forearm on your leg for support if necessary.
Coaching Points
The most common mistake I see my athletes make when doing One Arm Rows is not maintaining a flat back. The back should stay engaged and slightly arched – similar to the starting position of a Power Clean. Do not let the back round as this can cause unnecessary stress on the spine.
One Arm Dumbbell Snatch

I always like to include at least one explosive option if possible. One Arm Dumbbell Snatch is the best alternative if you want a movement for power development in place of your Renegade Row.
Equipment Needed
- Dumbbell
Step-by-Step Instructions
- Grab a dumbbell and stand with feet about shoulder-width apart.
- Put a slight bend in the knee, brace the core and set the back – shoulder blades pulled back, lats engaged, chest out.
- Hinge forward by pushing the hips back and let the dumbbell slide down right in between the knees, coming at a stop just below the knee.
- You are now in the ‘power position’.
- From here, drive the feet through the floor and aggressively extend the hips, driving the shoulders up and slightly back.
- As you reach triple extension of the hips, knees and ankles – use a quick, powerful shrug and allow the elbow to break and begin the pull with the arm.
- Keep the dumbbell close to the body as it travels up.
- Once the dumbbell reaches the highest point of the pull, rotate at the elbow to catch the dumbbell overhead while simultaneously dropping the hips into a quarter squat and shift the feet slightly out.
- Finish the rep by standing tall and lowering the dumbbell down to the shoulder first and then back to the starting position under control.
- Repeat until all reps are completed and then switch arms.
Coaching Points
The two biggest mistakes that I see with Single Arm Snatches are not keeping the dumbbell close to the body on the way up and letting the dumbbell ‘yank’ the shoulder down as it comes back to the starting point.
Hollow Rocks
Equipment Needed
- None
How To
- Lay on your back, legs straight and arms extended overhead.
- Brace the core and lift the feet roughly six inches off the ground.
- Now, slowly rock up and down, a few inches in each direction.
- Focus on keeping core tension throughout the movement.
Coaching Points
- You don’t need to go crazy with how much you rock for Hollow Rocks. Keep the rock small and controlled (arms and feet shouldn’t hit the ground) and focus on maintaining core tension.
Bird Dogs

Bird Dogs are a beginner-friendly Renegade Row alternative that will help improve balance, coordination and core strength.
Equipment Needed
- None
Step-by-Step Instructions
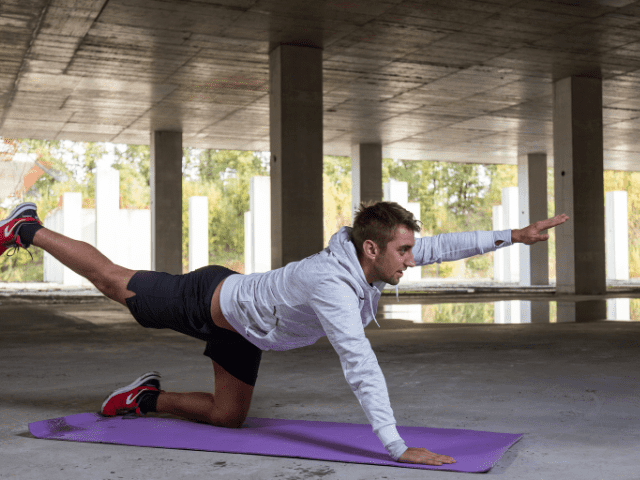
- Start on the ground, on your hands and knees.
- Simultaneously lift one arm and the opposite leg.
- Lift the arm straight out in front of the body, palm down. It should finish parallel to (or slightly higher than) the torso.
- Lift the leg straight out below the body, squeezing the glute at the top. It should finish parallel to (or slightly higher than) the torso.
- There should now be a (relatively) straight line through the ankle, knee, hip, shoulder and hand.
- Reset back to the starting position and then repeat the movement on the other side.
- Continue to alternate back and forth until all reps are completed.
Coaching Points
While doing Bird Dogs, keep the eyes focused down or slightly forward with the head neutral throughout the movement. Do not try to raise the head up too much as this will cause the back to overarch.
Inverted Rows

Inverted Rows are another great sub for Renegade Row. It’s going to work most of the same muscles, including (although to maybe a lesser degree) the core.
Equipment Needed
- Barbell*
- Squat Rack
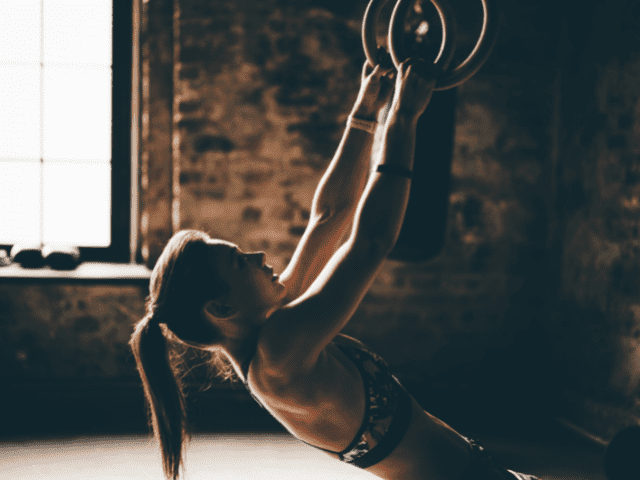
*I generally do Inverted Rows with a barbell in a rack, but if you have gym rings or a TRX Strap they work great as well.
Step-by-Step Instructions
- Start by placing a bar on the rack about waist height.
- The higher the bar is placed, the easier the rows will be. The lower the bar is placed, the harder the rows will be. (Just make sure to leave yourself enough room to fully extend your arms at the bottom of the rep)
- Set the bar on either the J-Hooks or the Safety Bars
- Lay down underneath the bar.
- Grab the bar with an overhand grip, brace the core and make sure your body is fully extended – including your legs.
- You should be positioned to where when you pull yourself up towards the bar, the bar touches the same spot on the chest as it would for bench press. Slide up or down to adjust accordingly.
- Now, keeping your body in a straight line, pull your chest up to the bar and lower back down until your arms are fully extended.
- Repeat until all reps are completed.
Coaching Points
You should think of the Inverted Row as a reverse bench press. Keep your head back, chest out and pull your chest directly to the bar. Pull the shoulder blades down and back at the top of the rep and squeeze the back.
Knees to Elbows
Equipment Needed
- Pull-Up Bar – Ideally a stand-alone pull-up bar or one connected to a squat rack although any sturdy object you can hang from will technically work.
Step-by-Step Instructions
- Find yourself a pull-up bar and grip the bar with an overhand grip
- Engage your lats so your body doesn’t go limp once you begin to hang
- Now hang from the bar and flex your arms slightly at the elbow.
- Lift the knees up and slightly roll the hips forward until the knees touch the elbows
- Actively drive your legs down and straight and then repeat.
- Don’t allow your legs to ‘just fall’ after touching your knees or you’ll swing uncontrollably.
- Repeat for the designated number of reps
Coaching Points
The biggest issue that most of my athletes run into when doing Knees To Elbows is how to keep from swinging.
To keep from swinging, you have to actively lower your legs back down. If you ‘let your legs go’ and just allow gravity to take over you’ll completely lose control of the movement. Timing and rhythm are both important for Knees To Elbows and you can’t achieve either if you’re not in control of your legs throughout the movement.
Final Thoughts
Renegade Rows are an excellent exercise for developing a strong core, back and biceps, however, sometimes they just aren’t an option. You may not have dumbbells or you may just want something different because Renegade Rows are crazy hard (don’t worry, I won’t tell).
In these situations, you’ll need a Renegade Row alternative and I hope that at least one of the alternative exercises I’ve listed here fits what you were looking for.

