Single Leg Glute Bridge (How To, Muscles Worked, Benefits)
The Single Leg Glute Bridge is a great warm-up exercise to activate the glutes. I like to incorporate them on my squat days in the weight room as well as my running days outside.
It’s an extremely versatile movement because it’s relatively easy to learn and requires no equipment to do.
In this guide, I’m going to teach you how to do a Single Leg Glute Bridge and give you a couple of alternatives you can do in its place.
How To Do a Single-Leg Glute Bridge
Equipment Needed
- None
Step-by-Step Instructions
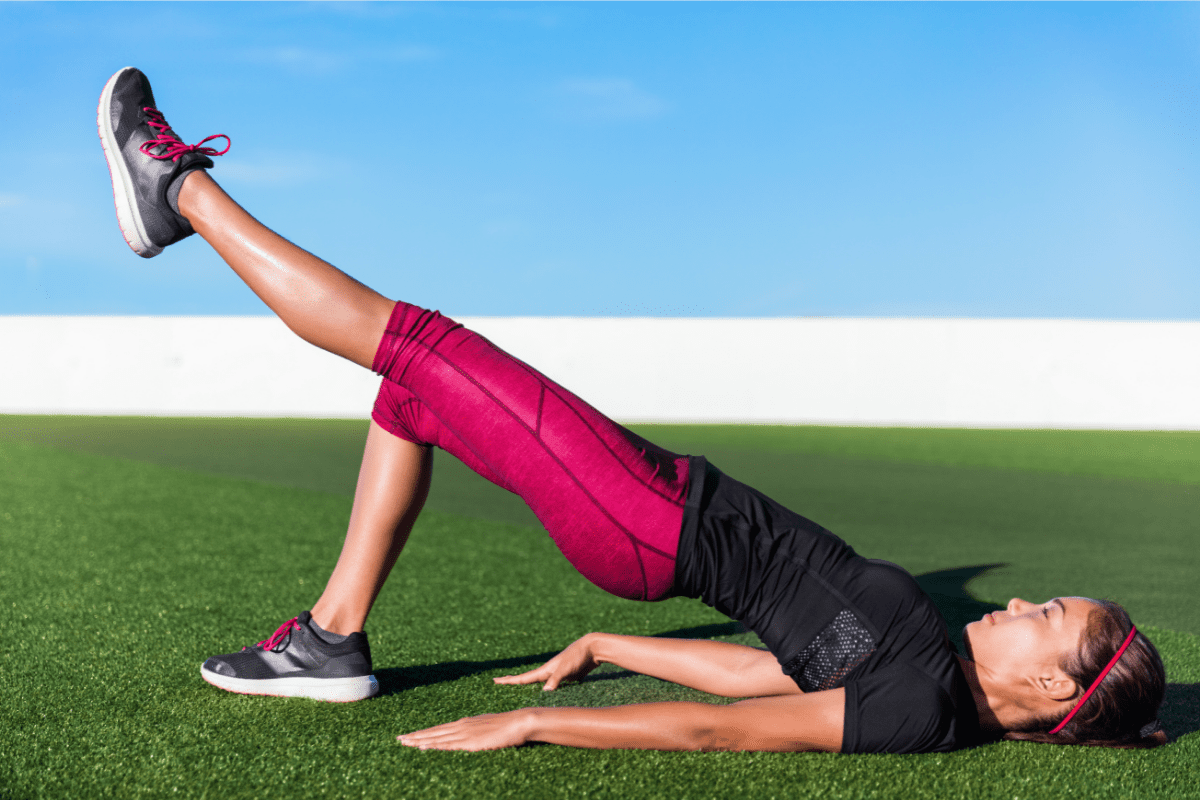
- Start by laying on your back on the ground.
- Bend both knees to about a 90-degree angle and place both feet flat on the floor.
- Now, extend one leg straight out, still keeping both knees side by side.
- Begin the rep by driving your hips up into the air. Try to attain a straight line from the ankle through the knees and hips.
- Squeeze the glute at the top of the rep and then lower back down to the starting position.
- Continue until all reps are completed and then switch sides.
Coaching Points
As you raise the hips up, try to drive the knee slightly forward (the leg with the foot on the ground). This can help with getting a strong glute contraction and a full extension of the hips.
Keep both knees side by side during the whole movement. Some athletes will tend to lift the straight leg higher in the air or let it trail lower.
How Many Reps?
I generally program Single Leg Glute Bridges as part of my warm-up. 1 to 2 sets of 10 to 15 reps on each leg.
Single Leg Glute Bridge Benefits
The Single Leg Glute Bridge is a great glute activator and an excellent lower-body warm-up exercise.
Unfortunately, many athletes (and non-athletes) don’t fire their glutes as they should during big compound movements. By utilizing a couple of activation movements, one can ‘wake up’ these muscles and get them prepared to work.
For these reasons, I like to incorporate Single Leg Glute Bridges on squat days, Olympic lift days as well as running days.
Muscles Worked
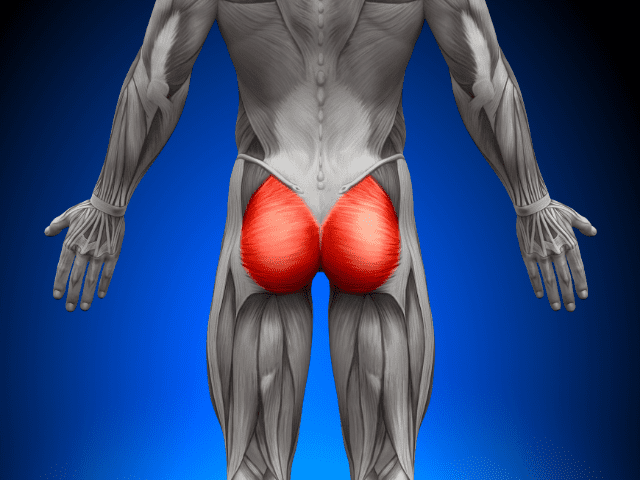
As you might expect, given the name, Single Leg Glute Bridges heavily emphasize the glutes.
SL Glute Bridge Variations
If you’re struggling with Single Leg Glute Bridges, here are a couple of variations you can try that are a little easier to start with. You can always progress back to SL Glute Bridges when you feel you’re ready.
Glute Bridges

The easiest modification to make with Single Leg Glute Bridges is to leave both feet on the floor and perform ‘regular’ Glute Bridges.
Being able to drive off both feet instead of just one makes the movement easier to do.
Bird Dogs
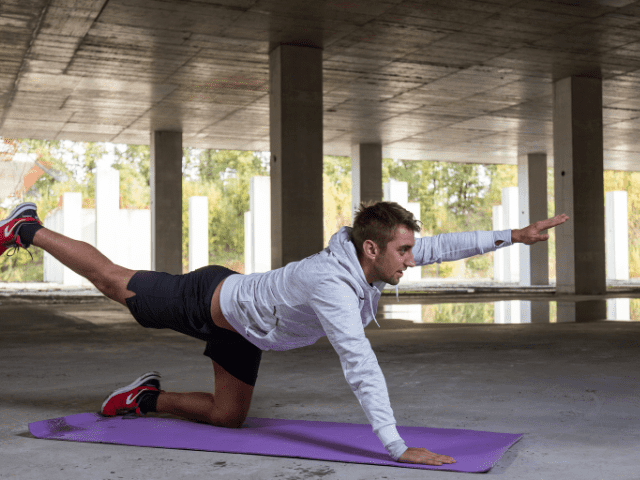
If you’re still struggling to get good hip extension, even with regular Glute Bridges, try switching things up a bit and give Bird Dogs a try instead.
Bird Dogs are another great glute activation movement, but they are done by starting prone on all fours (hands and knees). Lift and extend the right arm and left leg, squeeze the glutes, and then return to the starting position. Repeat for the opposite side.
More Links and Info
Looking for more great warm-up movements? Check out the Warm-Up Section of my Exercise Library.