The 7 Best Lower Body Exercises For Tennis
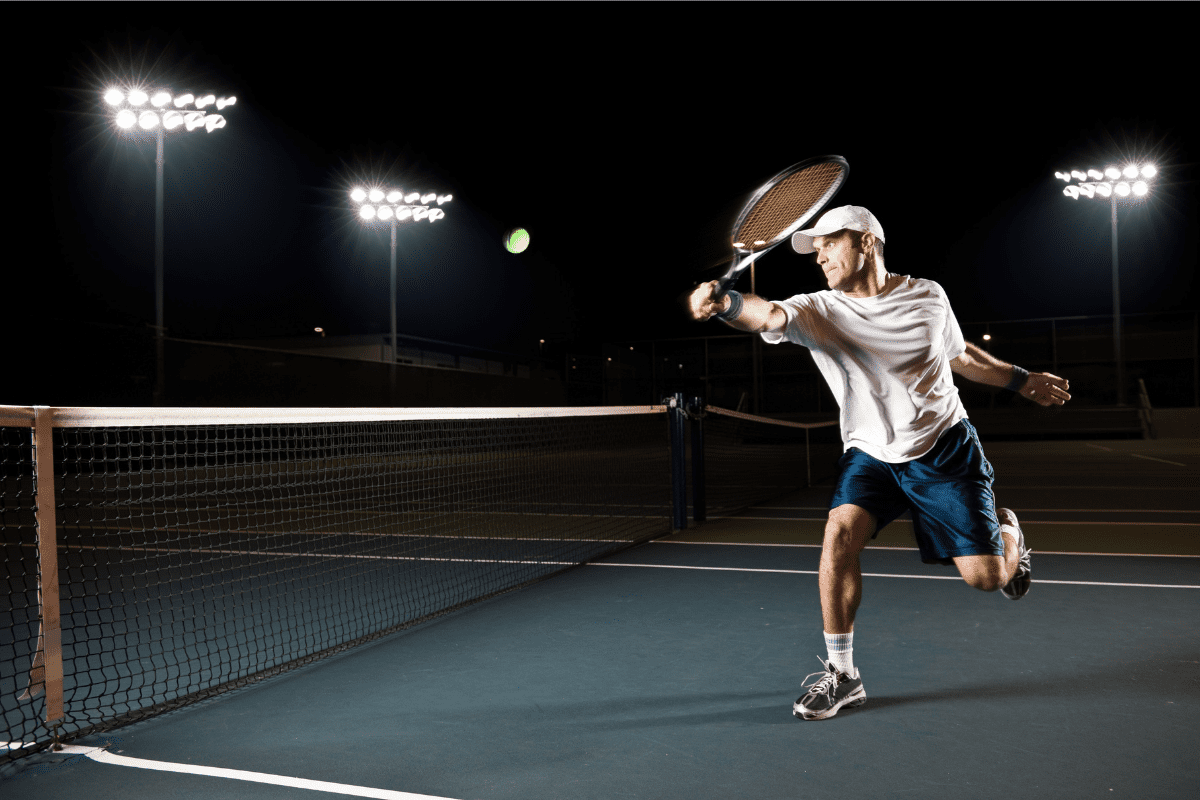
Tennis is a sport that requires a tremendous amount of strength and power. Tennis players should train the lower half to be able to sprint, change directions, react to a shot, stop their momentum on a dime, transfer that energy, rotate through the hips, and compete to win the point.
To gain strength in the lower half, I think the best implements are barbells, dumbbells, and kettlebells. These implements will engage the most musculature, train for upper body stability, and allow the legs to train for power and strength. These are movements that can be trained and overloaded over time.
I recommend these movements in the early off-season, fall season, winter, and in-season training regimen. How heavy, how often, and what exercises you are using are determined by the match schedule and your training readiness.
In this article, I will be going over the 7 best lower body exercises for tennis players to help you run faster and hit harder shots!
Lower Body Exercises For Tennis
Trap Bar Deadlift
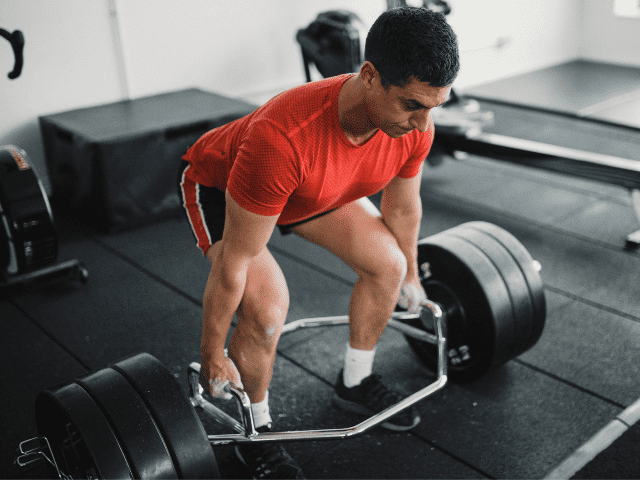
The Trap Bar Deadlift is by far my favorite variation of the deadlift for athletes. Because of the hexagonal shape that allows the athlete to stand inside the implement, you get to benefit from all the benefits of the deadlift with little risk.
The trap bar deadlift is a great lower body exercise for tennis players because it trains the whole body, strengthens the posterior chain musculature (Glutes, hamstrings, back), and challenges your grip.
Step-by-Step Instructions
Setup
- Step inside the trap bar.
- Place feet roughly shoulder width apart.
- Slightly turn their feet outward (engaging the glutes).
- Take a deep breath to brace the abdominal muscles.
- Hinge at the waist and bend at the knee simultaneously until you’re able to grab the bar handles.
- As you pull yourself down into the setup position, maintain a neutral head posture, with eyes fixed on something about 1-2 feet in front of you.
- In the final setup position, pull the chest up, and shoulder blades back, while still maintaining a brace in the abdominal muscles and get ready to lift.
Lift
- Start by pulling the “slack” out of the bar. This is where the lifter needs to create tension by slightly pulling into the bar and pushing their feet into the floor before maximal contraction/attempts.
- Once this tension is created, the lifter drives their feet through the floor, drives the hips forward, keeping tension in the abdomen and upper back (DO NOT ROUND YOUR BACK), maintaining the hand position over the midfoot, the lifter stands tall with the barbell, and locks the repetition in.
Coaching Points
Easily the most common mistake for deadlifts of any kind is allowing the back to round, placing unnecessary stress on the back. Keep the back flat throughout the movement and the core braced.
Do not bounce the bar off the floor between reps. Yes, bouncing the plates off the floor into the next rep may make the lift easier to do, but it’s also a good way to allow your technique to break down. Reset for each rep.
Pro Tip: Don’t have a trap bar? Here are 10 Trap Bar Deadlift Alternatives that still work great.
Front Foot Elevated Goblet Reverse Lunge
Tennis is a sport where you sometimes have to wait on the opponent and then explosively respond to the ball. The front foot elevated goblet reverse lunge helps train this pattern. In this movement lower body absorbs an eccentric load and then transfers that force back into an athletic stable position.
In the reverse lunge, once again we see shin angles that are very specific to tennis. This is also a very knee-friendly movement. Once the reverse lunge is complete, I queue players to “drive” back to the starting position with their toes pulled up and knee pulled up, holding at the top of the rep. This is very similar to how sprinters and jumpers train in track and field.
The goblet hold (using a kettlebell or dumbbell) is good for core strength and upper body stability. This movement can be done with dumbbells at the side. I would recommend that as a progression.
Step-by-Step Instructions
- Start standing behind a box or platform that is a few inches high (the box does NOT need to be tall).
- Place one foot on the box, ensuring your foot is centered and toes are pointing forward.
- Step back with your other foot and lower the back knee until it is a few inches from the ground.
- Keep your chest up and your core engaged as you lower into the lunge.
- Push through your front foot to rise back up to the starting position, driving the back knee up in front of you.
- Repeat for the designated amount of reps, then switch sides.
Coaching Points
I want to emphasize again that the box does not need to be tall. A few inches tall is enough to create the desired effect. A bumper plate laid on its side can work as a platform if it is flat on the sides.
When you step back, make sure to keep the feet hip to shoulder-width. A common mistake I see is stepping directly behind the front foot which creates a ‘tight-rope’ effect that makes it easy to lose balance.
Goblet Lateral Lunge
One of my favorite movements for tennis players, the goblet lateral lunge has many benefits. In tennis, we move laterally on the court constantly, getting to a shot, planting the feet, loading, rotating, exploding, and getting ready for the return. Lateral lower body strength is crucial to enhancing performance and decreasing the chances of injury.
In the goblet lateral lunge, we are training flexibility and strength in the adductor, groin, and inner thigh muscles.
At the same time, because of the goblet position, we are training upper body posture and stability. Once the bottom of the lateral lunge is met, I queue players to “drive” back to the starting position. I like this movement because of how specific it is to what we see on the field.
Step-by-Step Instructions
- Start in a standing position, feet hip-width apart, holding a Kettlebell at the chest.
- Step out laterally, wider than shoulder-width.
- Shift your weight towards the foot that just stepped out (the lead leg).
- As you shift your weight, bend the lead leg and keep the back leg straight.
- Push the hips back, keep the chest up and keep the lead foot flat on the ground (do not shift to the ball of the foot).
- Finally, extend up and step the trail leg back up to hip-width.
- Continue until the distance (or reps) assigned is completed*.
Coaching Points
*Lateral Lunges can also be done in place if you are short on space. Instead of bringing the trail leg to the lead leg after lunging, simply drive the lead leg back to the original starting position and then repeat. In this scenario, I like to alternate legs back and forth.
Bulgarian Split Squat
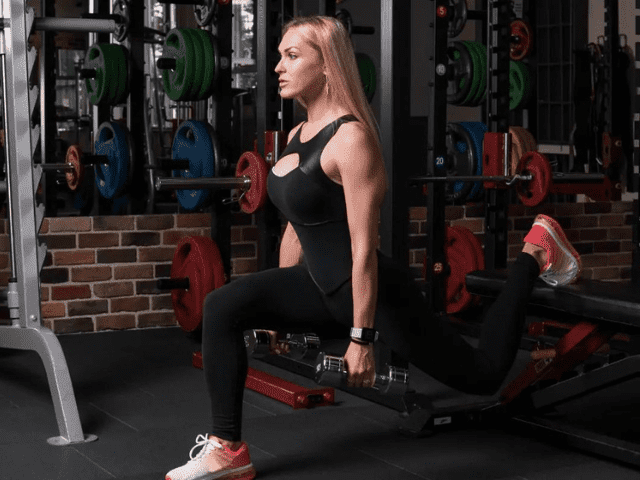
It is also very important for tennis players to train in single-leg movements. As athletes, we know we sprint, hit, and throw, pushing off a single leg.
Therefore, we need to train and be strong on a single leg. The Bulgarian Split Squat, also called a Rear Foot Elevated Lunge, is one of my favorite movements for training for strength on one leg.
By having one leg behind you and one leg out in the split squat stance, we replicate the shin angle similar to sprinting. Holding dumbbells will train the grip that we know is tremendously important for our forearms.
This movement also reinforces abdominal strength, upper body stability, and upper body posture.
Instructions
- Grab two dumbbells, one in each hand
- Get set up in front of your bench, reach one foot back and place it on the bench. Make sure you feel comfortable and balanced before proceeding.
- Squeeze the shoulder blades and engage the lats to create a stable back to help with bracing the upper body and to keep the dumbbells from swinging unnecessarily.
- Keep the chest as upright as possible and drop the back knee to roughly one inch from the floor.
- Now drive through the heel and midfoot of the front foot to drive yourself back up tall.
- Repeat until all reps are completed on that leg and then switch sides.
Coaching Points (Fixes to Common Mistakes)
When you step out, make sure to keep the feet shoulder-width apart. If you’re feeling very off-balance in your set up there is a good chance that you are placing the lead foot directly in front of the back foot (essentially placing yourself on a tight rope).
Keep the front foot flat on the floor when in the lunge position. One of the most common mistakes is raising up onto the ball of the front foot.
Make sure to take a big enough step. Often times I see athletes give themselves way too little distance from the bench. This leads to lunge being extremely cramped and can lead to a whole host of other issues (like coming up on the ball of the foot as mentioned above).
Curtsy Squat
One of the more unique exercises, the Curtsy Squat (or Curtsy Lunge) is a great lower body exercise for tennis players. Returning shots, especially on the backhand, we often find ourselves in a crossed-over position. This is exactly what the curtsy squat trains.
Hold a kettlebell by the horns, and reach one leg behind and across your body. Keep your posture up, core tight, keep your feet flat, and once you’ve gotten to about parallel, push back up.
This is a great exercise to train single-leg, sport-specific angles for tennis.
Step-by-Step Instructions
- Start in a standing position, feet roughly hip-width apart.
- With your right foot, step back behind yourself – placing your foot at roughly 7 to 8 o’clock.
- Take a big enough step to allow yourself room to be able to bend into the lunge (but don’t overextend)
- Try to keep your shoulders square (do not rotate open) and keep the front knee tracking over top of the front foot.
- Drop the back knee down to just above the ground and then drive yourself back to the starting position with the left leg.
- Alternate sides until all reps are completed.
Coaching Points
The biggest mistake I see made with Curtsy Lunges is letting the front knee drift outside the foot. Try to keep the front knee in line with the foot throughout the lunge.
Focus on keeping the upper body as square as possible.
Nordic Hamstring Curls
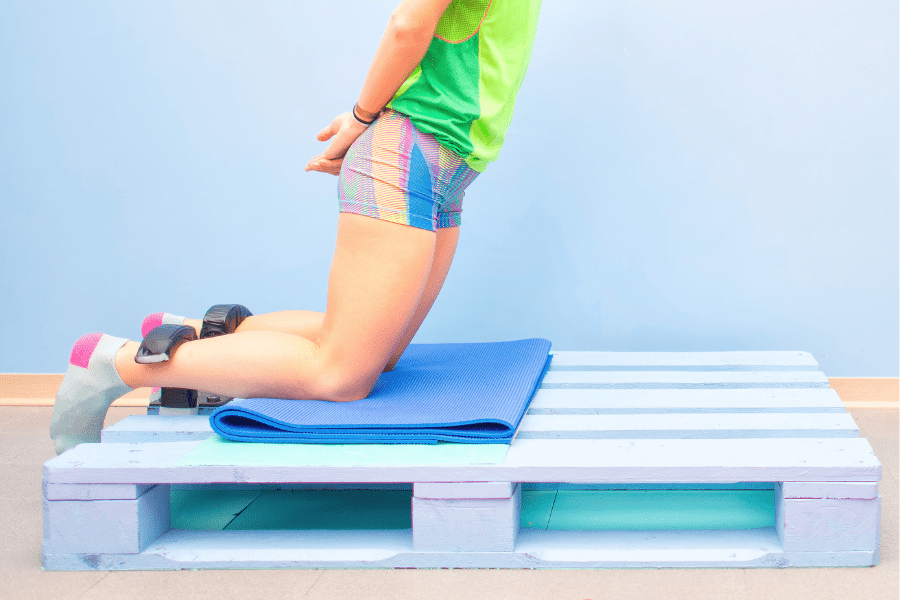
Staying healthy in tennis is always the name of the game. One of the best exercises for keeping those hamstrings healthy is the nordic hamstring curl.
Kneel down on both knees (use a soft surface or pad if you have one). Have a partner hold your feet down.
Slowly lower yourself to the ground, using your hamstrings to resist the fall and squeeze the glutes. As you approach the floor, do a small push-up, and use your hamstrings to pull yourself back to the starting position.
How To
- Start on your knees with a partner holding your feet (dorsiflexed, toes in the ground).
- Hold your hands in front of your chest, brace your core and lock in your hips.
- Now, keep your body in a straight line (shoulders, hips and knees) and lean forward.
- Lower slowly and under control as long as possible.
- Touch your chest to the ground, using your hands if necessary (they will most likely be necessary)
- Finally, give yourself a little push to get started and then use your hamstrings to curl yourself back to the start.
Coaching Points
The ultimate goal is to be able to lower yourself to the floor, touch the ground with your chest, and then curl yourself up without using your hands. However, this takes practice and a ton of hamstring strength. Be patient and focus on your progress each time.
Don’t allow your hips to shoot out, breaking the straight line going through your shoulders, hips and knees.
Only use as much push with your arms coming off the ground as needed. How much is the right amount? Trust me, when you get it just right – you’ll know.
Kettlebell Swing
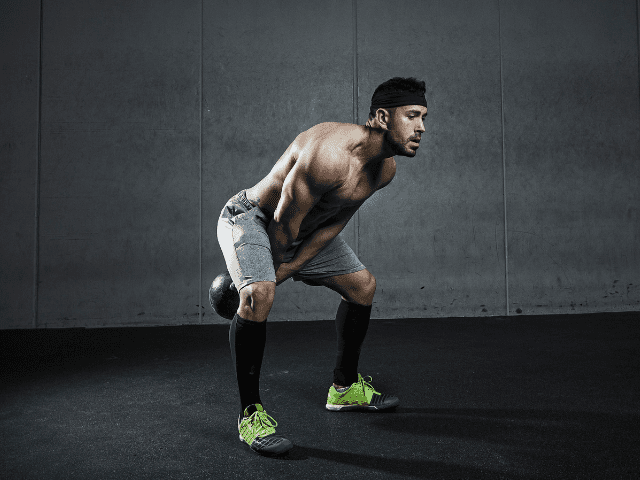
The Kettlebell Swing is a fantastic movement for all athletes. This exercise reinforces hip flexion and extension and can translate over to the court in our ability to run, jump, and explode through the hips.
I like this movement for tennis, especially because as tennis players we spend a lot of time in hip flexion, getting ready to return serves.
The Kettlebell Swing reinforces the rapid hip extension we need to sprint and jump. This exercise will help increase performance and also act as an injury preventative.
Step-by-Step Instruction
- Approach the kettlebell with a stance slightly wider than shoulder width.
- Take a deep breath, slightly bend the knees, hinge at the waist, and squeeze the kettlebell with both hands.
- Maintain a neutral spine, eyes focused on something just in front of you.
- Initiate the movement by pulling the dumbbell off the ground and into the “power position”.
- The power position is where the hips are flexed (loaded), knees are slightly bent, and you are now going to drive the kettlebell forward.
- Extend the hips and knees, driving the kettlebell forward.
- The kettlebell will drift from the hip extension to about shoulder height but should not go any higher.
- Gravity will bring the kettlebell back down.
- Actively “pull” the kettlebell back to the power position. You should never feel loose or out of control as you swing.
- As you pull the kettlebell and prepare for the next rep, remember to keep a tight abdomen and upper back.
Coaching Points
The Kettlebell Swing is a great movement to train rapid hip extension and flexion. Remember to always keep a neutral spine (DO NOT ROUND YOUR BACK).
Choosing the proper kettlebell weight is important. Heavier is not always better. Because of the rapid nature of the kettlebell swing, the emphasis should be on velocity, speed, and power.
I would recommend starting light and you will be able to increase weight easily as you get more comfortable with the movement.
Final Thoughts
Remember to always balance your court work with your weight room work. Everything you do in the gym should have a direct carry-over to the court.
Utilizing the exercises I’ve listed above as part of a complete strength and conditioning program will help improve your performance on the court and reduce your risk of injury.
If you found this article helpful, you may also like my article on the 10 best core exercises for tennis players.
