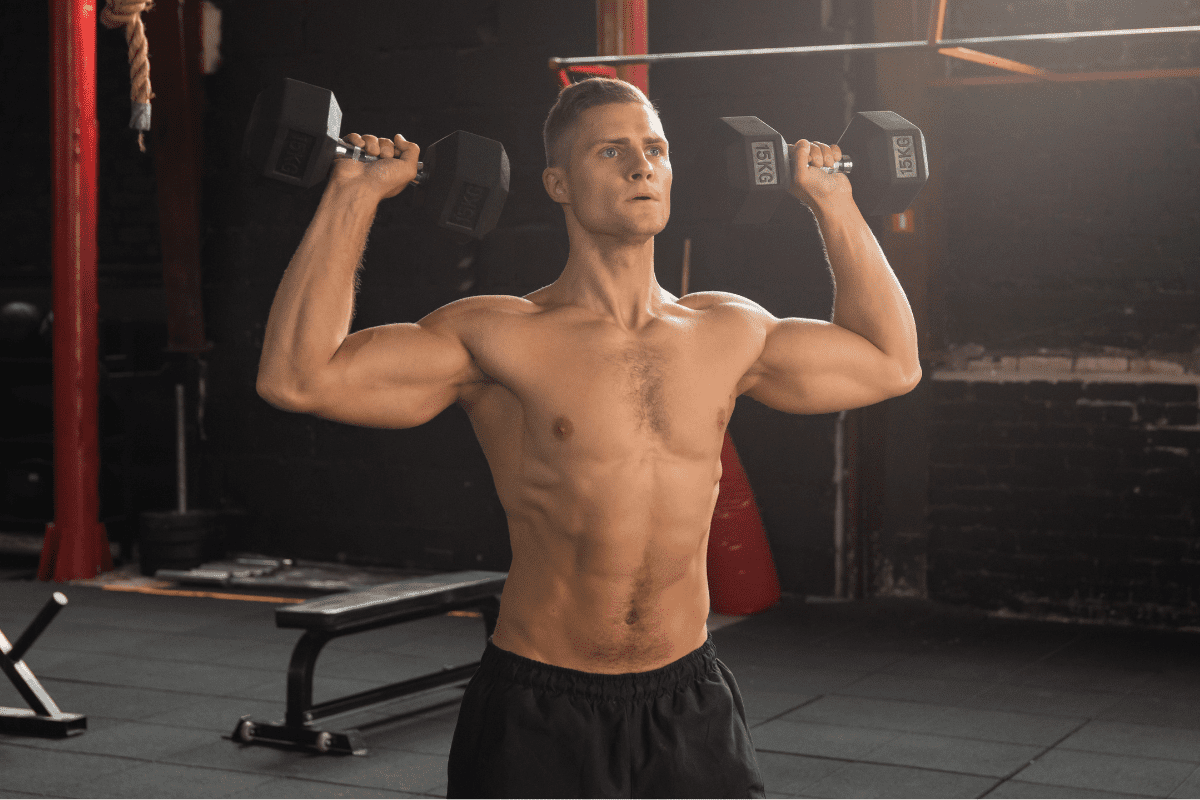
13 Arnold Press Alternatives To Develop Shoulder Strength
Arnold Press is an excellent exercise for developing shoulder strength. It’s a big compound movement, meaning it uses multiple muscle groups simultaneously, it’s done on the feet and the core has to work to stabilize the torso through the movement.
However, sometimes you may find yourself needing an alternative for Arnold Presses.
Maybe you don’t have dumbbells or maybe you’re just looking to add some variety to your workouts.
Whatever the reason, if you’re looking for an exercise to substitute for Arnold Press then you’re in the right place. I’m about to share with you 12 of my favorite Arnold Press alternatives.
Alternatives for Arnold Press
I’ve tried to incorporate as much variety into this list of alternatives as possible. I’ve included exercises using different pieces of equipment – some with dumbbells, barbells and even a medicine ball.
Hopefully, no matter your level of lifting experience or available equipment, you’ll find at least one exercise that you can use as a substitute for Arnold Presses.
Seated Dumbbell Shoulder Press
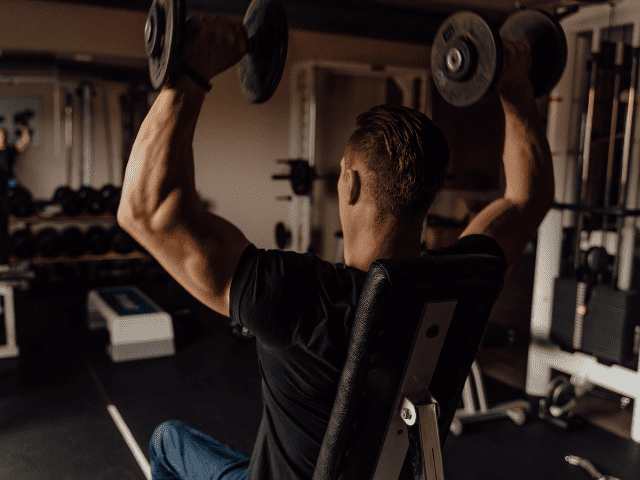
Equipment Needed
- Dumbbells
- Bench (Adjustable bench is optimal but not completely necessary)
Step-by-Step Instructions
Setup
- Grab two dumbbells and grab a bench.
- You have two options on the setup for the bench.
- If you have an adjustable bench, you can choose to adjust the bench up to 90 degrees. This will allow you to lean and brace yourself against the bench as you press.
- If you don’t have an adjustable bench (or even if you do), simply sit tall with good posture on the bench. This will force you to utilize your core to maintain your posture as you press.
Press
- Once you’re set up and ready, raise the dumbbells to your shoulders, palms facing forward or slightly towards one another (whichever is more comfortable).
- Press the dumbbells straight overhead. Dumbbells should come close to one another at full lockout overhead, but should not touch.
- Lower the dumbbells back down until hands are about ear height and repeat.
- Continue until all reps are completed.
Coaching Points
If you do use an adjustable bench to brace against for Seated Dumbbell Shoulder Presses, make sure not to overarch. There should not be an excessive amount of daylight between your back and the bench. If there is, there is a good chance you are overarching too much which will place unnecessary stress on the low back.
Single Arm Dumbbell Shoulder Press
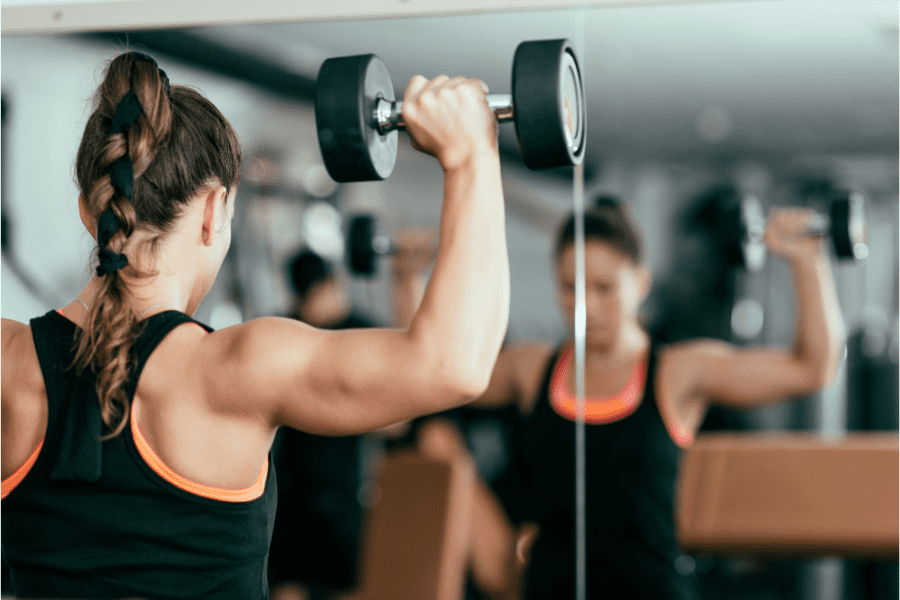
Equipment Needed
- Dumbbells
Step-by-Step Instruction
- Stand with the dumbbell next to you.
- Hinge at the waist and bend the knees until you can grab the dumbbell.
- Keep a neutral spine, and a nice flat back, and lift the dumbbell into your pressing position.
- I recommend palms facing away or toward you (whichever feels more comfortable).
- Brace the abdominal muscles and engage the upper back.
- Press the dumbbell directly overhead. (The dumbbell should not track forward.)
- Lock the reps out and pause for a quick second with each repetition.
- Slowly lower the dumbbell back to the starting position to prepare for the next repetition.
- Once all reps are completed on one arm, switch to the opposite arm and repeat.
Coaching Points
When doing Single Arm Shoulder Presses, keep the core engaged as you press. If you feel you are arching your back as you reach closer to lockout, consider going down in weight.
Dumbbell Curl and Press
Equipment Needed
- Dumbbells
Step-by-Step Instruction
- Grab dumbbells that you can perform at least 8 perfect reps with here.
- Standing nice and tall, hammer curl the dumbbells up to shoulder height.
- From here, press the dumbbells straight up overhead to lockout.
- Slowly bring the dumbbells back and down to shoulder height.
- From here, slowly return the dumbbells to your side.
Coaching Points
Go slow! Time under tension is key here. Feel the burn, especially on the way back down.
It’s easy to get out of control and begin swinging dumbbells all over the place with Curl and Presses. Stay in control of the weight throughout.
Dumbbell Z Press
Equipment Needed
- Dumbbells
Muscles Worked
- Shoulders (all three heads of the Deltoid)
- Abdominals (as stabilizers)
How To
- Sit on the floor with legs straight out in front.
- Brace the core and raise dumbbells to shoulder level (or have a partner hand them to you).
- Make sure your posture is good and your core is tight before trying to press.
- Press the dumbbells to full extension overhead.
- Lower the dumbbells back down to the shoulders and repeat until all reps are completed.
Coaching Points
The Dumbbell Z Press demands hamstring flexibility and core stability to maintain the body position while pressing. Deficits in either of these areas will greatly hinder your ability to be able to do Z Presses.
Make sure to maintain a vertical torso throughout the movement so that you’re pressing the dumbbells directly over the ears.
Kneeling Single Arm Press
Equipment Needed
- Dumbbell
Step-by-Step Instruction
- Take a kneeling position. One knee up and the other down. Bring your toe in on the down leg so that you are on the tip of your shoes
- If you have your right knee up, grab the dumbbell in your left hand. Face the palm toward you.
- Brace the abdomen and upper back. Make your torso as tall as possible and stay rigid throughout the entire movement.
- You may find it comfortable to put your non-pressing hand on your hip or extended out to the side for balance.
- Press the dumbbell vertically, finishing with the bicep very close to the ear. Lock in the rep at the top and slowly return to the start.
- Focus on your balance. The half-kneeling position should challenge your core control and ability to stay tall and rigid as you press.
- Once you finish your reps on one side, put the dumbbell down. Switch your knees in your kneeling stance. Perform your presses on the other side to complete the set.
Coaching Points
I am a huge fan of the tall-kneeling position. Half-kneeling Shoulder Presses challenge the lifter to balance, stay tall and rigid, and disallow the legs from cheating in helping the press.
Front Press
Equipment Needed
- Barbell
Instructions
- Grip should be shoulder width apart.
- Elbows should be under bar.
- Torso should be erect.
- Move bar off the rack.
- Keep chest up.
- Push bar up to full elbow extension.
- As soon as the bar passes the head – ‘pull the head through’ – so that the bar is being locked out directly over the ears.
- Keep elbow pointing out to side until arms are fully extended.
- Do not forcefully lock out elbow.
- Lower the bar slowly and under control to shoulder level.
- Do not jerk or bounce at the bottom.
Coaching Points (Common Mistakes)
The biggest mistake I see with Front Presses is overarching the back and leaning back way too much (hyperextension of the spine). This places too much unnecessary stress on the low back that should be avoided.
Personally, I like to use a staggered stance because I feel it helps me to keep from leaning back too far and placing that stress on the low back. It’s a technique I’ve used often with athletes as well experiencing the same problem. If that’s an issue for you as well I would definitely recommend giving a staggered stance a try.
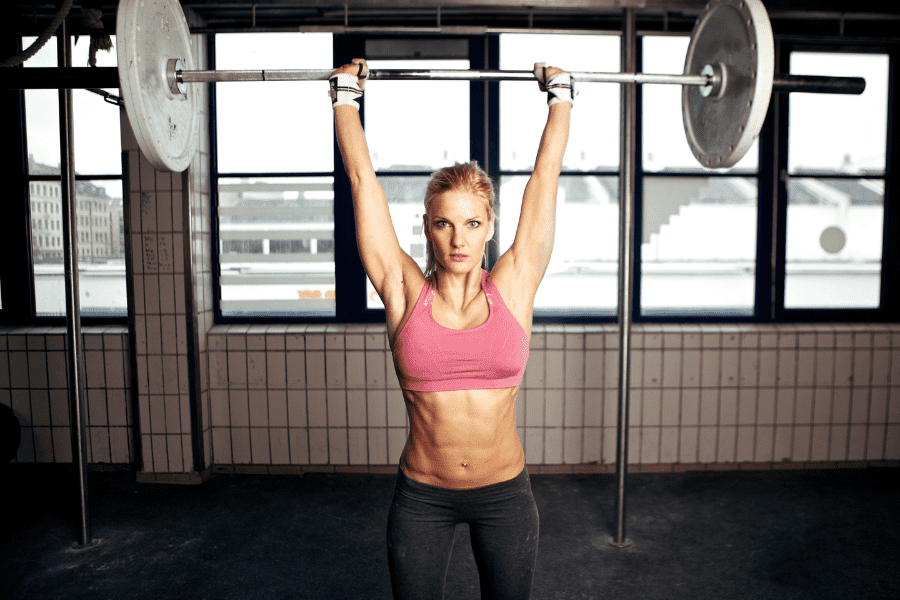
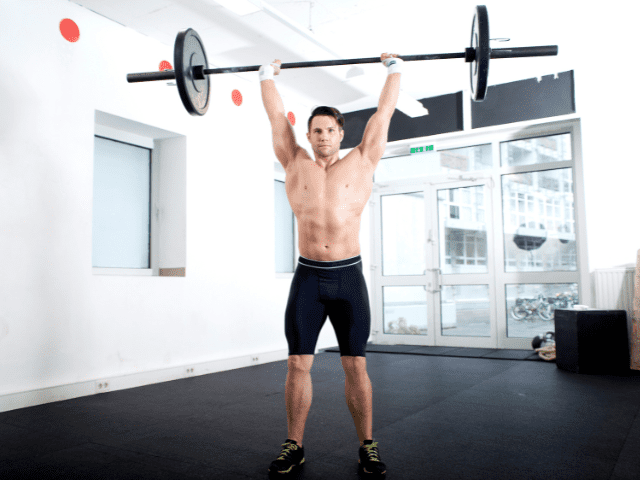
Push Press
Equipment Needed
- Multi-purpose lifting rack
- Barbell
- Bumper Plates (technically possible to do with Iron Plates, but Bumper Plates are highly recommended)
Step-by-Step Instructions
- Set the barbell at the height you would normally front squat with. (Barbell 1-2 inches below the flexed elbow, still on the hooks).
- Grab the barbell with your index finger on the knurling or just outside the knurling. (Flexibility and what feels comfortable are important here).
- Flex the elbows up slightly and keep your knuckles fairly vertical to the ceiling.
- You are not taking a “Front rack” position here. The elbows will be slightly up but the bar is not resting on the anterior delts.
- To unrack the bar, take a deep breath and brace the abdominal muscles and upper back. Use a staggered stance to unrack the bar.
- Take 2 steps backward and be sure that you will not hit the hooks or anything above your head when you start to press.
- Initiate the movement with a “dip” or bend of the knee that will help you propel the barbell up with momentum. Do not bend the knee forward onto the toes.
- Think about how you initiate a squat. The knee bend should be very similar to this movement.
- This is a quick movement that helps get the barbell moving upward.
- As you extend the legs, push the barbell up. Be sure not to hit your chin. Lock the rep out by holding the barbell overhead for about 1 second.
- Some coaches use the queue “push your head through the arms” to help lock out the rep and stabilize the bar overhead.
- Slowly bring the barbell back down to prepare for the next repetition.
Coaching Points
Push Press is very technical, uses the whole body, and requires patience and persistence, lifters often times have incorrect form without realizing it, go up in weight too quickly, and may injure themselves.
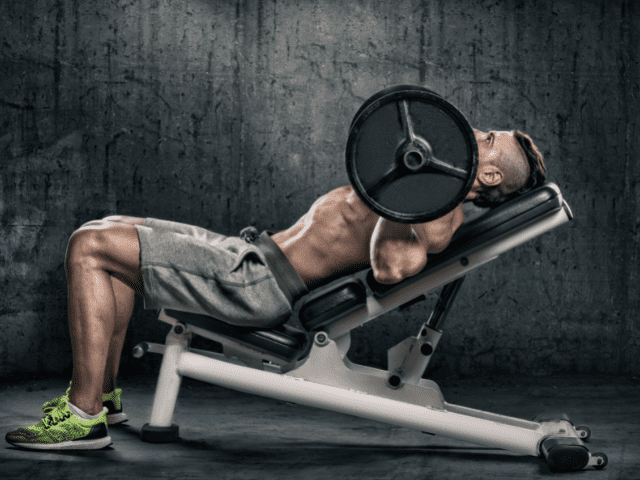
Incline Bench Press
Equipment Needed
- Multi-purpose lifting rack
- Bench
- Barbell
- Bumper or Iron plates
Step-by-Step Instructions
- Determine the angle for your incline bench. Most programs would refer to a 45-degree angle as ideal for it provides the best chest and shoulder engagement.
- As you go higher with your angle, you are moving more toward a shoulder press. The flatter the bench gets, you are moving more toward a regular bench press.
- Set the height of the barbell so that when you unrack the barbell, you are only doing a very short upward concentric movement.
- Lie flat on your back on the bench.
- Keep your feet flat on the floor.
- Pull your shoulder blades together and keep the back of your head on the bench. You will slightly arch your back. Keep your core tight and keep the shoulder blades pulled back tight.
- Take a thumbs-width grip from the knurling and completely close your grip. Keep your knuckles pointing toward the ceiling and squeeze the barbell.
- Unrack the weight and take a deep breath.
- Control the barbell down during the eccentric movement and draw the barbell in, keeping the elbows at about a 45-degree angle away from the torso.
- The barbell will make contact with your torso right at the nipple line on the chest.
- Once contact is made, drive the barbell back up to the starting position.
Coaching Points
Do not let the elbows flare out away from the midline when doing Incline Bench Press. The shoulders are incredibly vulnerable in these positions and the sheer force placed on the shoulders will lead to injury if the technique is not made a priority.
Landmine Press
Equipment Needed
- Landmine Attachment
- Barbell
- Weight Plates
How To
- Setup a landmine attachment with a barbell.
- Grab the end of the barbell and start with it at chest level.
- Feet should be shoulder-width apart with knees slightly bent and core braced.
- Remove one hand from the bar and then press the bar to full extension with the other arm.
- Lower the bar back to chest level under control.
- Repeat until all reps are completed and then switch to the opposite arm.
Coaching Points
Keep the core braced and maintain a neutral torso when doing Landmine Presses. If you find yourself leaning back and arching the low back, lower the weight if needed and correct your form.
Handstand Push Up
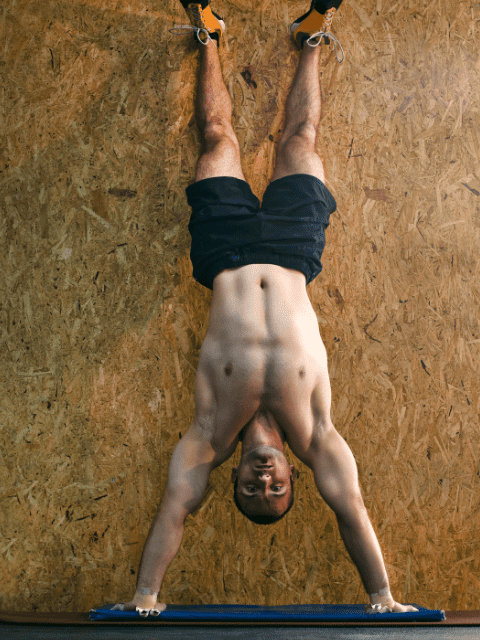
Easily one of the hardest bodyweight exercises to perform, Handstand Push-Ups will test your shoulder strength, shoulder stability, core and coordination all in one movement. Because it’s a bodyweight movement, it has the advantage of being able to be done anywhere without the need for equipment.
Find a sturdy wall, place your hands a few inches away and then kick your feet up over your head against the wall. From here, lower yourself down until you almost touch the floor with your head and then press yourself back up.
Note: Handstand Push-ups are an ADVANCED movement. I would not suggest this for beginners as it can be dangerous if you don’t have sufficient shoulder and core strength.
Machine Shoulder Press
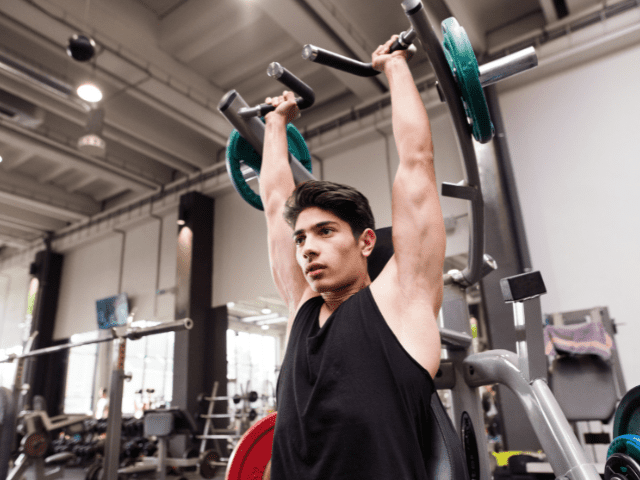
If you’re working out in a commercial gym or college weight room and you have access to machines, a Machine Shoulder Press can be a solid overhead press alternative.
My favorite machine for this is the Hammer Strength Iso Shoulder Press. It’s plate-loaded so it works more like a free weight and less like a cable machine. Both shoulders also work independently of one another too, so like with dumbbells, if you have any strength imbalances they’ll show themselves.
Dumbbell Side Raise
Equipment Needed
- Dumbbells
Instructions
- Hold dumbbells-palm in, arms straight down at sides.
- Raise dumbbells in semicircular motion slightly above shoulder height tilting the head of the dumbbell down.
- A slight pause, then lower to starting position under control.
- Keep your arms straight with just a slight bend in the elbow.
- Use the same path to continue repeated reps.
- Exhale up, inhale down.
Coaching Points
To keep the focus on the medial delt with Side Raises, make sure to keep your palms down at the top of the movement. Many lifters like to pull back, instead of lift straight out to the sides, which brings the stronger muscles of the upper back into play.
Med Ball Power Jerk
Equipment Needed
- Medicine Ball
Step-by-Step Instructions
- Make sure you have clearance above you to throw the ball. (Either outside or inside with high ceilings)
- Grab a medicine ball and stand tall with feet roughly hip-width apart.
- Med Ball should be at the chest. Hands under the ball, palms facing towards one another.
- Perform a 4 to 6-inch dip of the knees and hips, keeping the torso vertical and feet flat-footed on the ground.
- Now, aggressively drive up, fully extending through the hips, knees and ankles and push/throw the ball as high as possible.
- Allow the ball to hit the ground before resetting for the next rep. Trying to catch the ball out of the air is a good way to jam a wrist or finger.
Coaching Points
When doing Med Ball Power Jerks, drive through both arms equally. There is a natural tendency to allow your dominant arm to take over and shift more underneath the ball. Make sure you’re staying balanced with each rep.
Final Thoughts
Arnold Press is an excellent exercise for developing strong shoulders, but sometimes Arnold Presses just aren’t an option. You may not have the proper equipment available to you or at other times you might just be looking to add some variety to your dumbbell overhead press routine.
In these situations, you’ll need an Arnold Press alternative and I hope that one of the exercises I’ve listed here fits what you were looking for.