
The 10 Best Core Exercises For Basketball Players
A strong core is essential for any basketball player serious about their performance. A strong core helps transfer power, aids in balance and it provides stability when engaged with another player.
A stronger and more powerful core can lead to a higher vertical jump, better balance and strength when receiving contact and a lowered risk of injury.
And it’s not that basketball players necessarily neglect their core. The players I’ve been around all work on their core, but I often see them repeating the same exercises over and over again in their core workouts.
In this article, I’m going to try to help break you out of the monotony and give you eight of the most effective core exercises for basketball players that I’ve used over the years.
Core Exercises For Basketball
I’ve ordered these exercises from the most beginner-friendly to the most challenging and advanced core exercises.
Hopefully, no matter what your level of strength and experience is, you’ll be able to include one of these exercises into your next core workout.
Toe Touches
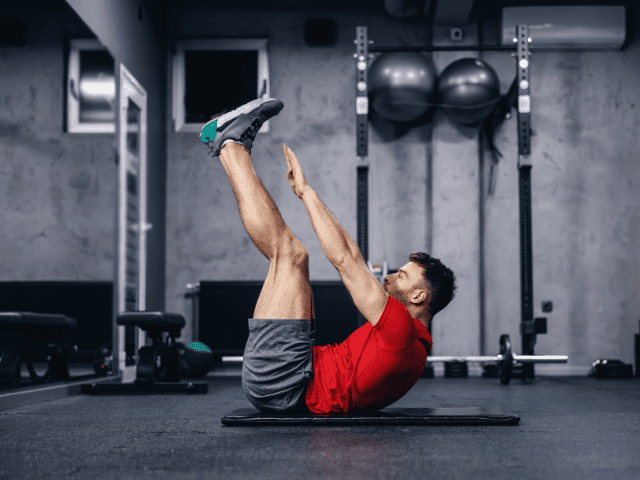
I know, Toe Touches is probably a core exercise that you’re already very familiar with. However, it is one of my favorite bodyweight core exercises for athletes.
Is it because having to hold your legs in the air makes the lower abs (and those hip flexors I just mentioned) have to work harder than regular crunches? Although that is a plus, that’s not the main reason.
Here’s why:
I love Toe Touches for basketball players because it gives me insight into who is extremely tight in their hamstrings. Players with really tight hamstrings will struggle to get into a proper position and will struggle even more to maintain it.
If this sounds familiar then it’s time to start addressing those hammies.
How To
- Lay flat on your back with your legs perpendicular to the floor (legs straight up in the air).
- From this position, keep your chin off of your chest, keep your arms straight and raise your upper body toward your feet.
- Touch your toes (or at least reach as high up your shins as you can) with your fingers and return to the starting position.
- Repeat the exercise until your set is complete.
Coaching Points
Athletes with tight hamstrings may find it hard to keep their legs straight up in the air through the duration of the exercise. Work to keep legs straight and vertical as much as possible.
Keep hands relatively close to the shins throughout the movement. Swinging the arms toward the head at the bottom causes momentum which takes away from the quality of the movement.
Suitcase Crunches
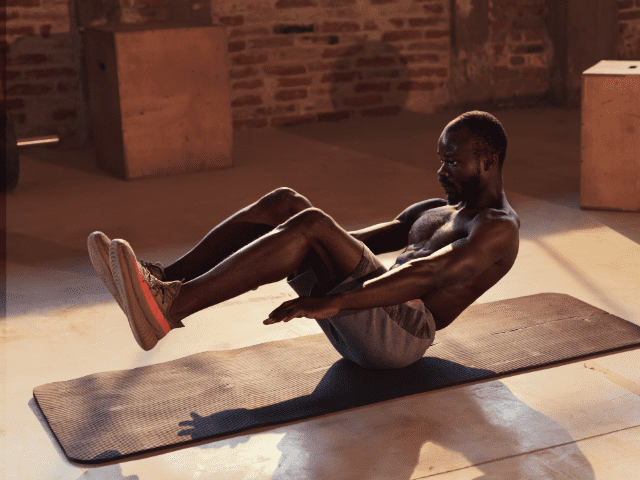
Next, let’s up the ante on the regular crunches that you’re probably already doing. Suitcase Crunches are an advanced variation of regular crunches.
Instead of laying your back, you’ll balance yourself up on your butt with your legs and back up off the ground.
Step-by-Step Instructions
- Start by sitting on the ground, balancing on your butt with legs and back up off the ground.
- Legs should be almost straight, feet roughly six inches off the ground. Torso should be leaned back at about a 30-degree angle.
- From the starting position, crunch up, bringing the knees and chest together above the hips (like a suitcase shutting)
- Lower back to the starting position and repeat until all reps are completed. (Feet and back should stay off the ground throughout the movement)
Coaching Points
If you keep your feet uncrossed during the movement, your groin will be forced to stay engaged. This creates a small added bonus to the exercise.
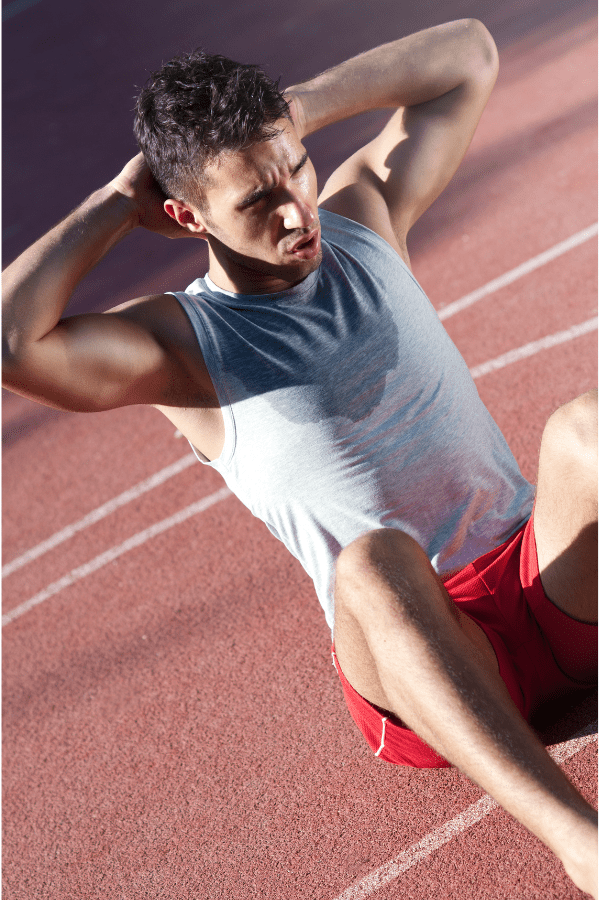
Sit-Ups
I know you’ve heard of Sit-ups, so why am I including them here?
No one does Sit-ups anymore.
I watch athletes stick around in the weight room and do extra core workouts all the time. They’ll do crunches and kinds of different crunch variations, but rarely will I see anyone do old-school Sit-ups.
They may not be fancy, but you’re fooling yourself if you don’t think Sit-ups are extremely effective at developing core strength.
Step-by-Step Instructions
- Lay on your back, knees bent, feet flat on the floor.
- Place your hands either behind your head for support, beside the ears or with arms crossed in front of the chest.
- Sit up by contracting and flexing the abdominals
- Lower back down to the floor and repeat
Coaching Points
The biggest mistake that I see with Sit-ups is pulling way too hard on the back of the head. If you are going to place your hands behind your head, do so only to support the head, not pull on it.
Instead of placing the hands behind the head you can also keep hands by the ears, or in front of the chest if needed, but avoid pulling on the back of the head.
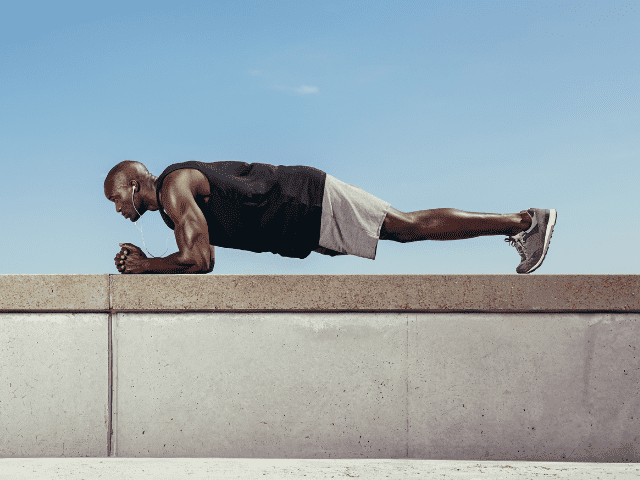
Planks
There are so many reasons that I love programming Planks for athletes, especially basketball players.
First, it teaches and reinforces how to brace your core. Knowing how to properly, and effectively, brace your core is so important not only in the weight room but on the court as well. Being able to brace and stabilize mid-air can make a huge difference in being able to finish at the rim.
Second, holding a plank can sometimes be as mentally challenging as it is physically challenging. I think anytime you can introduce exercises (safely!) that get players out of their comfort zone and force them to strain is beneficial.
Finally, planks are extremely versatile. You can add weight or time to make them more challenging. You can switch to a Lateral Plank to incorporate more obliques and they also work great as a competition to finish a workout.
Step-by-Step Instructions
- Start on the ground on your stomach.
- Assume a push-up like position on your elbows and toes. Elbows should be directly under the shoulders.
- Position your body in a straight line from the shoulders through the hips, knees and ankles.
- Brace the core tight. (As if you’re going to be punched in the stomach)
- Do not let the body slouch to the ground nor push the hips up high in the air.
- Hold for the designated amount of time.
Coaching Points
The biggest mistake that I see with Front Planks is athletes holding the position, but not properly keeping the core engaged and just allowing the torso to slouch. So, while they are technically up on their elbows and toes, all they’re really doing is straining the low back.
The other mistake I see is the exact opposite and that is athletes shooting their butts into the air, resembling more of a Down Dog position.
The difference between the two is the second, having your butt too high, is easier to notice and corrected more often. However, letting the body slouch during a plank is often allowed to pass as ‘good form’ when it is not.
Stir The Pot

If you want to take your Planks to another level, then consider Stir the Pot.
Stir the Pot is a core exercise that is done from a plank position on a stability ball. The instability caused by the stability ball and constant movement really challenges your core stability.
If you have a stability ball they can be a great addition to your core workouts.
Step-by-Step Instructions
- Start on your knees with the Stability Ball directly in front of you.
- Place your forearms on the ball and clasp your hands together.
- Now slowly lift up off of your knees, balancing yourself with your forearms on the ball and toes on the ground.
- You should now basically be in plank position, but with your forearms on a stability ball instead of the ground.
- Now work your hands into small circles. This should simulate, you guessed it, stirring a pot with a big wooden spoon.
- Work clockwise until all reps are completed and then switch and go counter-clockwise as well.
- Once all reps are completed lower back down to your knees.
Coaching Points
Take your time getting properly set up! If you’ve never done this exercise before it can be surprising just how hard it is to balance yourself on a stability ball in this manner let alone shift in circles.
Make SMALL circles. Trying to go too big with your circles is a good way to end up lying on your back.
Medicine Ball Slams
Incorporating a medicine ball into your core routine is a great way to add resistance to some of the bodyweight exercises I’ve already listed. But, that’s not where a medicine ball really shines. Utilizing the ball in dynamic movements to build power is why you want to add a med ball to your core training.
These next two exercises are great examples of that.

Med Ball Slams is the perfect example of a dynamic core exercise incorporating a medicine ball. A Medicine Ball Slam is essentially utilizing your core to generate as much power as possible flexing at the torso and releasing that power in the form of slamming a med ball into the ground.
Step-by-Step Instructions
- Grab a medicine ball and stand tall with feet roughly shoulder-width apart.
- Reach the medicine ball high overhead.
- Using the core, pull the body down – hinging forward at the hips.
- Follow through with the arms and release the ball.
- Let the ball slam into the ground, catch it off the bounce and repeat for the designated number of reps.
Coaching Points
First and foremost, test how ‘bouncy’ your medicine ball is before starting. I can’t tell you how many times I’ve seen athletes almost have their face smashed by a medicine ball bouncing much harder and rebounding much faster off the ground than they were anticipating.
The biggest mistake I see with Med Ball Slams is athletes not utilizing the core and simply throwing the ball down with their arms. The bulk of the force should be generated by aggressively using the core to hinge forward. If done correctly, it should almost (and actually might) lift your feet up off the floor.
Med Ball Side Toss

Med Ball Side Toss is a core exercise that emphasizes and improves rotational power.
I love Med Ball throwing movements like Slams and Side Tosses because of how much power players are able to generate. Definitely beats laying on the ground and doing crunches every day.
Step-by-Step Instructions
- Grab a medicine ball and stand perpendicular to a sturdy wall*.
- Distance away from the wall will vary based on the type of medicine ball you have.
- Stand in a good athletic position, feet shoulder width apart, hips and knees bent.
- Begin by rotating away from the wall, reaching the medicine ball toward the back hip.
- Now, aggressively rotate toward the wall, turning on the ball of the back foot, opening the hips toward the wall and releasing the ball into the wall.
- Catch the ball off the ball, reset and repeat. Once all reps are completed switch sides.
Coaching Points
The biggest mistake I see athletes make is using their arms (and not their hips) way too much to throw the ball. Power for the throw should primarily come from rotating the hips and torso and the arms should be secondary.
*If you have a partner, you can throw to each other instead of into a wall.
Hanging Straight Leg Raises
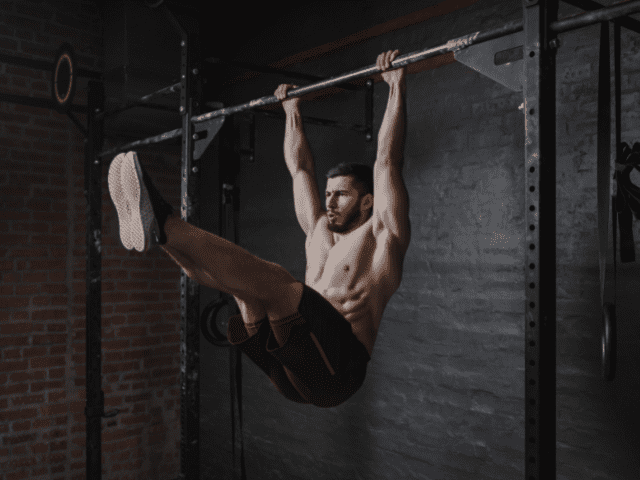
Hanging abs are some of my absolute favorite core exercises.
Not only are they very challenging ab movements, but they also provide extra benefits as well. In addition to the core, most hanging ab movements, like Hanging Straight Leg Raises, also work the grip, shoulders, back and biceps.
Step-by-Step Instructions
- Find yourself a pull-up bar and grip the bar with an overhand grip.
- Engage your lats so your body doesn’t go limp once you begin to hang.
- Now hang from the bar and keeping your legs straight, drive them up to hip height (or slightly above hip height).
- Finally, actively lower your legs back to the starting position – don’t allow the legs to just swing down.
- Repeat until all reps are completed.
Coaching Points
The biggest issue that most of my athletes run into when doing Hanging Straight Leg Raises (or any hanging ab exercise for that matter) is how to keep from swinging out of control.
To keep from swinging, you have to actively lower your legs back down. If you ‘let your legs go’ and just allow gravity to take over you’ll completely lose control of the movement. Timing and rhythm are also both important for Leg Raises and you can’t achieve either if you’re not in control of your legs throughout the movement.
Windshield Wipers

One of the hardest core exercises to do, hands down, is Windshield Wipers. It takes a tremendous amount of core strength and will stress your entire core (and your hip flexors, upper body and grip).
If you progress to the point where you can knock out a set of ten Windshield Wipers, you should feel pretty good about your core strength.
Step-by-Step Instructions
- Find yourself a pull-up bar and grip the bar with an overhand grip
- Engage your lats so your body doesn’t go limp once you begin to hang from the bar.
- Now hang from the bar with a slight flex at the elbow
- Keeping the legs straight, flex the core and lift the legs up until your toes touch the pull-up bar.
- From this position rotate your feet to the left about two to two and a half feet.
- Now swing them back to the top and over to the right about the same distance.
- Continue to rotate back and forth from the left to the right and back until all reps are completed (or until a break is needed to reset)
Coaching Points
As mentioned at the top of this guide, this is an extremely challenging ab exercise. I would highly suggest mastering other hanging ab exercises like Knees to Elbows and Toes to Bar (both listed below under variations) before beginning to attempt Windshield Wipers.
Because you’re almost hanging upside down while doing Windshield Wipers, the grip plays an extremely critical role. If you ever feel you’re struggling with your grip AT ALL, you should stop your set immediately.
Hyperextensions

Too often when players think about doing ‘core work’ they only think of working their abs. However, low back work is just as important, but it’s often either overlooked or just ignored.
Hyperextensions are one of the best movements you can do in a weight room to focus on building a strong low back. Hypers will also work the glutes and hamstrings as well.
If you don’t have access to a Glute Ham Machine, you can try either Supermans or Back Crunches. Both also work the low back and require no equipment.
Step-by-Step Instruction
- First, you are going to want to get the glute-ham raise machine adjusted to the correct length.
- I recommend adjusting the machine so that your hip crease is at the end of the padding of the machine.
- Locking your feet in, facing the ground, keep a neutral spine by focusing your eyes on the floor below.
- Take in a deep breath, brace the abdomen, and keep your hands on the handles until you are ready to perform the eccentric movement.
- Once ready, take your hands off the handles, extend your body, keep your arms at your side, and control your body down until your torso is about perpendicular to the floor.
- Pause for 1 second in the bottom of the position to maintain stiffness in the muscles before coming back up.
- After 1 second of the isometric hold, pull yourself back parallel to the floor, engaging the glutes, hamstrings, and low back, while also keeping stiffness in the abdomen and upper back.
Coaching Points
Hyperextensions are surprisingly easy to mess up. One of the easiest ways to make a mistake is going down too fast and “whipping” yourself back to the starting position.
As with any exercise, the setup, initial breath before eccentric movement, maintaining control, pausing, and breathing out during concentric contraction are important.
Final Thoughts
There are dozens of core exercises for basketball players to choose from so there is no need to get into a rut of doing the same movements over and over again all the time.
You also don’t have to limit yourself to just bodyweight abs, like crunches and sit-ups, either. Grab a medicine ball or find a pull-up bar and add some variety (and difficulty) to your core workout.
Finally, don’t forget about that posterior chain! Exercises like Hyperextensions, Supermans or even Back Crunches can help strengthen your low back – an important part of your core.
If you enjoyed this article, check out my favorite upper-body exercises for basketball players.