
11 Best Lower Body Exercises for Basketball Players (2023)
Having a strong, powerful lower body is extremely important for Basketball Players. Lower body strength can help players with establishing position under the rim, vertical jump and can even help with endurance by becoming more efficient.
Leg exercises for basketball players shouldn’t just be taken from a bodybuilding workout though. Functionality is the key to choosing the proper exercises for lower body training.
By functionality, I’m not talking about standing on a balance ball and doing one-arm reverse presses. I’m talking about exercises that will improve strength and power that will translate onto the basketball court.
In this article, I’m going to discuss my 11 favorite lower body exercises for basketball players. Not just to improve performance, but to also help reduce the risk of injury.
This article contains affiliate links. If you purchase something using these links I may earn a commission. Thanks.
Lower Body Exercises for Basketball
Clean Pull
Lower body training for basketball should include a heavy dose of explosive exercises. I’m a big believer in utilizing the Olympic lifts to develop explosiveness in athletes, including basketball players.
Clean Pull is an Olympic lift variation that omits the catch.
I tend to stay away from catching Cleans with basketball players because one bad catch could potentially lead to a jammed wrist and that can substantially negatively impact their on-court training.
Equipment Needed
- Barbell
- Bumper Plates
Step-by-Step Instructions
Starting Stance
- Start with feet hip-width apart with toes straight ahead (or ever so slightly pointed out).
- The bar should be over the middle of the feet. (Close to, but not touching, the shins.
- Grip should be slightly wider than shoulder-width.*
- The grip is a pronated grip (both palms facing down) and the lifter can choose, although highly recommended, to use a hook grip.
- The wrists should be slightly curled so that the knuckles are pointed straight down to the ground.
- Shoulders slightly over the bar, arms straight, hips slightly higher than the knees. Because of differences in body composition, torso lengths and limb lengths, every lifter will not look exactly the same when it comes to the starting body position.
- Back should be flat or have a slight arch. Shoulder blades should be pulled back and the upper back including the lats should be engaged.
First Pull
The ‘First Pull’ simply refers to the portion of the movement that involves moving the bar from the floor to the knee.
- The last thing that should happen as the lifter is setting up in their starting stance is to take a deep breath in and engage, or brace, their core. This helps the lifter both protect their back as well as aid in the transfer of power from their legs to the bar.
- Raise the bar off the floor at a constant speed using the legs by driving the feet through the ground. Arms should stay straight and the barbell shouldn’t be ‘yanked’ off the ground.
- Hips and shoulders rise at the same time (torso angle remains constant)**.
- As the bar comes up, keep the bar close to the shins and the feet should remain flat, driving the feet hard into the floor.
- Finally, as the bar passes knee level, wrists remain curled and elbows rotate out to the side, core and back should still be tight and engaged.
Second Pull (and finish)
The second pull involves getting the bar from just above the knee to the power position. The power position is the point where the athlete is nearly vertical and where the final triple extension of the hip, knees and ankles will occur followed immediately by the shrug and pull from the arms.
- Once the bar crosses the knees, the bar is then pulled explosively, bringing the shoulders back and up.
- As the lifter continues to drive vertically, the shoulders will end up slightly behind the bar and the hips, knees slightly bent and ankles will have just a bit of flexion left in them.
- From the power position, this is where the final explosive hip extension occurs along with the full extension of the knees.
- The foot drive shifts from the whole foot to now extending up through the balls of the feet.
- The triple extension of the hip, knees and ankles is followed instantaneously by a quick, aggressive shrug.
- Bar is pulled vertically close to the body as the traps shrug to elevate the bar.
- Now, either retrace back to the floor or drop the bar and then reset.
Coaching Points
*An easy way to get your grip in the right position is to place your hands one thumb length away from the start of the knurling of the bar.
This width will work for 90% of lifters. Wider athletes may end up sliding their hands just a bit wider and vice versa for narrow athletes, but it’s a good starting point for anyone.
**One of the biggest mistakes with power clean technique is that lifters will shoot their butt up first, locking their knees out and then pulling the bar with their back instead of their legs.
This is most often caused by lifters trying to rush the first pull too much. Don’t get ahead of yourself.
Hang Muscle Snatch

The Hang Muscle Snatch is another explosive movement. This exercise is a variation of the Snatch that over-emphasizes triple extension of the hips, knees and ankles.
I’ve found that many basketball players, because of their height, tend to cut their extensions short and rush to the catch position in Olympic lifts.
A Muscle Snatch finishes in a tall position. So, with no need to drop into a catch, players can solely focus on being explosive and extending.
It’s a great exercise on its own and as part of a teaching progression toward more complex variations.
Equipment Needed
- Barbell
- Bumper Plates
Instructions
- Using a snatch grip (hands outside the snatch rings), pick up the bar and stand tall.
- Pull the shoulder blades back and engage the lats to lock the back in the place.
- Put a slight bend in the knee and hinge forward by pushing the hips back and letting the bar slide down the thigh.
- Stop once the bar reaches the bottom of the thigh, just above the knee. Shoulders should be above or slightly in front of the bar.
- Now, explosively extend the hips and pull the bar high once triple extension of the hips, knees and ankles has been achieved.
- Finish the movement by rotating the hands above the elbow.
- The finishing position should be with the lifter fully extended. This is much different than most other variations of the snatch where the lifter catches in a full or quarter squat.
Coaching Points
Once the weight gets heavy enough, the natural adjustment of the lifter will be to want to bend the legs to dip slightly under the bar in order to get full arm extension.
Resist this urge to want to dip the legs. If movement quality starts to break down, lower the weight.
Medicine Ball Cannonball Throws
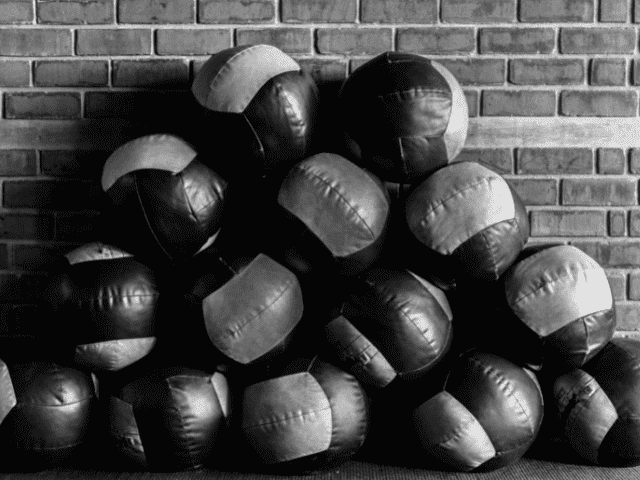
Explosive exercises to improve vertical jump aren’t limited to just inside the weight room.
A Medicine Ball Cannonball throw is a perfect example of this.
It checks many of the same boxes as Olympic lifts – starts in a good athletic position, explosive triple extension and develops power. All of this, in a beginner-friendly exercise that basically amounts to throwing a medicine ball as high as possible.
Medicine Ball Cannonballs are also a great first introduction to many of the body positions used in Olympic lifts.
Equipment Needed
- Medicine Ball
Muscles Worked
- Medicine Ball Cannonball Throws are a total body exercise that involves almost every major muscle group.
How To
- First, make sure you have enough ceiling height to be able to do Cannonballs. I recommend doing them outside to avoid this issue altogether.
- Grab the ball with both hands cradling under the ball. Stand tall, feet shoulder-width apart.
- Pull the shoulder blades back, engage the lats and core, slightly bend the knees and hinge forward at the hips.
- Allow the medicine ball to fall in between the shins.
- You should now be in a good athletic position that looks very similar to the starting position of a Hang Clean.
- From here, explosively drive the feet through the ground and aggressively extend the hips and throw the ball as high as possible.
- Allow the ball to hit the ground, grab it, then reset and repeat.
Coaching Points
Do NOT try to catch the ball directly out of the air. This is a great way to jam a wrist or a finger. Allow the ball to hit the ground first before grabbing it for the next rep.
Back Squat
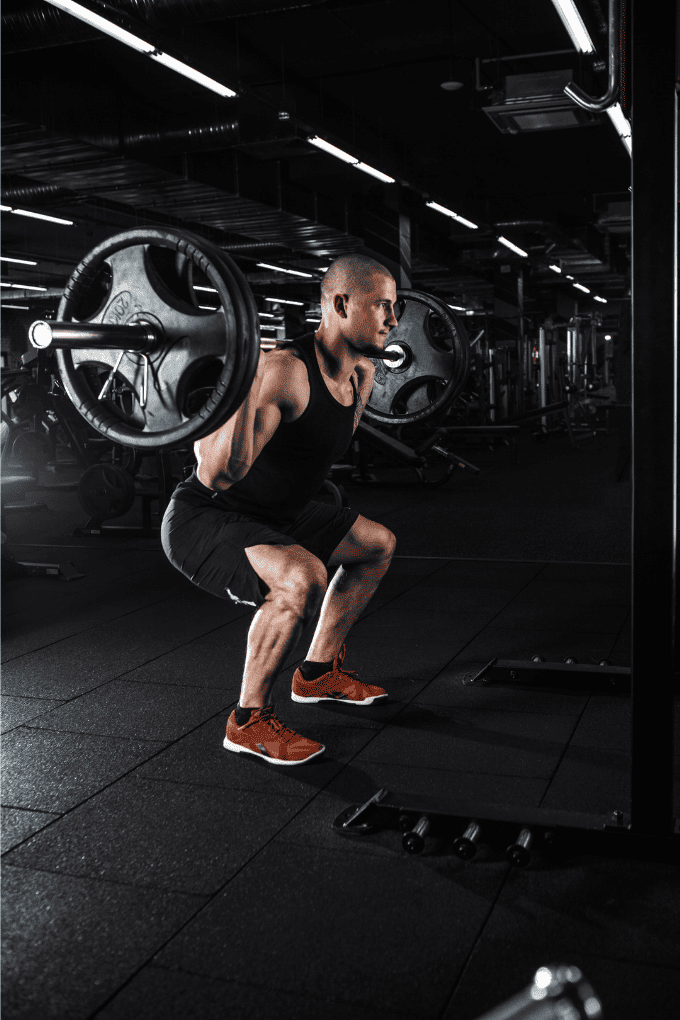
Back Squat is still the king of building lower body strength in my opinion. Front Squat and Single-leg exercises are both great and both have their place within basketball strength training.
However, if the question is what exercise is the best at developing leg strength – the answer is Back Squat.
My biggest tip for basketball players when it comes to Back Squats: focus on range of motion and technique – not weight.
The weight used will go up as you get stronger, but do NOT sacrifice range of motion or technique to add an extra plate to the bar.
Equipment Needed
- Squat Rack
- Barbell
Setup
- Position the bar in a high bar position.
- In the high bar position, the barbell rests on the athlete’s trapezius (traps). When squatting high bar, the athlete adopts a relatively upright torso position in order to keep the bar over the mid-foot.
- Actively pull the shoulders together and back in order to create a shelf for the barbell to rest on. This is also to generate as much upper body tension as possible in order to maintain a consistent torso position for the duration of the lift.
- A good cue here is to have the athlete pin their elbows down by their sides, similar to the bottom position of a Lat pulldown, before placing the bar on their shoulders.
- After setting up properly, the athlete un-racks the bar and walks it out of the uprights, takes a big breath in, braces their core, and initiates the eccentric portion of their squat.
Squat
- While maintaining a tight brace in their core and tension in their upper back (as mentioned in the setup paragraph), the athlete initiates downward motion of the bar via simultaneous hip and knee flexion until the crease of their hip goes below the knee.
- The concentric portion of the squat involves the athlete rising out of the hole via a combination of knee and hip extension.
- In rising out of the hole, athletes commonly experience sticking points either in the hole or when they are just above parallel. These can vary based on each athlete’s relative strengths and weaknesses, or some technical errors to be addressed later.
- Once the athlete completes the rep, they exhale, and either initiate the next rep or re-rack the bar.
Dumbbell Step-Ups

There are a ton of great single-leg exercises to choose from – lunges, pistol squats, etc – but for basketball players, I would pick Dumbbell Step-Ups as my first choice.
Why?
Out of all the single-leg exercises, Step-Ups are usually the friendliest with knees. Basketball players are often dealing with sore and aching knees and I like to try to avoid exercises that exacerbate that issue.
Instead, I try to find exercises that still get in the quality of work we need and Step-Ups can usually fill that role.
Equipment Needed
- Dumbbells (Kettlebells can also be used if needed)
- A very stable surface to step up to.
Step-by-Step Instruction
- With the dumbbells at your side, hinge at the waist and bend your knees to lift. Keep a neutral spine as you are lifting the dumbbells.
- Use a box height that is going to allow your hip and knee flexion to be as similar as possible to your stride while sprinting or bounding.
- Place the right foot on the box, and drive the left leg’s knee up.
- The leg drive should be fast and explosive.
- Engage the glutes and pause for a brief second at the top of the movement.
- Carefully lower the left leg back down and prepare for the next repetition.
Coaching Points
A stable box cannot be overstated here. If the box is not stable, do not do step-ups.
Box height is very important to benefit from this movement. If the box height is too short or high, there will be less sport or movement-specific training.
Trap Bar Deadlift
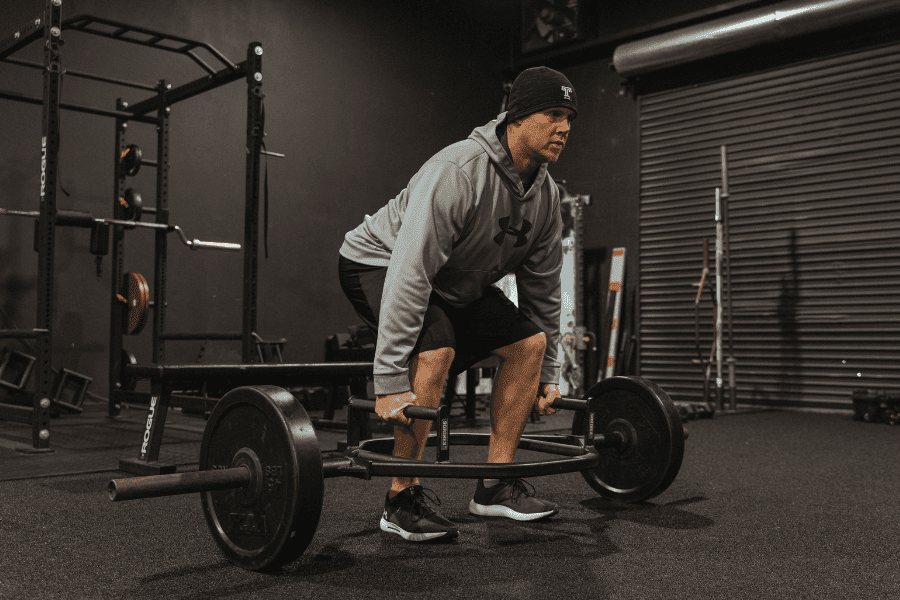
I like Trap Bar Deadlifts for basketball players for a few reasons. First, they’re simply a great exercise for building lower body strength, especially for the posterior chain.
But, specifically for taller players, being able to use a trap bar allows the weight to be shifted slightly more towards the hips which will take a bit of strain off the low back (compared to regular deadlifts).
Finally, most trap bars come with high handles which makes them much friendlier for taller players to work with.
Equipment Needed
- Trap Bar (also known as a hex bar)
- Plates (Preferably bumper plates, but iron plates can also be used if necessary.)
Step-by-Step Instructions
Setup
- Step inside the trap bar.
- Place feet roughly shoulder-width apart.
- Take a deep breath to brace the abdominal muscles.
- Hinge at the waist and bend at the knee simultaneously until you’re able to grab the bar handles.
- As you pull yourself down into the setup position, maintain a neutral head posture, with eyes fixed on something about 1-2 feet in front of you.
- In the final setup position, pull the chest up, and shoulder blades back, while still maintaining a brace in the abdominal muscles and get ready to lift.
Lift
- Start by pulling the “slack” out of the bar. This is where the lifter needs to create tension by slightly pulling into the bar and pushing their feet into the floor before maximal contraction/attempts.
- Once this tension is created, the lifter drives their feet through the floor, drives the hips forward, keeping tension in the abdomen and upper back, maintaining the hand position over the midfoot, the lifter stands tall with the barbell, and locks the repetition in.
- After locking in the repetition for about 1 second, the lifter is ready to lower the weight. Take in a big breath, maintaining a braced core and shoulder blades pulled together. The hips will push back and the knees will bend simultaneously.
- The weight should be maintained in a position over the midfoot. The athlete will continue to lower the barbell until the weights rest on the floor and prepare for the next repetition.
Coaching Points
Pro Tip: Don’t have a trap bar? Here are 10 alternatives for Trap Bar Deadlift that don’t need one.
Easily the most common mistake for deadlifts of any kind is allowing the back to round, placing unnecessary stress on the back. Keep the back flat throughout the movement and the core braced.
Do not bounce the bar off the floor between reps. Yes, bouncing the plates off the floor into the next rep may make the lift easier to do, but it’s also a good way to allow your technique to break down. Reset for each rep.
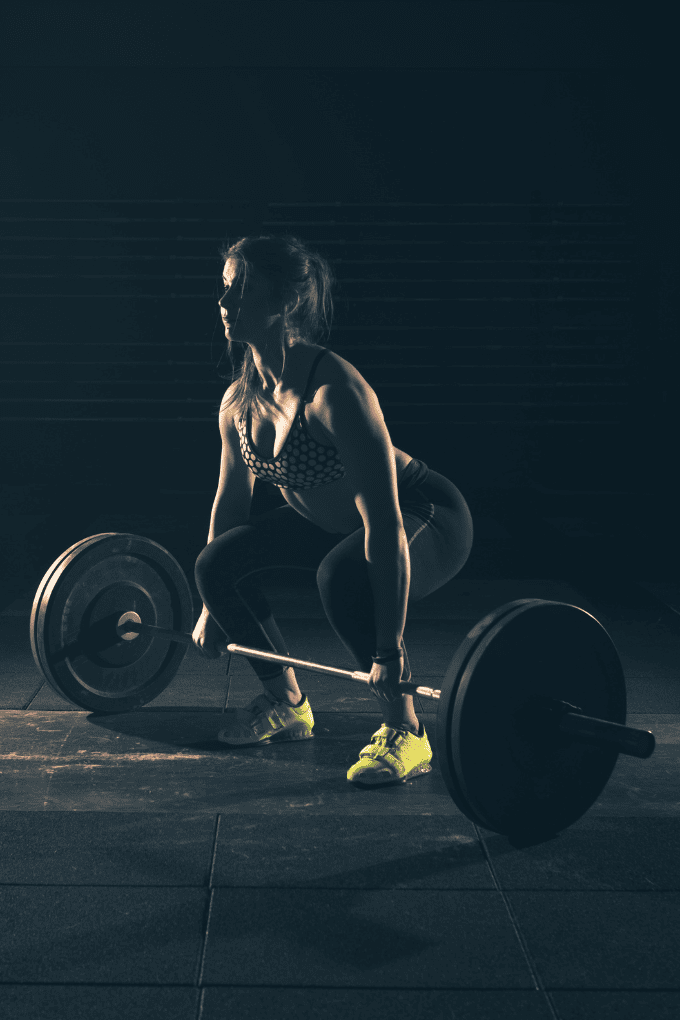
Romanian Deadlift (RDL)
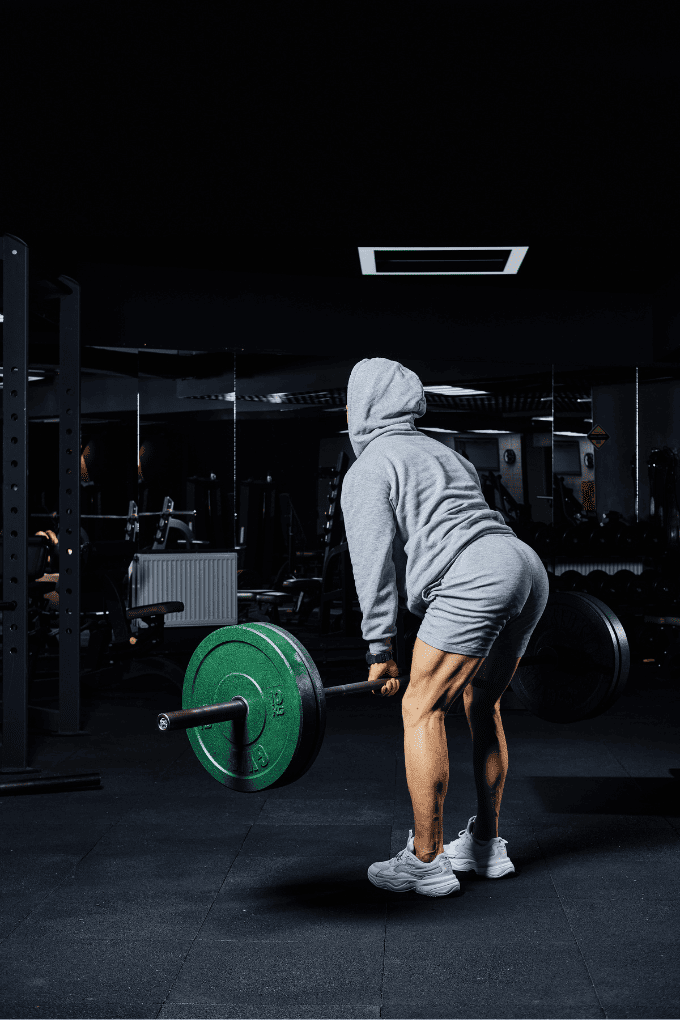
Romanian Deadlifts, or RDLs for short, are another great exercise for developing strength through the posterior chain.
Equipment Needed
- Barbell
- Weight Plates (Bumper or Iron)
Muscles Worked
- Hamstrings
- Glutes
- Erectors (Low Back)
How To
- Address the bar with feet shoulder-width apart, and toes straight ahead.
- Use a pronated grip about a thumb length from the start of the knurling.
- Now, with a good flat back, pick the bar up to a standing position.
- From here, put a slight bend in the knees and ‘set the back’ by squeezing the shoulder blades and engaging the lats.
- Brace the core and hinge forward by pushing the hips back.
- The bar should almost drag right down the legs, across the knees and straight down the shins. The whole foot should stay flat on the ground, but the weight should be on the mid-foot to heel.
- Maintain the neutral spine position throughout the descent and once you feel a good stretch in the hamstrings, drive the hips forward (hip extension) and return to the starting position.
Coaching Points
The ‘depth’ that each person gets will be different and absolutely solely dependent upon hamstring flexibility.
Do NOT try to ‘reach’ the barbell toward the ground because you believe the plates should touch the floor. If you have tight hamstrings you may be doing well to get the bar to mid-shin.
Lateral Lunge
Yes, all athletes should do single-leg work. Yes, all athletes should do groin work.
However, for basketball players both of these aspects of training are probably even more important. (Think of a Point Guard moving laterally to play defense)
One of the best ways to do both is with Lateral Lunges. Can be done with just body weight or holding a kettlebell or dumbbell for added resistance.
Equipment Needed
- None
Step-by-Step Instructions
- Start in a standing position, feet hip-width apart.
- Step out laterally with the left leg, wider than shoulder-width.
- Now, shift your weight towards the left leg.
- As you shift your weight, bend the left leg and keep the right leg straight.
- Push the hips back, keep the chest up and keep the left foot flat on the ground (do not shift to the ball of the foot).
- Finally, extend up and step the trail leg back up to hip-width.
- Continue until the distance assigned is completed and then switch sides.
Coaching Points
Oftentimes, I see athletes who turn this movement into a full ‘butt-to-the-floor’ on the lead leg and then turning the toe up on the back side leg to manage the position.
This may look good, but it defeats the purpose of stretching the back side groin. By turning the toe up, the stretch moves to the hamstring which is not where the emphasis should be.
Lateral Lunges can also be done in place if you are short on space. Instead of bringing the trail leg to the lead leg after lunging, simply drive the lead leg back to the original starting position and then repeat.
In this scenario, I like to alternate legs back and forth.
Floor Slider Leg Curls
Floor Slider Leg Curls are one of my favorite hamstring exercises for basketball players.
Not only is it great hamstring work, but it also engages the glutes and core muscles. Win-Win.
Equipment Needed
- Furniture Sliders (Big enough to fit the heel of your foot on)
Step-by-Step Instruction
- Lie down on your back and bend your knees at about 90 degrees.
- Place the sliders under the heels of your feet.
- Drive your elbows into the floor and keep your abdomen tight.
- Drive your hips to the ceiling and engage your glutes.
- Keeping your core nice and tight, slowly slide your heels away from your body until your knees are almost fully extended.
- At the end range of this movement, your body should be straight, hips up, and core engaged.
- Engaging the hamstrings, pull your heels back to the starting position and squeeze the glutes to resume the starting position.
Coaching Points
One of the most important points about this movement is the surface you are sliding on and the type of slider you’re using.
I personally like these Super Sliders with a hard plastic bottom. They are big enough for even large feet and I’ve had the most luck with them on multiple surfaces. (They’re also super cheap)
The furniture slide should freely move with little resistance, I would say carpet is ideal if available. If there is resistance, this may affect your technique and coordination.
Remember to always squeeze with the glutes and actively engage the hamstrings. Do not round the back and push your belly to the sky. Keep the anterior core locked in throughout the movement.
Box Jumps
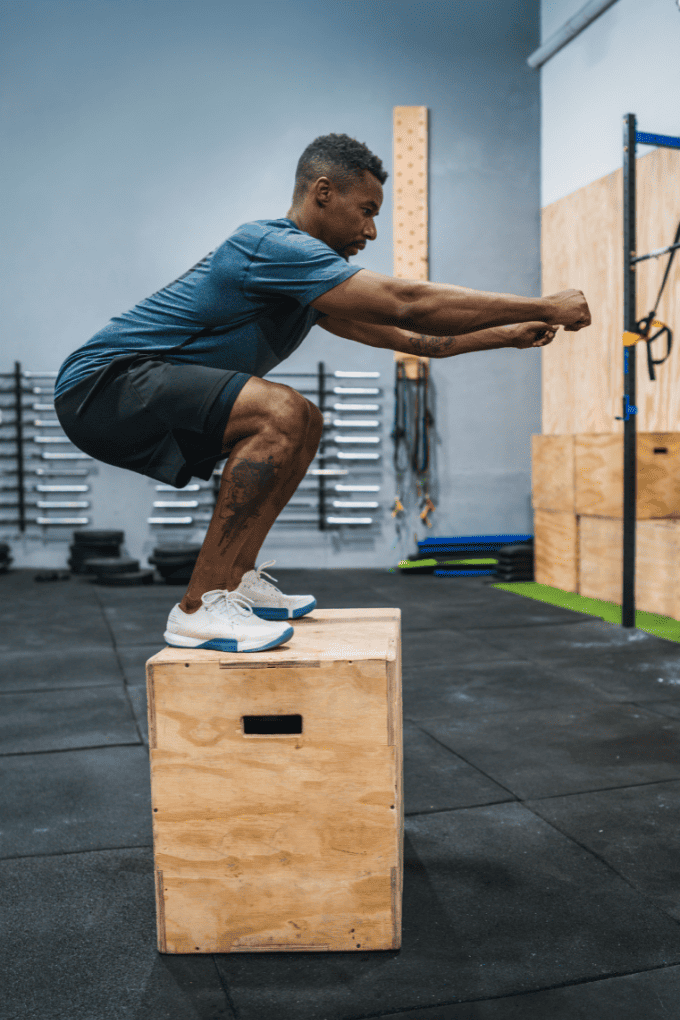
I couldn’t do an entire list of lower body exercises for basketball players and completely leave off plyometric training. The problem was which plyometric drill to pick.
I ended up going with probably the most popular and well-known plyometric training drill. Popular, but still extremely effective. Box Jumps.
Box Jumps will help develop explosiveness and take a lot of wear and tear off the joints by landing on a higher surface instead of all the way back to the ground each rep.
Just focus on proper technique and avoid trying to jump on boxes too tall to do properly.
Equipment Needed
- Plyo Box
Step-by-Step Instructions
- Grab a box that is the proper height for your jumping ability
- Start just far enough away from the box so that your hands will not hit the box when you swing them.
- Once you’re in position, stand tall with feet hip-width apart.
- Now raise your arms overhead and extend up onto the balls of the feet.
- Start your countermovement by hinging at the hips, bending the knees and throwing the hands down and back behind the body.
- Immediately redirect by driving the feet through the floor, throwing the hands up and triple extending through the hips, knees and ankles.
- Land softly on the box by bending the knees upon landing and absorbing the force of impact.
- Step down off the box and repeat.
Coaching Points
Pick a box that is an appropriate height. You should land on the box in roughly a quarter-squat position. All too often I see athletes jump on a box that is way too high, causing them to have to land in a full squat position.
This is wrong for two reasons.
First, picking your feet higher so you can land in a full squat doesn’t actually mean you jump any higher.
Second, having to land in a full squat to make it onto the box eliminates any room for error. If you jump perhaps even an inch not high enough you could end up missing the box.
Sprints
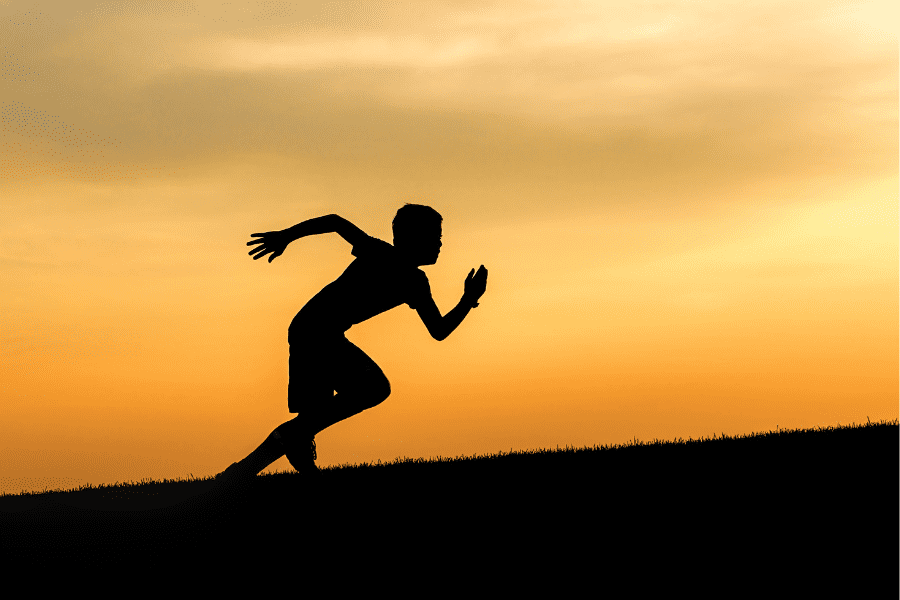
You may not have expected to see sprinting on a list of lower body exercises, but that’s just how important I believe sprinting is for basketball players.
This sprinting can be part of a full program complete with sprinting drills, but it can also be as simple as just getting out and sprinting.
I think too many basketball players have gotten away from doing sprints in their training programs. I see so many players lift, condition and do far too many ladder drills.
However, going out, lining up and running as fast as possible is neglected far too much.
If you want to run fast, you need to run fast. Even more, if you want your hamstrings to be prepared (and not pull) to do a full sprint once you’re in a fast break on the court – then you better be doing that in your training.
Final Thoughts
Are these the only lower-body exercises basketball players can do to build strong and explosive legs? Of course not.
But, in my opinion, your training program should have all (or at the very least, most) of these exercises incorporated into it at some point.
Just make sure to focus on technique, don’t try to use more weight than you can safely handle and don’t slack on your nutrition and recovery. Do all of these things and you should see a big-time improvement in your performance on the basketball court!
Finally, if you found this article helpful, then you may also enjoy checking out my favorite core exercises for basketball players.