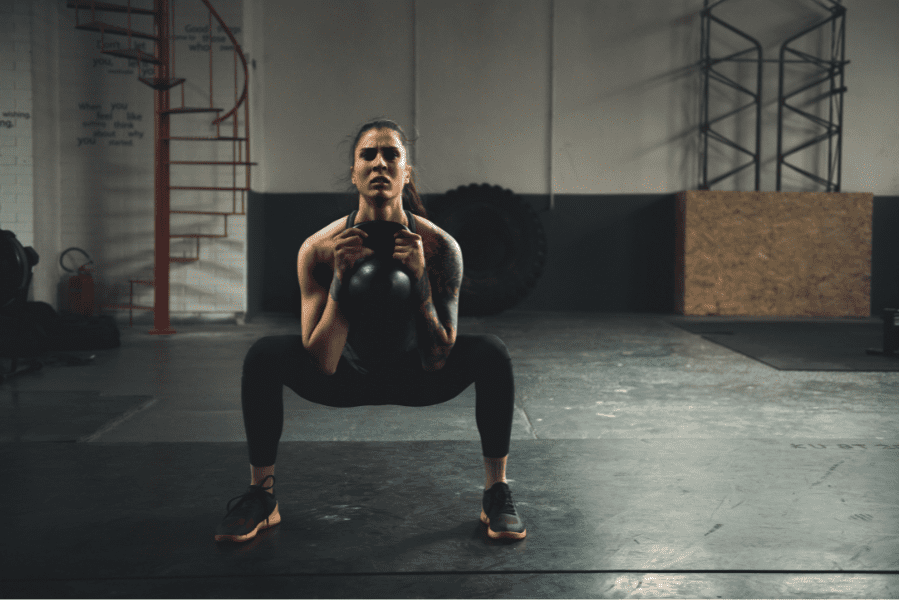
7 Goblet Squat Alternatives To Build Leg Strength
Goblet Squats are an excellent exercise to use as a teaching tool for anyone first learning how to squat. They can also work great as part of a high-intensity circuit.
However, sometimes you may find yourself needing an alternative for Goblet Squats.
Maybe you don’t have a kettlebell or a dumbbell. Or, maybe you’re just looking to change up your workout.
Whatever the reason, if you’re looking for an exercise to substitute for Goblet Squats then you’re in the right place. I’m about to share with you 7 of my favorite Goblet Squat alternatives.
Alternatives for Goblet Squat
Since Goblet Squats are generally done by beginners, I’ve tried to mostly select exercises that work similarly to Goblet Squats (similar movement patterns and/or similar muscle groups) and are also beginner-friendly.
Hopefully, no matter what equipment you have or what your level of experience is, one of these exercises will be a good fit for you.
PRO TIP: Before we get into alternative exercises, if you’re here simply because you’ve seen a Kettlebell Goblet Squat, just know that you can also do Goblet Squats with a dumbbell.
Just place your palms underneath the inside of one head of a dumbbell and you’re good to go.
Bodyweight Squat w/ Band
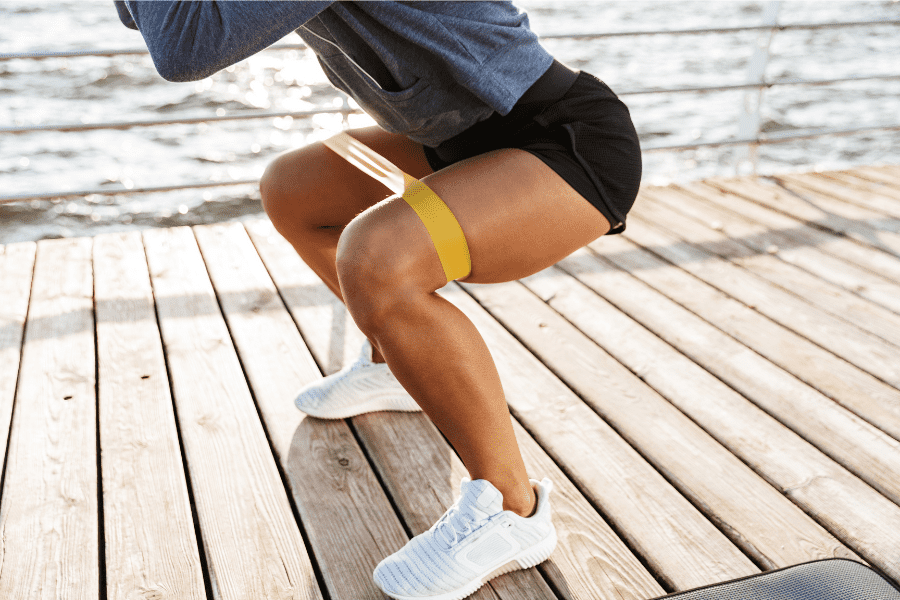
If you don’t have a kettlebell or dumbbell or you just don’t feel comfortable with your Goblet Squat technique, there is nothing wrong with sticking to a Bodyweight Squat.
Using a resistance band will help engage the glute med more which can make it a great choice as an activation movement in a warm-up.
Equipment Needed
- Resistance Band (either a standard band or a mini-band)
Instructions
- Start by creating a loop with a resistance band. (You can skip this step if using shorter mini-bands)
- Create a loop by making one twist in the middle of the band and then doubling the band over. Essentially you’re making a smaller loop that will fit snugly around your legs.
- Step into the loop you’ve created with both legs and pull the band up to just above the knee.
- Now perform your bodyweight squat by placing feet shoulder width apart, toes straight ahead or slightly pointed out.
- Squat down by first hinging the hips back and then bending the knees and dropping the hips straight down.
- Chest should stay up, eyes focused straight ahead.
- Feet should remain flat on the floor with weight evenly distributed between the heel and ball of the foot.
- As you descend, push your knees out against the resistance of the band. This will engage the glutes more and help reinforce proper technique.
- Stand tall by pushing the feet ‘through the floor’, driving the hips up and the shoulders tall.
- Repeat for the desired number of reps.
Coaching Points
The biggest error I see when watching athletes do Bodyweight Squats with a Band is placing the band too high or too low on their legs.
In my opinion, wrapping the band around the ankles or on the mid-thigh doesn’t place the same amount of tension on the Glute Med as placing it just above the knee.
I also think placing the band just above the knee also helps mentally reinforce pushing the knees out during a squat which can be a huge benefit in preventing knee valgus during the squat.
BONUS EXERCISE: Resistance Band Goblet Squat
If you’re looking to add variety or increase the challenge of your Goblet Squats, add a resistance band.
A Resistance Band Goblet Squat is also a great teaching exercise to emphasize keeping the knees pushed out when squatting with an external load.
Front Squat
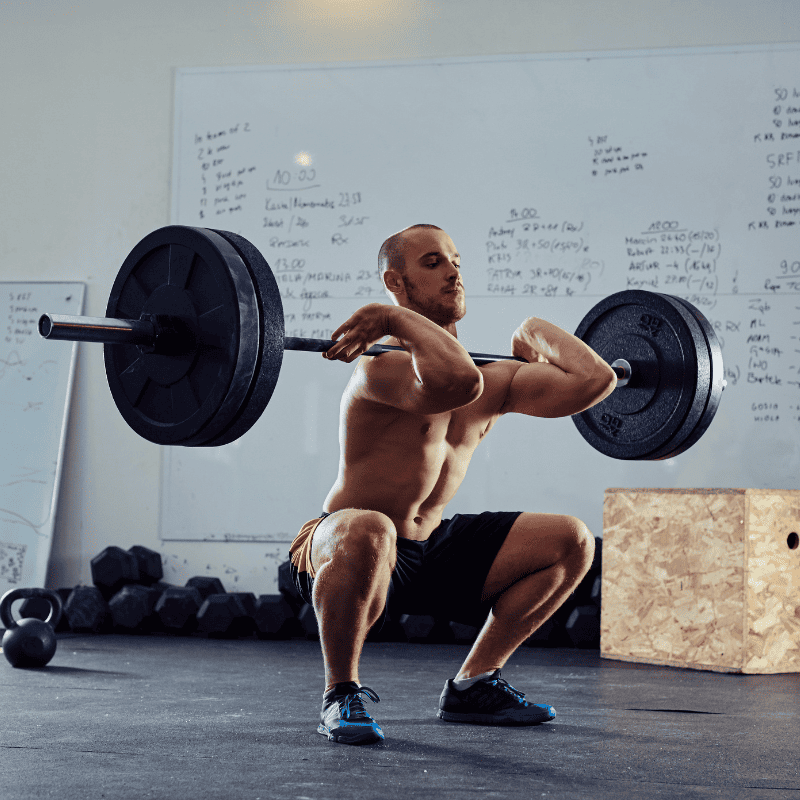
By far the most technical lift on this list, Front Squat is also a front-loaded squat that can be a good exercise to progress to once you feel confident with your Goblet Squat technique.
Equipment Needed
- Squat Rack
- Barbell
- Bumper or Iron Plates
Step-by-Step Instruction
- Set the height of the squat rack so that the barbell is about 1-2 inches below the flexed elbow (Elbow pointing toward the squat rack prior to taking the weight off the hooks).
- One of the first considerations you are going to want to make is what grip you want to use to perform the front squat.
- Later in the article, I will talk about different grips and the reasoning behind each grip.
- For now, I am going to assume you are using a two-finger clean grip. (Most commonly used by athletes).
- Walk closely to the barbell and place it very close to your neck.
- Bring your elbows up and the barbell should be resting on the raised anterior deltoid muscles. You are now holding the bar with what’s called a “front rack position” (THERE SHOULD BE NO STRESS OR TENSION ON THE HAND OR WRIST TO HOLD THE BARBELL).
- With your front rack, lift the bar off the hooks. I recommend a staggered stance to lift the barbell off the rack.
- Take 2 steps back and set your feet slightly wider than shoulder width. Toes slightly pointed out.
- Maintaining a strong front rack, take a deep breath, and brace the core.
- Initiate the squat by hinging the hips back and bending the knees simultaneously.
- Descend into the squat with control until your hip crease is slightly below the knee. (Most professionals consider this to be parallel or just below parallel).
- At this point, the core should be braced, the front rack strong, elbows up, and the lifter is ready to drive out of the “hole” and stand the weight back up.
- Keep a balanced foot with a strong arch, drive through the heels, and drive the hips until you are back at the top of the movement and ready for the next rep.
Grips
- Clean grip with 1 or 2 fingers. This is the most common grip used by Olympic lifters and athletes. This trains the specific position the bar would be in at the catch of a clean and therefore very advantageous for these athletes.
- Crossed arms. This is a common grip for athletes that want all the benefits from the front squat but may not have the flexibility or need for a finger grip.
- Lifting Straps. This allows the lifter to get the front rack position, engaging the upper back musculature, and takes a lot of stress off the fingers and wrists.
Coaching Points
By far the most common mistake with Front Squats (and most all compound movements) is improper form.
Because the lift is very technical, uses the whole body, and requires patience and persistence, lifters oftentimes have incorrect form without realizing it, go up in weight too quickly, and may injure themselves.
Bulgarian Split Squat
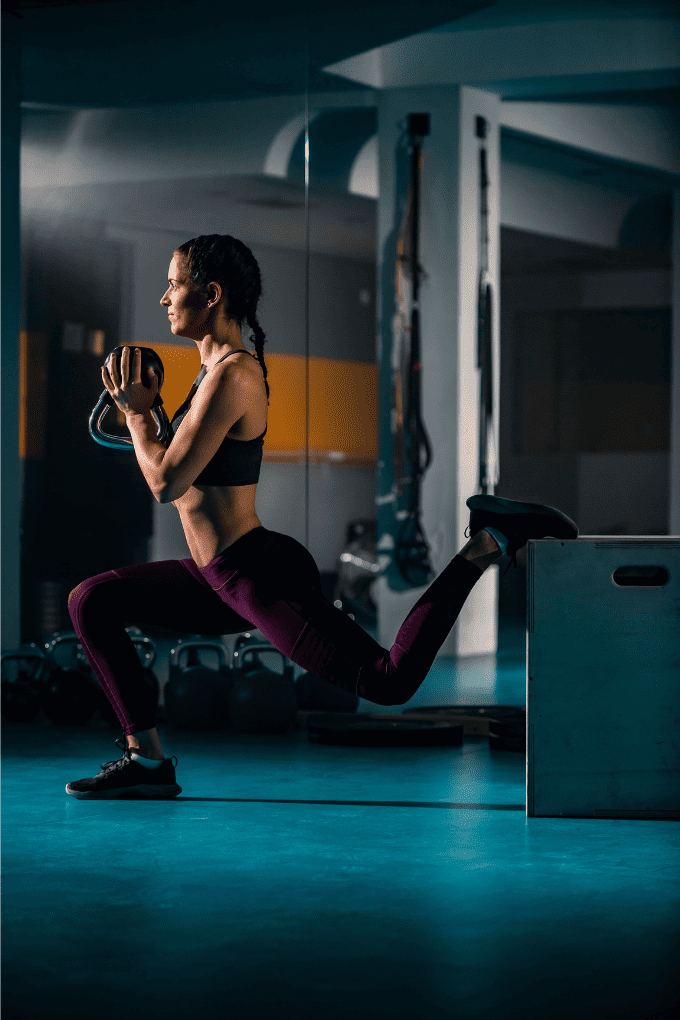
Bulgarian Split Squats are an excellent single-leg Goblet Squat alternative that can be done with just bodyweight, dumbbells or a kettlebell.
Most often I have athletes hold dumbbells in each hand when doing Bulgarian Split Squat, but you can absolutely hold a kettlebell in a goblet position instead.
Equipment Needed
- Dumbbells
- Bench, Box or Stack of Bumper Plates (essentially anything stable enough and tall enough to place your foot on)
Instructions
- Grab two dumbbells, one in each hand
- Get set up in front of your bench, reach one foot back and place it on the bench. Make sure you feel comfortable and balanced before proceeding.
- Squeeze the shoulder blades and engage the lats to create a stable back to help with bracing the upper body and to keep the dumbbells from swinging unnecessarily.
- Keep the chest as upright as possible and drop the back knee to roughly one inch from the floor.
- Now drive through the heel and midfoot of the front foot to drive yourself back up tall.
- Repeat until all reps are completed on that leg and then switch sides.
Coaching Points (Fixes to Common Mistakes)
When you step out, make sure to keep the feet shoulder-width apart.
If you’re feeling very off-balance in your lunge there is a good chance that you are placing the lead foot directly in front of the back foot (essentially placing yourself on a tight rope).
Trap Bar Deadlift
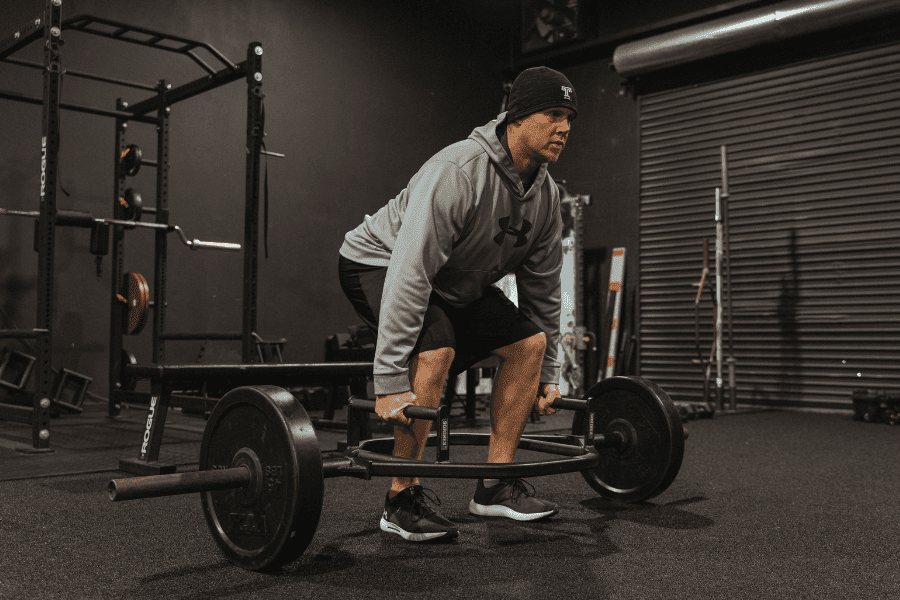
Trap Bar Deadlift isn’t a squat, but it is a beginner-friendly pulling exercise that allows lifters to learn how to properly set the back and brace the core.
Combined with Goblet Squats, Trap Bar Deadlifts may be the best two exercises to learn first to build the foundation for almost any lift in the weight room.
Equipment Needed
- Trap Bar (also known as a hex bar)
- Plates (Preferably bumper plates, but iron plates can also be used if necessary.)
Step-by-Step Instructions
Setup
- Step inside the trap bar.
- Place feet roughly shoulder-width apart.
- Slightly turn their feet outward (engaging the glutes).
- Take a deep breath to brace the abdominal muscles.
- Hinge at the waist and bend at the knee simultaneously until you’re able to grab the bar handles.
- As you pull yourself down into the setup position, maintain a neutral head posture, with eyes fixed on something about 1-2 feet in front of you.
- In the final setup position, pull the chest up, and shoulder blades back, while still maintaining a brace in the abdominal muscles and get ready to lift.
Lift
- Start by pulling the “slack” out of the bar. This is where the lifter needs to create tension by slightly pulling into the bar and pushing their feet into the floor before maximal contraction/attempts.
- Once this tension is created, the lifter drives their feet through the floor, drives the hips forward, keeping tension in the abdomen and upper back (DO NOT ROUND YOUR BACK), maintaining the hand position over the midfoot, the lifter stands tall with the barbell, and locks the repetition in.
- It is important that each repetition is locked in and controlled at the top of the movement. This is considered an isometric hold. This hold generally only needs to be about 1 second.
- After locking in the repetition for about 1 second, the lifter is ready to lower the weight. Take in a big breath, maintaining a braced core and shoulder blades pulled together. The hips will push back and the knees will bend simultaneously.
- The weight should be maintained in a position over the midfoot. The athlete will continue to lower the barbell until the weights rest on the floor and prepare for the next repetition.
Coaching Points
Easily the most common mistake for deadlifts of any kind is allowing the back to round, placing unnecessary stress on the back. Keep the back flat throughout the movement and the core braced.
Do not bounce the bar off the floor between reps. Yes, bouncing the plates off the floor into the next rep may make the lift easier to do, but it’s also a good way to allow your technique to break down. Reset for each rep.
Unlike barbells which have a standard weight, hex bars weight can vary from one bar to the next. Keep this in mind if using set weights off of your training program.
Dumbbell Step-Up
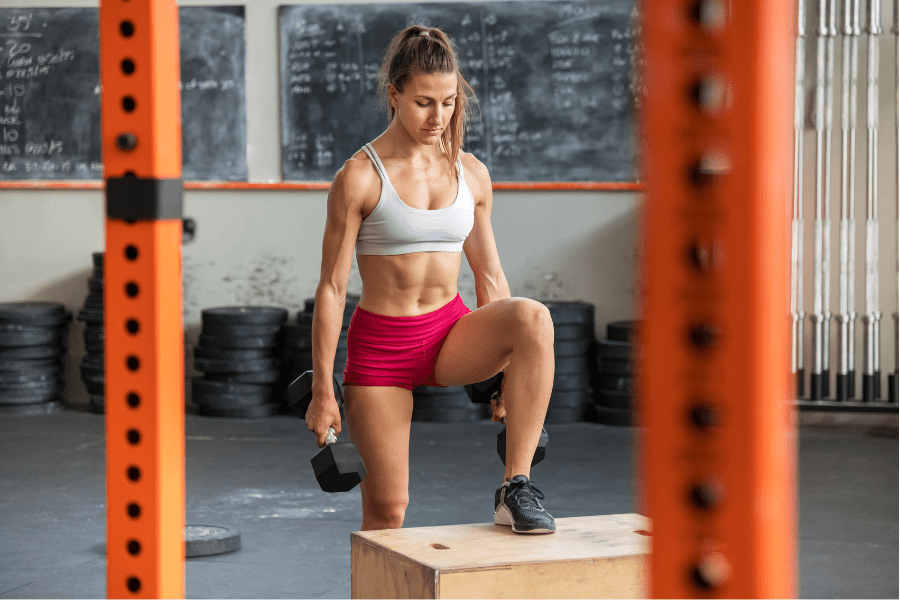
Dumbbell Step Ups are another beginner-friendly movement to develop leg strength.
Equipment Needed
- Dumbbells (Kettlebells can also be used if needed)
- A very stable surface to step up to. (Ideally, a box or bench that is stable, heavy, and well balanced)
Step-by-Step Instruction
- With the dumbbells at your side, hinge at the waist and bend your knees to lift. Keep a neutral spine as you are lifting the dumbbells. NEVER ROUND YOUR BACK WHILE LIFTING.
- Use a box height that is going to allow your hip and knee flexion to be as similar as possible to your stride while sprinting or bounding.
- Place one foot on the box, and drive the other leg’s knee up.
- The leg drive should be fast and explosive. (Quick note: keep the up leg’s foot pulled up toward the shin).
- Engage the glutes and pause for a brief second at the top of the movement.
- Carefully lower the leg back down and prepare for the next repetition.
Coaching Points
A stable box cannot be overstated here. If the box is not stable, do not do step-ups. The risk-to-reward ratio should always be considered with all exercises and implements.
Squat Jumps
Another exercise that requires zero equipment, Squat Jumps are an explosive movement that can also help build leg strength and power.
Equipment Needed
- None
Step-by-Step Instructions
- First, make sure you have enough clearance to safely do Squat Jumps (no low ceilings!)
- Start in a shoulder-width with toes either straight ahead or turned slightly out.
- Squat down, exactly how you would with a normal Bodyweight Squat.
- As you squat down, cock your arms back so that they are down and slightly behind the hips.
- When you get to the bottom of the squat, explosively drive yourself up – hips and arms – into the air as high as possible.
- Land softly by bending the hips and knees to absorb force when contacting the ground.
- Repeat for the designated number of reps.
Coaching Points
Go for MAXIMUM height for each jump. Reset and reload each repetition – don’t rush through.
Don’t forget to use your arms! Your arms can help you generate power on your jumps – utilize them!
Get Shredded… For Free
Get a free workout Monday through Friday, posted right here on Horton Barbell. These workouts are designed to help you get strong, in shape and look great at the beach!
Final Thoughts
Goblet Squats are a great beginner-friendly exercise for building leg strength, but sometimes they are just not an option.
You may not have the proper equipment available to you or at other times you might just be looking to add some variety to your training program.
In these situations, you’ll need a Goblet Squat alternative and I hope that at least one of the alternative exercises or Goblet Squat variations I’ve listed here fits what you were looking for.

