9 Lying Leg Curl Alternatives To Develop Hamstring Strength
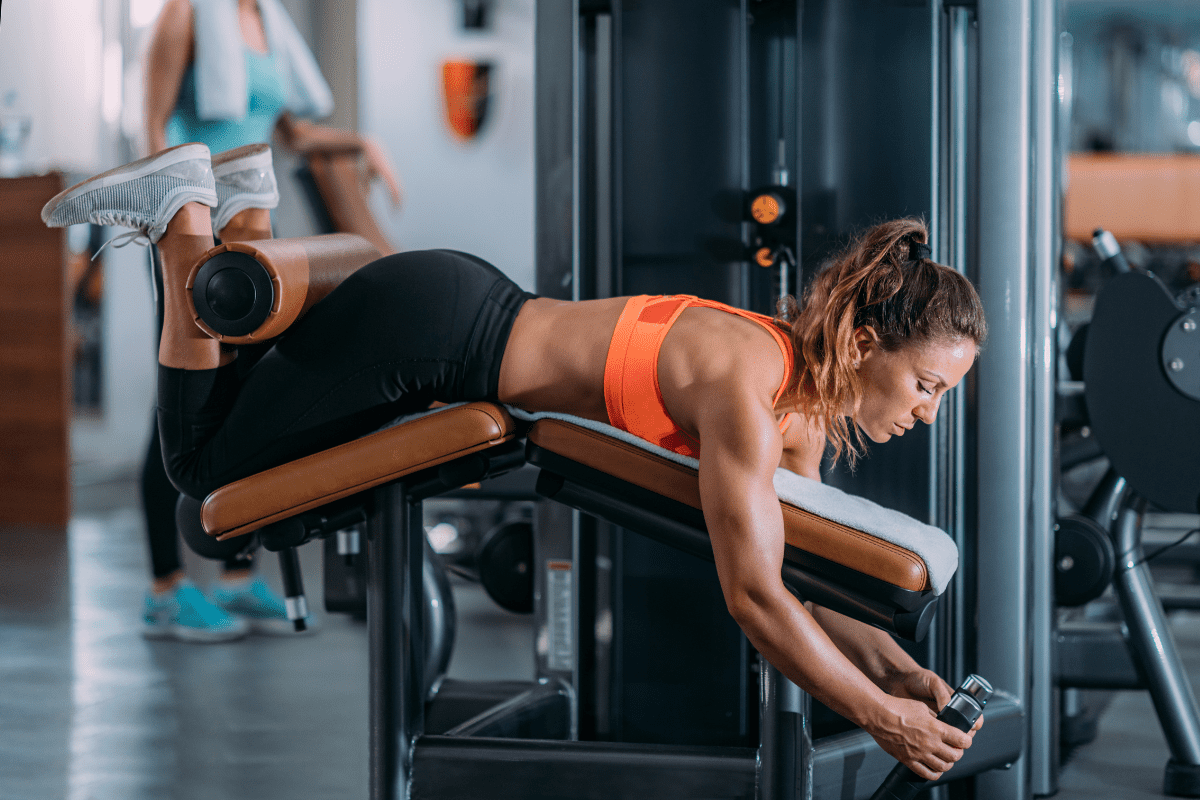
The Lying Leg Curl is a common exercise used to target the muscles in the back of the lower leg, known as the hamstrings. It is performed on a weight machine, with the athlete lying on their stomach and sliding their ankles under a lever. Lying Leg Curls can be a beneficial exercise for athletes, bodybuilders, and anyone looking to improve their hamstring strength.
However, as beneficial as Lying Leg Curls may be, sometimes you may find yourself needing a Lying Leg Curl alternative. The most obvious of which is you don’t have access to a leg curl machine. But, perhaps you’re just looking to change your workout up a bit.
Whatever the reason, you’re in the right place. In this guide, I’m going to give you 10 of my favorite hamstring movements to use as an alternative for Lying Leg Curls.
Alternatives to Lying Leg Curls
This list of Lying Leg Curl alternatives has a lot of variety within it. Some exercises still require equipment – medicine balls, weight plates, stability ball – but many exercises don’t require any equipment at all.
My goal with this list was to give you a bunch of ideas so you could pick and choose which exercises you like the best to serve as a replacement for Lying Leg Curls.
Floor Slider Leg Curls
One of the best alternatives for Leg Curls, if you don’t have a leg curl machine, is Floor Slider Leg Curls.
Floor Sliders only cost a couple of bucks and are small enough to easily keep in your gym bag if you need to.
And, most importantly, they are incredible at working your hamstrings. Easily one of the most deceptively hard movements in a weight room, I have seen countless athletes quickly humbled by just a few reps of Floor Slider Leg Curls.
Step-by-Step Instruction
- Lie down on your back and bend your knees at about 90 degrees.
- Place the sliders under the heels of your feet.
- Drive your elbows into the floor and keep your abdomen tight.
- Drive your hips to the ceiling and engage your glutes.
- Keeping your core nice and tight, slowly slide your heels away from your body until your knees are almost fully extended.
- At the end range of this movement, your body should be straight, hips up, and core engaged.
- Engaging the hamstrings, pull your heels back to the starting position and squeeze the glutes to resume the starting position.
Coaching Points
One of the most important points about Floor Slider Leg Curls is the surface you are sliding on and the type of slider you’re using.
The furniture slide should freely move with little resistance, I would say carpet is ideal if available. If there is resistance, this may affect your technique and coordination.
Controlling the eccentric portion of this movement is critical. Your hamstrings will engage and get a good stretch at the end range of this movement, so go slow, pause, and then curl back to the start.
Nordic Hamstring Curls
One of the best hamstrings movements (according to research) to keep hamstrings healthy and help prevents strains on the field or court is Nordic Hamstring Curls.
Nordic Hamstring Curls are primarily an eccentric hamstring movement, but if done correctly, will also really challenge the hamstring on the concentric phase as well (coming off the floor).
These are a staple in my programming and I highly recommend incorporating them into yours – even if you have a leg curl machine.
How To
- Start on your knees with a partner holding your feet (dorsiflexed, toes in the ground).
- Hold your hands in front of your chest, brace your core and lock in your hips.
- Now, keep your body in a straight line (shoulders, hips and knees) and lean forward.
- Lower slowly and under control as long as possible.
- Touch your chest to the ground, using your hands if necessary (they will most likely be necessary)
- Finally, give yourself a little push to get started and then use your hamstrings to curl yourself back to the start.
Coaching Points
The ultimate goal is to be able to lower yourself to the floor, touch the ground with your chest, and then curl yourself up without using your hands. However, this takes practice and a ton of hamstring strength. Be patient and focus on your progress each time.
Don’t allow your hips to shoot out, breaking the straight line going through your shoulders, hips and knees.
Only use as much push with your arms coming off the ground as needed. How much is the right amount? Trust me, when you get it just right – you’ll know.
Stability Ball Hamstring Curl
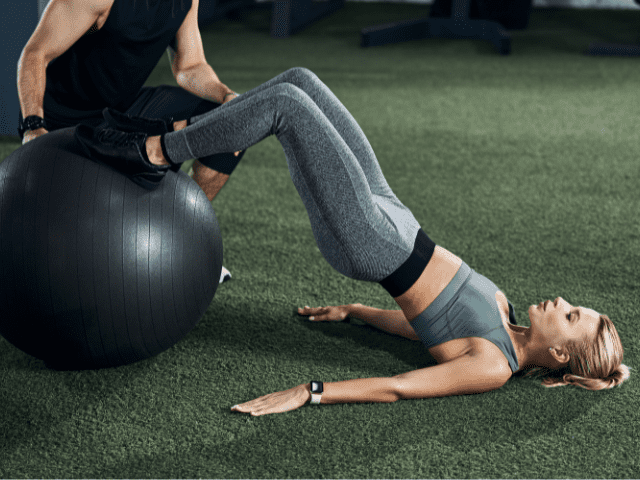
The Stability Ball Hamstring Curl is another really good leg curl alternative that uses a piece of equipment that most of us probably have access to – and if not, is cheap and easy to buy.
They work very similar to a Floor Slider Leg Curl, but not quite as intense. So, if you’ve tried leg curls with furniture sliders and found them to be a little too challenging, Stability Ball Hamstring Curls might be the perfect solution.
Step-by-Step Instruction
- Lie down on your back and almost fully extend your legs.
- Place your heels on the ball.
- Drive your elbows into the floor and keep your abdomen tight. Drive your heels into the ball.
- Drive your hips to the ceiling and engage your glutes.
- Keeping your core nice and tight, pull the ball under your butt as much as possible.
- At the top of this movement, keep the glutes engaged and core tight.
- Engaging the hamstrings, roll the ball back until your body is almost fully straight.
Coaching Points
Make sure the stability ball is properly inflated when doing Stability Ball Hamstring Curls. If it is not, the muscles we are training will not engage fully.
Remember to always squeeze with the glutes and actively engage the hamstrings. Do not round the back and push your belly to the sky. Keep the anterior core locked in throughout the movement.
Tired of coming up with your own workouts? But don’t want to pay an arm and a leg?
I post workouts 5 days a week right here. (Did I mention they’re free?)
Glute Ham Raise

The Glute Ham Raise is a combo of a Hyperextension and a Nordic Hamstring Curl that I mentioned above.
If you have access to one a Glute-Ham Machine, Glute Ham Raises are one of the most effective exercises for working the entire posterior chain – from the low back and the way down through the hamstrings.
Step-by-Step Instruction
- Position yourself on a Glute Ham Developer (GHD) machine with your feet secured under the roller and your knees just behind the pad.
- Start with your body in a straight line from your knees to your head, torso upright.
- Begin the movement by slowly lowering your torso forward and downward, maintaining a straight line from your knees through your head.
- When you’ve descended as far as possible with control, use your hamstrings and glutes to reverse the motion.
- Pull yourself back up to the starting position, squeezing your glutes at the top of the movement.
Coaching Points
One of the common mistakes I’ve seen with Glute-Ham Raises is athletes will pull with the hamstrings and not engage the glutes.
What this looks like is the athlete leaves their hips behind and they don’t quite get to perpendicular because they didn’t extend the hips and engage the glutes.
Manual Leg Curl
No leg curl machine needed for Manual Leg Curls – only a partner.
If done correctly, Manual Leg Curls are excellent for working the hamstring through its entire range of motion because the partner can alter the amount of resistance throughout the movement.
How To
- Lay on your stomach with your legs straight.
- Have your partner grab the backs of your heels.
- Curl your feet toward your butt and have your partner give you resistance as you do.
- Now, have your partner pull your feet back to the floor, but resist them from pulling you down.
Coaching Points
One of the keys to Manual Leg Curls is to not miss out on the eccentric portion of the exercise. Make your partner really have to work to pull your feet back to the floor. Depending on your hamstring strength, your partner may end up having to work as hard as you do!
Having a good partner is critical. They should be modifying how much resistance they’re applying throughout the movement so that you’re constantly challenged but still able to move through the range of motion.
Romanian Deadlift (RDL)
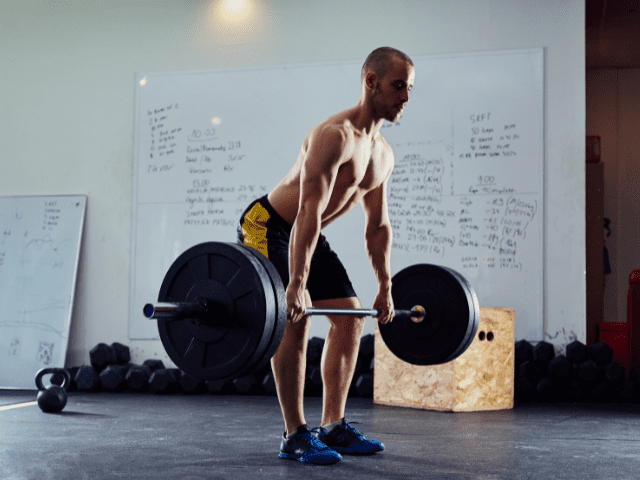
An excellent posterior chain alternative for any exercise, including leg curls, is the Romanian Deadlift.
How To
- Begin by standing upright, holding a barbell in front of you with an overhand grip.
- Feet should be hip-width apart with a slight bend in the knees.
- Keeping a neutral spine and your chest up, hinge at the hips, pushing them backward.
- Allow the barbell to slide down close to your legs. Your back remains straight throughout.
- Lower the bar until you feel a strong stretch in your hamstrings or it reaches mid-shin level, whichever comes first.
- Engage your hamstrings and glutes, then reverse the motion, bringing the barbell back to the starting position.
Coaching Points
The ‘depth’ that each person gets when doing Romanian Deadlifts will be different and absolutely solely dependent upon hamstring flexibility.
Do NOT try to ‘reach’ the barbell toward the ground because you believe the plates should touch the floor. If you have tight hamstrings you may be doing well to get the bar to mid-shin.
Single Leg Dumbbell RDL
All the benefits of the Romanian Deadlift, plus the additional benefits of balance and coordination make the Single-Leg Dumbbell RDL an excellent leg curl alternative.
Step-by-Step Instruction
- Opt for a dumbbell or kettlebell that you can control throughout the movement.
- Stand on one leg, holding the weight in the opposite hand.
- Keeping a slight bend in the standing leg, hinge forward at the hip while extending the free leg straight behind you.
- Lower the weight towards the ground while maintaining a straight line from head to extended foot.
- Pause briefly at the bottom without rounding your back.
- Engage your hamstring and glute to return to the starting position, maintaining balance.
Coaching Points
When doing Single-Leg RDLs, do not let the weight drift over the midline. You will train for more structural stability if you keep the dumbbell in front of the down leg.
It is important for the lifter to maintain a neutral spine, maintaining tension in the abdomen and upper back.
Remember to breathe in and hold the breath during eccentric (lowering the weight) and breathe out as you perform the concentric movement (bringing the weight back up).
Banded Good Mornings
Honestly, I’m not a huge fan of Barbell Good Mornings except for very experienced lifters, but Banded Good Mornings are an excellent option for working the posterior chain.
I tend to include them as part of a warm-up to prime the low back, glutes and hamstrings and get them ready for the work ahead.
Step-by-Step Instructions
- Stand on a resistance band and pull it up over the head and across the back of the shoulders.
- Stand tall with feet hip-width apart, hands holding and securing the band in place.
- Put a slight bend in the knee and pull the shoulder blades back.
- Hinge at the hips by pushing the hips back and bending at the waist. Push your knees out slightly as you descend.
- Keep the back slightly arched throughout the movement.
- Continue the hinge until you feel a stretch in the hamstrings.
- Stand back up tall and push the hips forward to the starting position.
Coaching Points
Banded Good Mornings can serve as a warm-up movement or as a strength-building exercise, usually as part of a circuit.
Listen to your body. Depending on your hamstring (and sometimes glute or low back) flexibility, you may be able to lower down quite far or not very much at all. The key is to move just to the edge of your range of motion. Don’t try to force anything.
Deadlift
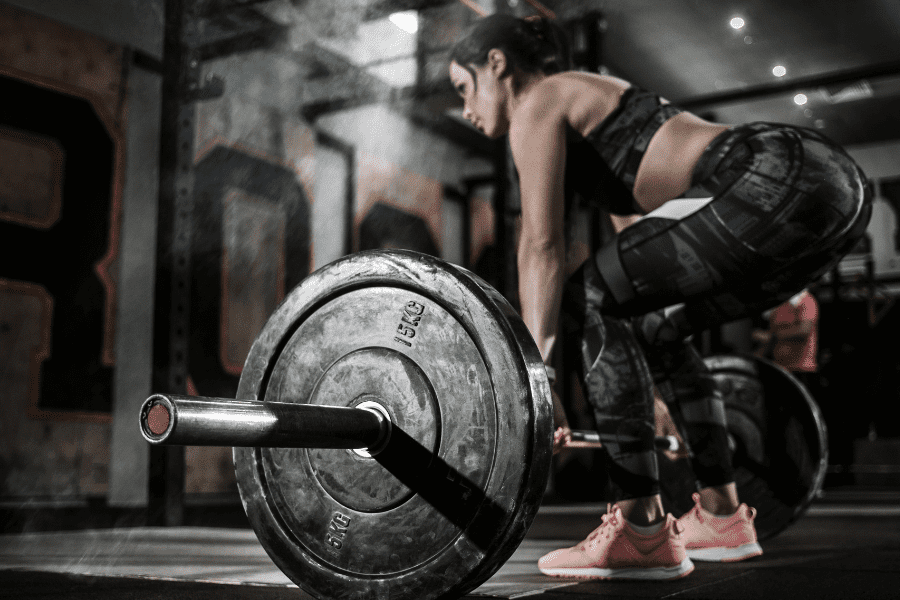
It’s hard to leave Deadlifts off a list of alternatives for any posterior chain muscle.
Deadlifts are the king of the posterior chain and a great exercise for developing strong hamstrings.
Step-by-Step Instructions
The deadlift is a very basic movement; there is a setup, a concentric movement (pulling the bar off the ground), an isometric hold (locking the repetition in), and an eccentric movement (lowering the bar back to the ground before the start of the next repetition).
How To
- Position your feet hip-width apart, with your toes under the barbell.
- Bend at the hips and knees to lower your body and grip the barbell. Your grip can be overhand or mixed (one hand overhand, one hand underhand).
- Ensure your spine is neutral, your chest is up, and your shoulders are slightly in front of the bar.
- Engage your core and begin the lift by pushing through your heels, extending your hips and knees simultaneously.
- Keep the bar close to your body throughout the entire lift.
- Once you’re fully upright, stand tall with your chest out and shoulders back.
- To lower the bar, hinge at your hips first, then bend your knees once the bar passes them. Return the bar to the ground in a controlled manner.
Coaching Points
In regards to your setup and form; treat every rep like it’s a 1 rep max. Put a tremendous amount of detail in your setup (Do it the exact same way, every rep).
Get Shredded… For Free
Get a free workout Monday through Friday, posted right here on Horton Barbell. These workouts are designed to help you get strong, in shape and look great at the beach!
Final Thoughts
Lying Leg Curls are a solid exercise for hamstring development, however, sometimes Lying Leg Curls are just not possible. You may not have the proper equipment or you may just want something a little different to add some variety to your training program.
In these situations, you’ll need a Lying Leg Curl alternative and I hope that at least one of the alternative exercises I’ve listed here fits what you were looking for.