Power Clean: How To and Why (The Complete Guide)
The power clean is easily the most popular variation of the Olympic Clean found in Olympic weightlifting.
In almost all professional, collegiate and high school weight rooms, you’ll find athletes power cleaning to help improve athletic performance. You’ll also find power cleans in Crossfit boxes in WODs featuring the exercise.
I’ve been coaching the power clean with college athletes for the last two decades and in this article, I’m going walk you through step-by-step how to properly power clean. I’m also going to explain why you should power clean including all of it’s benefits for athletes (both current and former).
Let’s get straight to it.
How to Power Clean
I already mentioned how popular of a lift the power clean is, but unfortunately it’s also probably the most incorrectly performed lift. That’s not good, considering poor technique combined with trying to do too much weight can easily lead to an injury when trying to power clean.
Starting Position
The starting position from the floor is arguably the most important aspect of the entire lift. Beginning the lift in a poor starting position will almost guarantee a poor power clean rep.
Foot Position
Start with feet hip width apart with toes straight ahead (or ever so slightly pointed out).
The bar should be over the middle of the feet. I always used the knot in your shoe lace as a visual cue, but essentially the bar close to (but not touching) the shins.
Grip
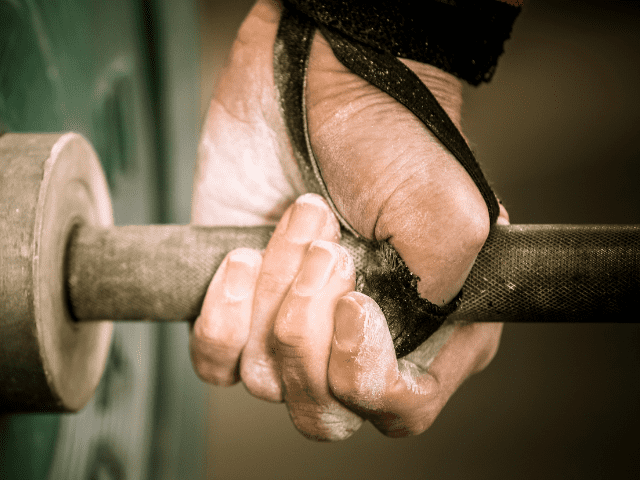
Grip should be slightly wider than shoulder width. An easy way to get your grip in the right position is place your hands one thumb length away from the start of the knurling of the bar. This width will work for 90% of lifters.
Wider athletes may end up sliding their hands just a bit wider and vice versa for narrow athletes, but it’s a good starting point for anyone.
The grip is a pronated grip (both palms facing down) and the lifter can choose, although highly recommended, to use a hook grip. A hook grip is where the thumb is wrapped around the bar first and then the fingers are wrapped over the thumb.
This style of grip is uncomfortable at first and takes a little bit of time to get used to, but it will dramatically improve your grip strength and help you move more weight.
The wrists should be slightly curled so that the knuckles are pointed straight down to the ground. This will also naturally rotate the elbows, pointing them laterally away from the body.
Body Position
Shoulders slightly over the bar, arms straight, hips slightly higher than the knees. Because of differences in body composition, torso lengths and limb lengths, every lifter will not look exactly the same when it comes to the starting body position.
The key is to find a position that meets the basic criteria of shoulders over the bar, hips slightly higher than the knees and is comfortable for the lifter.
Back should be flat or have a slight arch. Shoulder blades should be pulled back and the upper back including the lats should be engaged. I like to use the coaching cue ‘big chest’ or ‘superman chest’ with athletes so they get the idea of retracting their shoulder blades which coincides with “puffing out their chest.”
I recommend for beginners to look straight ahead because it helps with maintaining good posture and body position, but more advanced lifters can also look slightly down if they choose.
First Pull
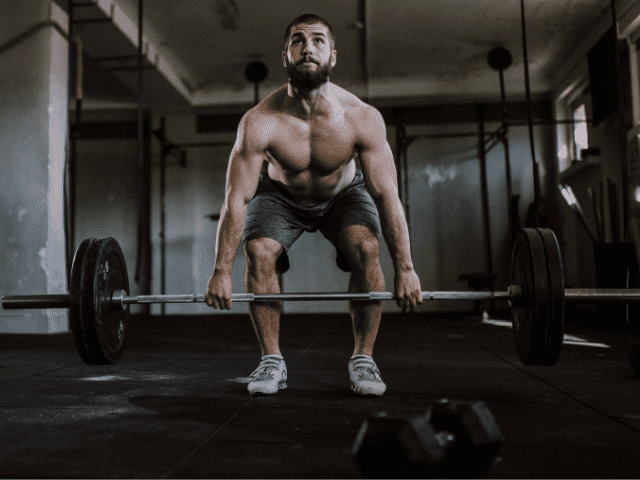
The first pull involves moving the bar from the floor to above the knee. The goal of the first pull is to put yourself in a good position for the second pull. I always told my athletes that power clean attempts cannot be made during the first pull, but they can definitely be missed.
The last thing that should happen as the lifter is setting up in their starting stance is to take a deep breath in and engage, or brace, their core. This helps the lifter both protect their back as well as aid in the transfer of power from their legs to the bar.
Raise the bar off the floor at a constant speed using the legs by driving the feet through the ground. Arms should stay straight and the barbell shouldn’t be ‘yanked’ off the ground.
Hips and shoulders rise at the same time (torso angle remains constant). One of the biggest mistakes with power clean technique is that lifters will shoot their butt up first, locking their knees out and then they end up pulling the bar with their back instead of their legs.
This is most often caused by lifters trying to rush the first pull too much. Don’t get ahead of yourself.
As the bar comes up, keep the bar close to the shins and the feet should remain flat, driving the feet hard into the floor.
Another common mistake is the lifter ‘swinging’ the bar away from their shins, usually because they are worried about the bar hitting their knees. However, the knees will naturally slide back out of the way as you extend.
By swinging the bar out is throws off the vertical bar path of the bar and pulls the lifter out towards their toes. Both are problems that will hinder your power clean.
Finally, as the bar passes knee level, wrists remain curled and elbows rotate out to the side, core and back should still be tight and engaged.
Second Pull
The second pull involves getting the bar from just above the knee to the power position. The power position is the point where the athlete is nearly vertical and where the final triple extension of the hip, knees and ankles will occur followed immediately by the shrug and pull from the arms.
Once the bar crosses the knees, the bar is then pulled explosively, bringing the shoulders back and up.
“When the bar crosses the knees, it doubles in speed.”
That was the mantra that I was first taught when I was a young intern strength coach and it something that has stuck with me my entire career.
As the lifter continues to drive vertically, the shoulders will end up slightly behind the bar and the hips, knees slightly bent and the ankles will have just a bit of flexion left in them.
This is the power position and the start of the third pull.
Third Pull
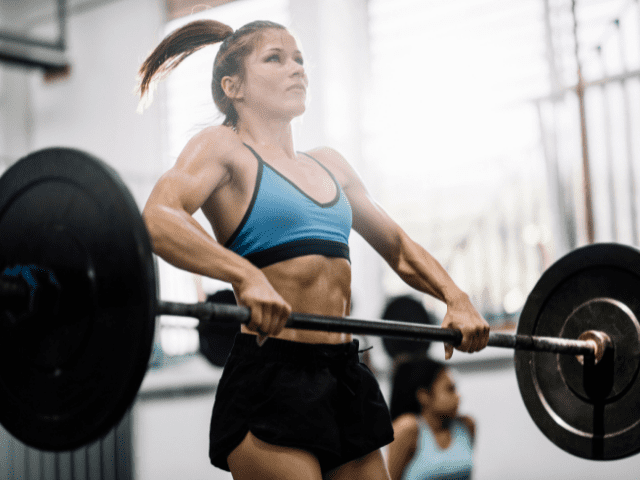
If we were doing a full clean (catching the bar in the bottom position of a front squat), then here is where we would finish our triple extension and then begin to pull ourselves under the bar.
However, since this is for a power clean, we’ll be pulling vertically on the bar more with are arms since we are only dropping to a quarter squat position.
From the power position, this is where the final explosive hip extension occurs along with the full extension of the knees.
The foot drive shifts from the whole foot to now extending up through the balls of the feet.
The triple extension of the hip, knees and ankles is followed instantaneously by a quick, aggressive shrug.
Bar is pulled vertically close to the body as the traps shrug to elevate the bar.
Elbows should break out to the side as the bar continues to rise.
Catch The Bar
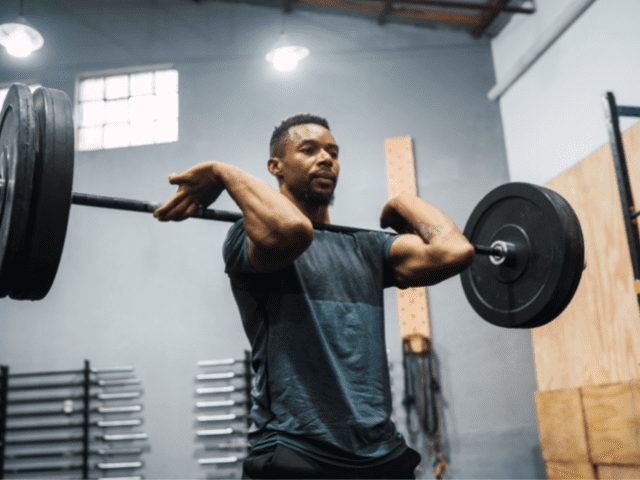
We’re now entering the final phase of the power clean where we will catch the bar and finish the lift.
As the bar elevates from the shrug, the feet shift from hip width to shoulder width to prepare for the catch.
Elbows rotate around the bar and ‘shoot through’ to help receive the bar in front of the shoulders. Triceps should be parallel to the floor in the finished catch position with the elbows forward.
While the elbows are rotating around the bar and into place, most lifters will have to release the bar so the elbows can rotate all the way into a front rack position. This is because for many lifters, wrist flexibility will be a limiting factor on them being able to maintain their grip on the bar in the catch position.
All the lifter needs, though, is two or three fingers to remain connected to the bar as it sits on the shoulders.
Bend at the knees into a quarter squat position to absorb weight in the rack position.
Stand tall after the rack, drop the weight and you’ve just completely a power clean with great technique.
Power Clean Teaching Progression
Obviously, this is all easier said than done and it will take a good amount of practice before you become proficient with your technique.
It also needs to be said that I would never start an athlete, or any lifter, with power cleans straight away if they are still new to lifting. The power clean involves a lot of moving parts – technique, timing and coordination all have to be in sync to properly execute the lift.
I always start by teaching a few other lifts and power clean variations to get lifters comfortable with the different aspects of the power clean and after a few weeks we’d start to attempt the full lift.
Front Squats
The first thing I have a lifter start working on is front squats. Not only will the front squat help build lower body strength, core strength and upper back strength – all important for power cleans – but, it will also help teach the lifter the final catch position.
If a new lifter has never front squatted before, the front rack position is sometimes not the most comfortable position to attain.
In fact, lack of wrist flexibility can make the position very uncomfortable. However, this can be improved over time which is exactly why I like to start with front squats in the first place.
Deadlift / Clean Pulls
Next, we’ll begin to learn the starting position and first pull by deadlifting. I don’t do a lot of deadlifting within my programming, but I love them for learning the starting position and first pull in a slower, more controlled movement.
This will help the lifter how get their core engaged, learn torso angle and build strength in the posterior chain muscles.
Once the lifter shows proficiency with the deadlift, we’ll quickly move on to clean pulls. (Normally after 2 to 3 sessions)
Clean pulls are essentially power cleans without the catch.
Lifters will use the same starting position, first pull and second pull and then finish the rep by aggressively extending through the hips, up through the balls of the feet and shrugging.
After three to four weeks of front squat, along with a progression of deadlifts and clean pulls, we’ll put the two lifts together and power clean. We’ll start with very light weight and then slowly build our way up.
Power Clean Variations
Technically the power clean is a variation itself – a variation of the full clean as seen in Olympic weightlifting.
Instead of catching the bar in the bottom of a front squat, the bar is caught much higher, in a quarter squat position.
If you change the starting position to a hang, instead of the floor, you have what is called a hang power clean.
For a hang power clean you will start by standing with the bar followed by setting the back, knees bent, engaging the core and then hinging forward until the bar is just above the knee. It’s basically skipping the first pull of the power clean and starting directly from the second pull instead.
Catching low from this hang position instead of up high turns this lift into a hang clean.
Finally, if you start from an even higher hang position, just above the mid thigh position, you have what’s called a high hang power clean.
This is probably the most challenging variation because you have less hip extension to help you drive the bar. It is predominantly used to help reinforce the final full hip extension, driving the elbows high and quickly snapping under to catch the bar.
Why Power Clean
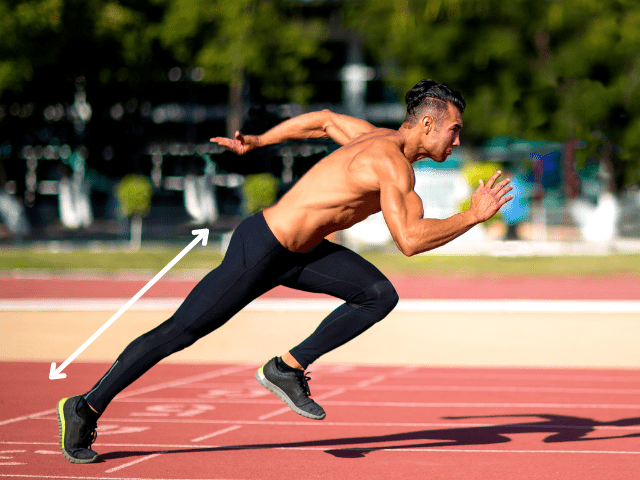
Now that I’ve covered how to power clean along with progressions and variations, why should you power clean in the first place?
Power cleans are one of the best movements anyone, whether athlete or weekend warrior, to build explosive power and improve athletic performance.
The movement pattern of a power clean is the same explosive triple extension as someone jumping, exploding out of the blocks on a 100m sprint or making a tackle on the football field.
It’s one of the best tools we have available to us in the weight room to develop full body power.
Because with Olympic movements like power cleans, it’s not just about upper body strength or lower body strength, it’s about being able to use your entire body to coordinate power and explosiveness in an athletic movement.
Power cleans demand maximal effort on every rep. They also demand focus and they demand attention to detail, even on lighter work sets.
Online Strength Programs
- 1-on-1 Online Coaching
- Sports Performance Programs for Football, Basketball, Soccer & More
- Programs for Former Athletes (Legends) Who Still Want to Train Like Athletes
- Programs for Adults Who Want to Get Healthy (and look great at the beach!)
- Use Code “HB10” to Get 10% Off Today
Final Thoughts on Power Cleans
Now you should not only know how to power clean, but how to build up your technical base and progress to power cleans and finally why you should be doing power cleans in the first place.
Just remember, that while they are great for building explosive power, never sacrifice heavier weights for technique. Proper technique should always be the first priority to ensure that the lift is being done safely.

