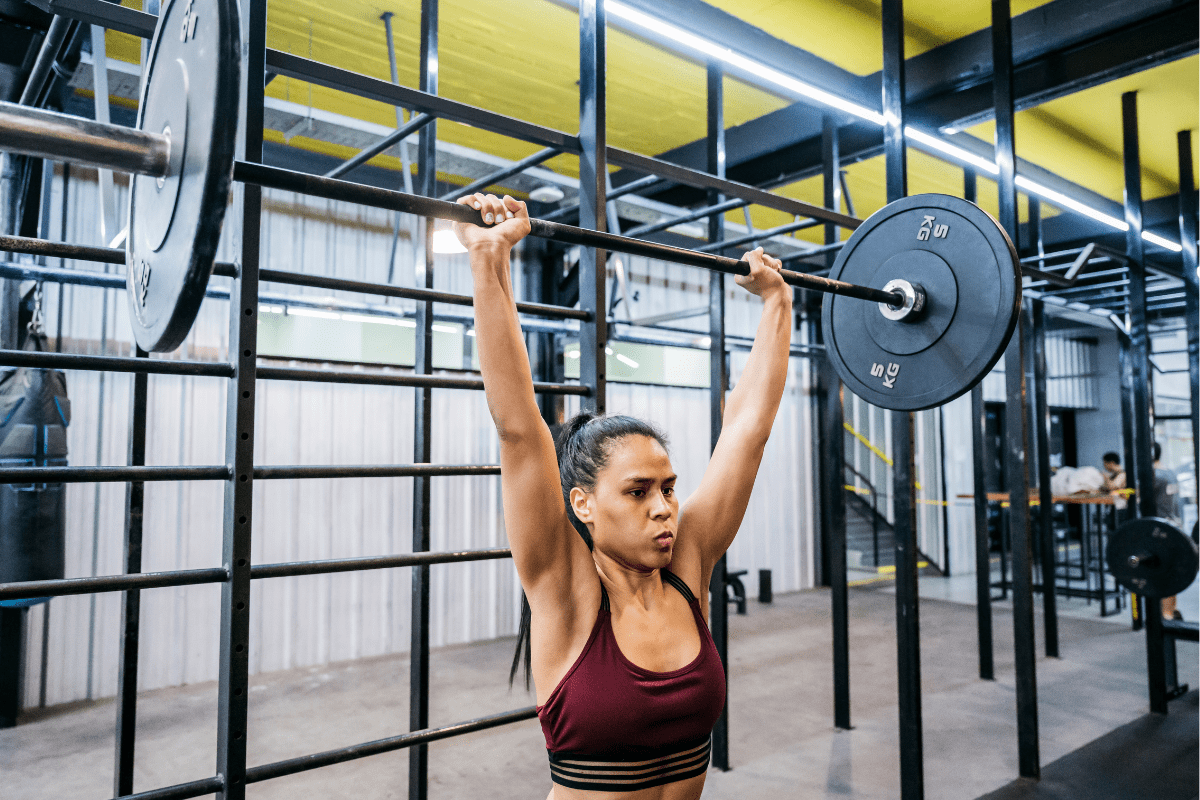
10 Push Press Alternatives For Improving Pressing Power
The Push Press is one of the best upper-body movements for developing power and strength. It’s a big compound movement, meaning it uses multiple muscle groups simultaneously, it’s done on the feet and the core has to work to stabilize the torso through the movement.
However, sometimes you may find yourself needing an alternative for Push Presses. Maybe you don’t have a barbell or maybe you’re just looking to add some variety to your workouts.
Well, I’ve been a College Strength Coach for 20 years and finding alternative exercises for athletes is something I’ve been doing my entire career. In this article, I will share with you 10 of my favorite Push Press alternatives.
Alternatives for Push Press
I’ve tried to include as much variety in this list as possible. There are exercises that utilize a variety of equipment from barbells to medicine balls to even no equipment at all.
There are also advanced movements that are very similar to Push Press (ex. Power Jerk) as well as more beginner-friendly exercises (ex. Dumbbell Shoulder Press).
My goal is that no matter what equipment you have access to and no matter what your level of experience is, one of these alternative exercises will be a good fit for you.
Power Jerk
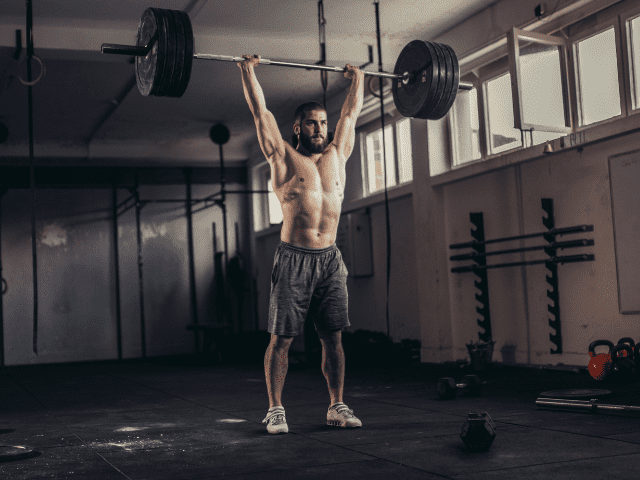
Power Jerk is typically the next progression after a lifter has become proficient at the Push Press.
It involves dropping the hips into a quarter squat position and catching the bar overhead rather than just pressing it to extension.
The catch position will also demand a bit more shoulder mobility and stability as well.
Instructions
- Starting Position: Begin with a clean grip on the barbell, resting on your front shoulders. Your feet should be about hip-width apart, and your elbows should be pointing slightly forward but not excessively high. Ensure a strong, neutral spine.
- Dip: Initiate the movement by performing a shallow dip: bend at the knees, keeping your chest up and heels grounded.
- Drive: Explosively extend your hips and knees, driving the barbell upward. Use the power from your legs rather than trying to press the weight up.
- Drop and Catch: As the barbell ascends, quickly drop under the bar by re-bending the knees. Your feet might move slightly outward for a better base of support.
- Recovery: Stand tall by fully extending your knees and hips, with the barbell locked out overhead.
- Lowering the Bar: Safely return the bar to the front shoulders or drop it if you’re using bumper plates in an appropriate setting.
Coaching Points
The Power Jerk is a compound movement specific to Olympic lifts. This is also a great movement for field and court sport athletes that needed overhead power. This movement should be trained and programmed according to goals, injury history, athlete readiness, and time of year.
Med Ball Power Jerk
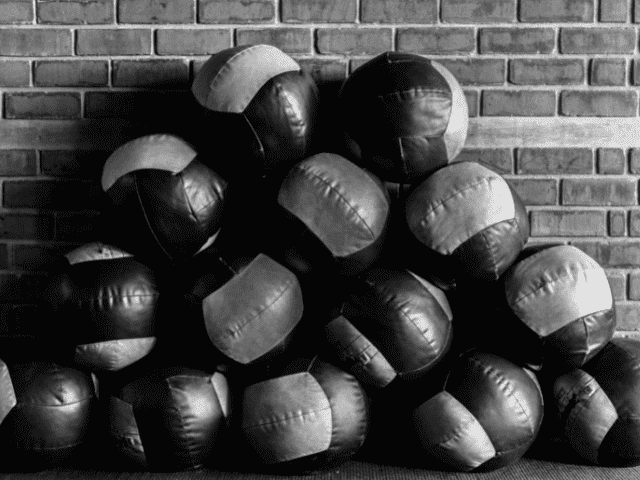
If you don’t have a barbell (or if you’re not comfortable with the technique yet), Med Ball Power Jerks can serve as a solid Push Press alternative.
They won’t build the same amount of strength because you’ll be limited by the amount of weight you can use, but they’re still a great movement for developing upper-body power.
Step-by-Step Instructions
- Make sure you have clearance above you to throw the ball. (Either outside or inside with high ceilings)
- Grab a medicine ball and stand tall with feet roughly hip-width apart.
- Med Ball should be at the chest. Hands under the ball, palms facing towards one another.
- Perform a 4 to 6-inch dip of the knees and hips, keeping the torso vertical and feet flat-footed on the ground.
- Now, aggressively drive up, fully extending through the hips, knees and ankles and push/throw the ball as high as possible.
- Allow the ball to hit the ground before resetting for the next rep. Trying to catch the ball out of the air is a good way to jam a wrist or finger.
Coaching Points
Drive through both arms equally. There is a natural tendency to allow your dominant arm to take over and shift more underneath the ball. Make sure you’re staying balanced with each rep.
Med Ball Exercises like Med Ball Power Jerks are great movements for athletes to build explosive power. I recommend incorporating them early in your workouts while you’re still fresh to maximize power output.
If you’re already familiar with Wall Balls that are used extensively in CrossFit, a Med Ball Power Jerk is very similar. The differences are that it starts with a quick dip as opposed to a full squat and you throw the ball as high as possible each rep instead of aiming for a target.
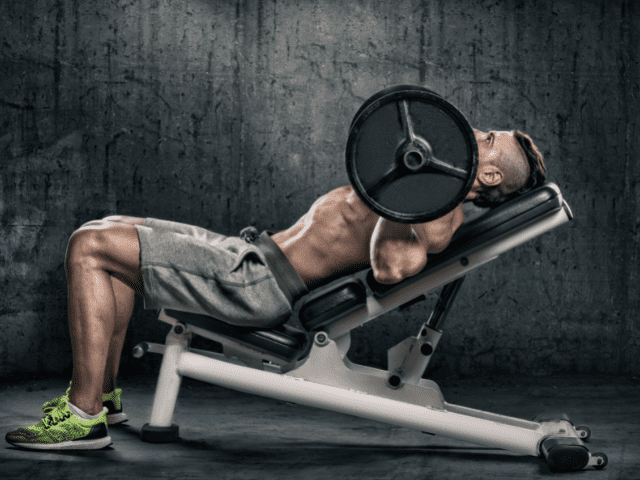
Floor Overhead Press
Floor Overhead Press, also referred to as a Z Press, is a unique barbell overhead press.
By sitting on the floor, the legs are taken completely out of the lift (basically the opposite of a Push Press).
The core is heavily challenged during a Z Press to maintain an upright posture while pressing.
How To
- Sit on the floor in front a rack, legs straight out in front.
- Brace the core and unrack the bar (or have a partner hand it to you).
- Make sure you’re posture is good and your core is tight before trying to press.
- Press the bar to full extension overhead.
- Lower the bar back down to under the chin and repeat.
Coaching Points
The Z Press demands some hamstring flexibility and core stability to maintain the body position while pressing. Deficits in either of these areas will greatly hinder your ability to be able to do Z Presses.
Once the bar crosses the top of the head, ‘pull the head through’ so that you’re pressing the bar directly over the ears.
Strength Trivia: The Z Press got its name from legendary strongman Zydrunas Savickas who made the lift popular.
Thrusters
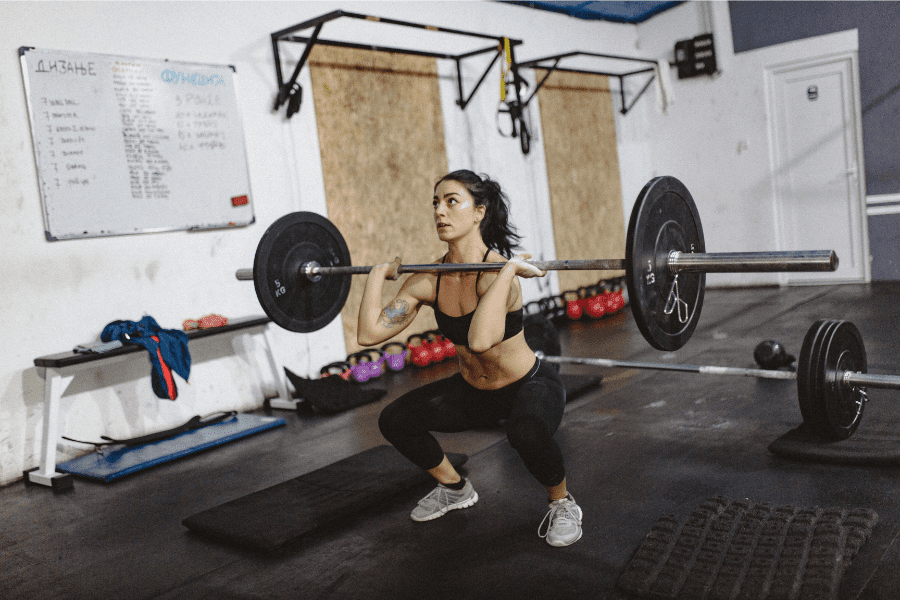
Thrusters are essentially a Push Press combined with a Front Squat.
Instead of the short dip and drive that is associated with a Push Press, a Thruster involves a full Front Squat before driving up into the Overhead Press.
How To
- Start with the barbell in a front rack position – the same as you would for a Front Squat.
- To get to this position you can either take the bar out of the rack or clean it from the floor.
- Now, with feet shoulder-width apart and core braced, descend down into a Front Squat.
- Once you reach full depth, explosively drive up.
- As you reach full extension with the hips, drive the bar up to an overhead position.
- Return the bar back to the starting position on the shoulders and repeat.
Coaching Points
Thrusters are a complex movement, combining the movements of two technical lifts – the Front Squat and the Push Press. If you’re not already proficient in both of those lifts I would recommend becoming familiar with those first.
I know many CrossFit workouts prescribe a high volume of Thruster reps and encourage you to work as fast as possible. Having said that, always make sure that you’re able to maintain proper technique and keep a braced core when squatting.
Tired of coming up with your own workouts? But don’t want to pay an arm and a leg?
I post workouts 5 days a week right here. (Did I mention they’re free?)
Landmine Press
If you want something a little “outside-the-box”, a Landmine Press makes an excellent Push Press alternative. You even have the option of approaching it more like a strict Overhead Press, or use your hips and turn the Landmine Press into an explosive movement – just like a Push Press.
How To
- Setup a landmine attachment with a barbell.
- Grab the end of the barbell and start with it at chest level.
- Feet should be shoulder-width apart with knees slightly bent and core braced.
- Remove one hand from the bar and then press the bar to full extension with the other arm.
- Lower the bar back to chest level under control.
Coaching Points
Keep the core braced and maintain a neutral torso. If you find yourself leaning back and arching the low back, lower the weight if needed and correct your form.
If you don’t have a landmine attachment for Landmine Press, don’t worry! Here is how you can make your own DIY Landmine Attachment with just a tennis ball.
Bench Press
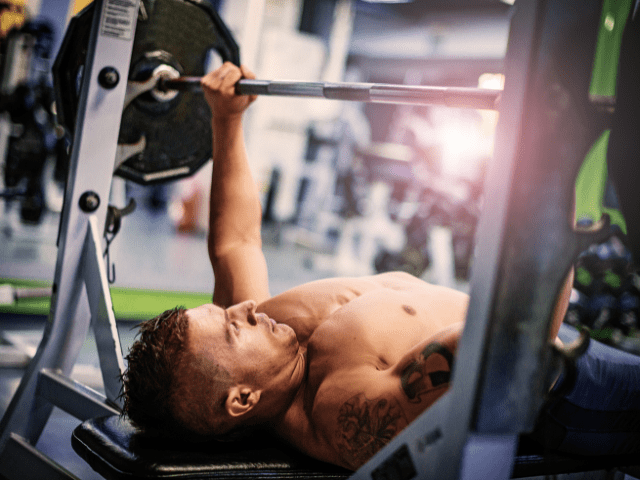
Bench Press may not involve pressing weight overhead, but it’s still one of the best upper-body movements you can do to develop strength.
Step-by-Step Instructions
- Set the barbell on a bench press rack and load it with the desired weight.
- Lie on the bench with your eyes directly under the bar. Plant your feet flat on the floor.
- Pull your shoulder blades back and engage your lats to create a stable base.
- Grasp the bar with hands slightly wider than shoulder-width, palms facing away from you.
- Lift the bar off the rack and position it above your chest with arms fully extended.
- Lower the bar to your mid-chest, keeping your elbows at a 75-90 degree angle.
- Push the bar back up to the starting position, fully extending your arms.
- Safely return the bar to the rack.
Coaching Points
Do not overarch the back or let your butt come off the bench when doing Bench Press. Most professionals will not accept repetitions if the butt comes off the bench but also you can possibly injure yourself with poor form.
Do not let the elbows flare out away from the midline. The shoulders are incredibly vulnerable in these positions and the sheer force placed on the shoulders will lead to injury if the technique is not made a priority.
Incline Bench Press
Incline Bench Press is another great movement for developing upper-body strength and, because of the angle, the shoulders are more involved than they are with a regular flat bench.
Step-by-Step Instructions
- Adjust the bench to a 15-30 degree incline. Set the barbell on the rack.
- Sit on the bench, feet flat on the floor.
- Pull your shoulder blades back and engage your lats to create a stable base.
- Grasp the bar with hands slightly wider than shoulder-width, palms facing forward.
- Lift the bar off the rack and hold it above your upper chest with arms fully extended.
- Lower the bar to your upper chest in a controlled manner.
- Press the bar back to the starting position, extending your arms fully.
- Safely return the bar to the rack after your set is complete.
Coaching Points
Make your angle appropriate for your goals and injury history. I do not typically recommend an incline bench angle greater than 45 degrees.
If a lifter wants to do a shoulder press, I would recommend standing and pressing.
The Incline Bench Press is a great movement for lifters looking to gain strength in their shoulders and chest. Using the same implement will also carry over to specific strength for the bench press.
Dumbbell Shoulder Press
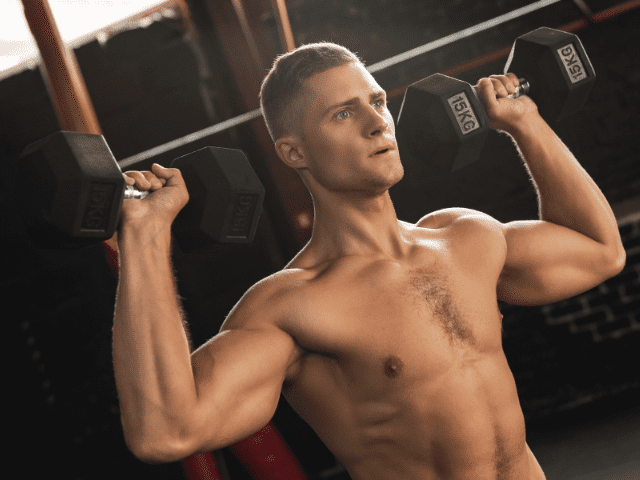
I’ve given you a lot of barbell overhead press movements on this list, but many of those movements can also be done with dumbbells.
The Dumbbell Shoulder Press is a good example of this. Similar movement and a similar range of motion – just done with dumbbells instead of a bar.
Dumbbell Shoulder Press isn’t the only dumbbell variation that I could have added either: Dumbbell Push Press, DB Z Press and Dumbbell Power Jerk are all dumbbell variations that could sub for Push Presses.
Step-by-Step Instruction
- Keep a neutral spine, and a nice flat back, and lift the dumbbells into your pressing position.
- I recommend palms face away or toward each other (whichever feels more comfortable).
- Brace the abdominal muscles and engage the upper back.
- Press the dumbbells directly overhead.
- Lock the reps out and pause for about 1 second with each repetition.
- Slowly lower the dumbbells back to the starting position.
Coaching Points
Keep the core engaged as you press. If you feel you are arching your back as you reach closer to lockout, consider going down in weight.
Remember this is not a push press. This is a purely upper-body pressing movement. If you are using your legs, even slightly, this would be called a Push Press. The push press is a great movement as well BUT a Dumbbell Shoulder Press should be focused on the shoulders, no cheating.
Kneeling Single Arm Press
This is one of my favorite Overhead Press variations to build shoulder strength. Not only will the Kneeling Single Arm Press develop upper-body strength, but it will also help improve core stability as well.
Step-by-Step Instruction
- Starting Position: Begin in a half-kneeling position with one knee down and the other foot planted in front. Ensure the forward foot is in line with the back knee.
- Hold the Weight: With the arm on the same side as the down knee, hold a dumbbell at shoulder height.
- Stabilize: Engage your core and make sure your hips are square to avoid leaning to one side.
- Press: Extend your arm, pressing the dumbbell overhead. Keep your wrist stable and shoulder away from the ear.
- Top Position: Ensure your arm is fully extended overhead, without arching your back.
- Lower: Control the descent, bringing the dumbbell back to shoulder height.
Coaching Points
I am a huge fan of the tall-kneeling position. It challenges the lifter to balance, stay tall and rigid, and disallows the legs from cheating in helping the press.
Kneeling Single Arm Press is a great movement for novice lifters that need a progression into overhead pressing. After 2-3 weeks of training, 2 dumbbell, standing, landmine, and barbell options will fall in line for this progression.
Handstand Push Ups
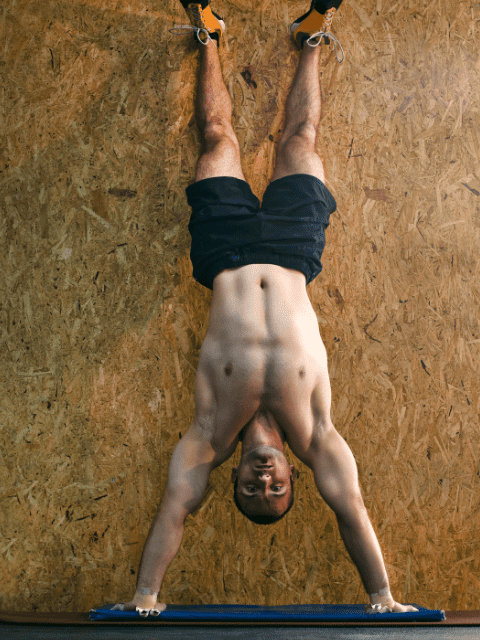
Easily one of the hardest bodyweight exercises to perform, Handstand Push-Ups will test your shoulder strength, shoulder stability, core and coordination all in one movement. Because it’s a bodyweight movement, it has the advantage of being able to be done anywhere without the need for equipment.
Note: Handstand Push-ups are an ADVANCED movement. I would not suggest this for beginners as it can be dangerous if you don’t have sufficient shoulder and core strength.
Step-by-Step Instructions
- Start in a handstand position with your hands on the ground, arms straight, and body in a straight line. You can kick up into the handstand or walk your feet up a wall to get into position.
- Slowly lower yourself down, bending your elbows and keeping your body in a straight line. Your head should lightly touch the ground, or a mat, and then push back up to straight arms.
- Control your descent and make sure to keep your body in a straight line throughout the movement. Avoid arching or sagging your back, and keep your elbows close to your body.
- Once you can perform a single repetition with proper form, aim to do sets of 3-5 reps. Rest for 2-3 minutes between sets, and focus on maintaining good technique and control.
Coaching Points
Handstand Push-ups require a significant amount of strength in the shoulders, triceps, and core. Therefore, it’s important to build a strong foundation by focusing on exercises that target these muscle groups. This may include exercises like Shoulder Presses, Dips, and Planks.
Handstand push-ups require a lot of coordination and balance. Concentrate on your form like keeping your core tight and keeping your elbows close to your body.
Get Shredded… For Free
Get a free workout Monday through Friday, posted right here on Horton Barbell. These workouts are designed to help you get strong, in shape and look great at the beach!
Final Thoughts
Push Press is a beast of an exercise for developing strong shoulders, but sometimes Push Presses are just not an option. Sometimes you may not have the proper equipment available to you or other times you might just be looking to add some variety to your training program.
In these situations, you’ll need a Push Press alternative and I hope that one of the exercises I’ve listed here fits what you were looking for.
More Links and Info
There is almost always an alternative for any exercise regardless of what limitations you may have. Check out these alternatives for Overhead Press and Z Press.