8 Thruster Alternatives For Hip Drive & Shoulder Strength
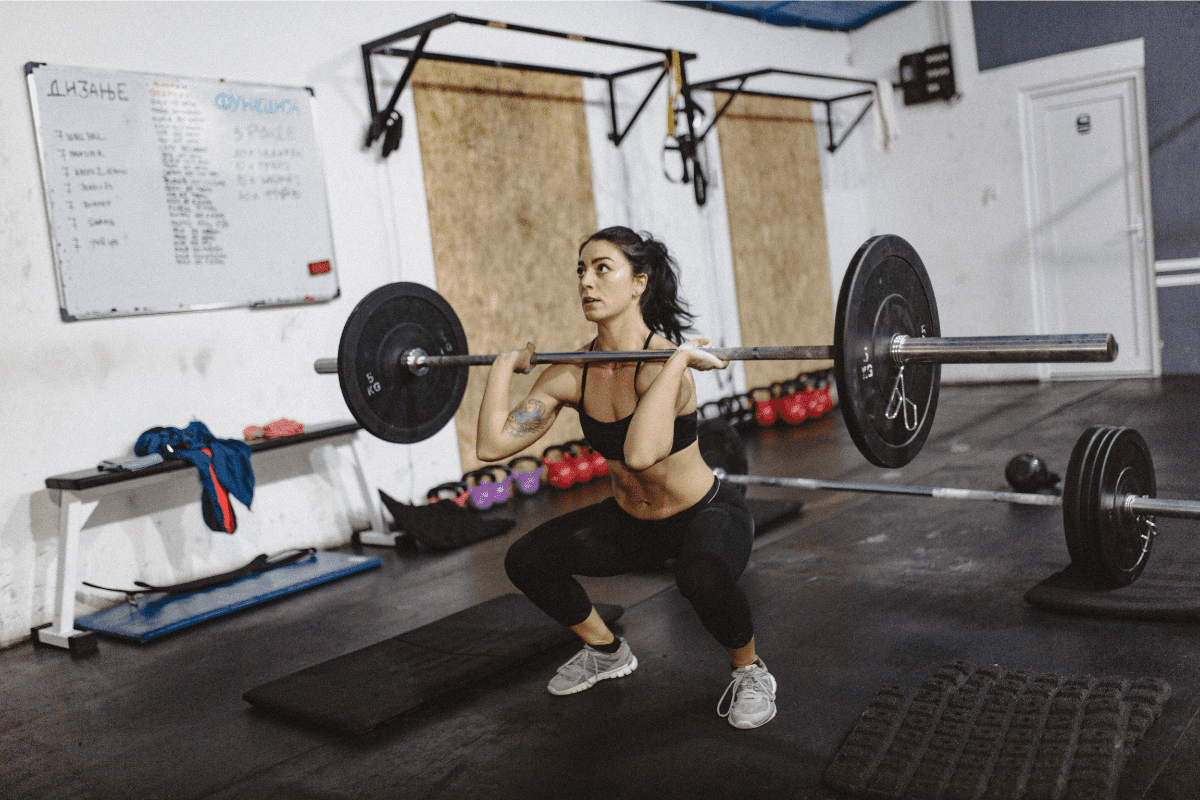
Thrusters are an exercise that has been made very popular by CrossFit.
It’s basically a combination of a Front Squat and a Push Press. It’s a total body movement that can not only improve strength but can absolutely gas you pretty quickly.
However, as good of an exercise as Thrusters may be, sometimes you may need an alternative for them.
Perhaps you don’t have a barbell or maybe you’re just not comfortable with the technique.
Whatever the reason, you’re in the right place. I’m about to share with you 8 of my favorite alternatives for Thrusters.
Alternatives For Thrusters
Thrusters are a unique exercise and not many other exercises mimic the same exact movement. In this list of alternatives, I’ve tried to include other total body movements that emphasize hip drive and/or overhead pressing.
I’ve also tried to include exercises that use all different types of equipment along with exercises for beginners and advanced lifters.
Hopefully, at least one of these exercises works as a good substitution for you.
Wall Balls
Equipment Needed
- Medicine Ball
- Wall at least 10 feet tall that you don’t mind hitting a medicine ball off of
How To
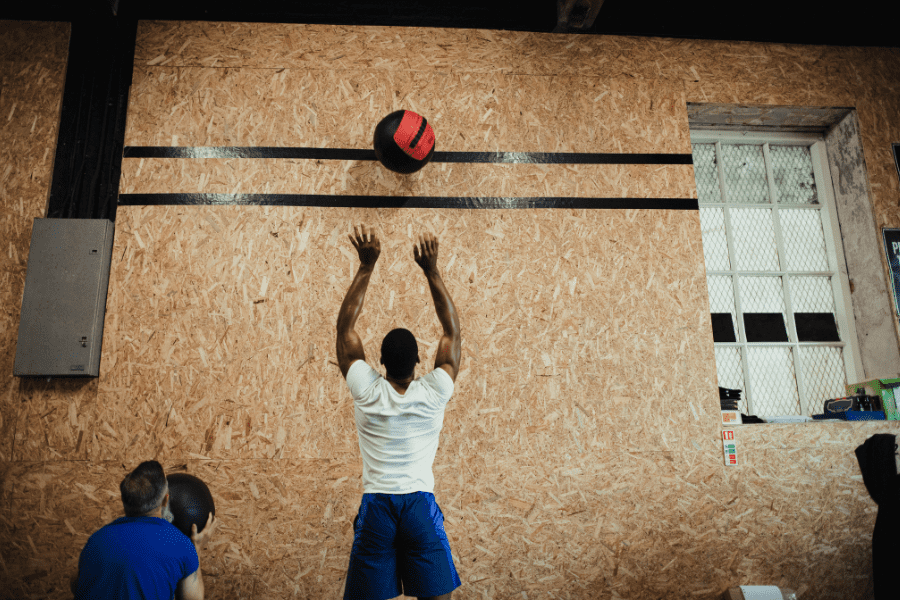
- Start with a medicine ball held right at the chest.
- Now, with feet shoulder-width apart and core braced, descend down into a squat.
- Once you reach full depth, explosively drive up.
- As you reach full extension with the hips, throw the ball vertically to a spot 10 feet up on the wall.
- Catch the ball as it falls down from the wall and repeat.
Coaching Points
I know many CrossFit workouts prescribe a high volume of Wall Ball reps and encourage you to work as fast as possible.
Having said that, always make sure that you’re able to maintain proper technique and keep a braced core when squatting.
Don’t let the combination of fatigue and trying to rush cause you to use poor technique as this can lead to injury.
Push Press
Equipment Needed
- Multi-purpose lifting rack
- Barbell
- Bumper Plates (technically possible to do with Iron Plates, but Bumper Plates are highly recommended)
Step-by-Step Instructions
- Set the barbell at the height you would normally front squat with. (Barbell 1-2 inches below the flexed elbow, still on the hooks).
- Grab the barbell with your index finger on the knurling or just outside the knurling. (Flexibility and what feels comfortable are important here).
- Flex the elbows up slightly and keep your knuckles fairly vertical to the ceiling.
- You are not taking a “Front rack” position here. The elbows will be slightly up but the bar is not resting on the anterior delts.
- To unrack the bar, take a deep breath and brace the abdominal muscles and upper back. Use a staggered stance to unrack the bar.
- Take 2 steps backward and be sure that you will not hit the hooks or anything above your head when you start to press.
- Initiate the movement with a “dip” or bend of the knee that will help you propel the barbell up with momentum. Do not bend the knee forward onto the toes.
- Think about how you initiate a squat. The knee bend should be very similar to this movement.
- This is a quick movement that helps get the barbell moving upward.
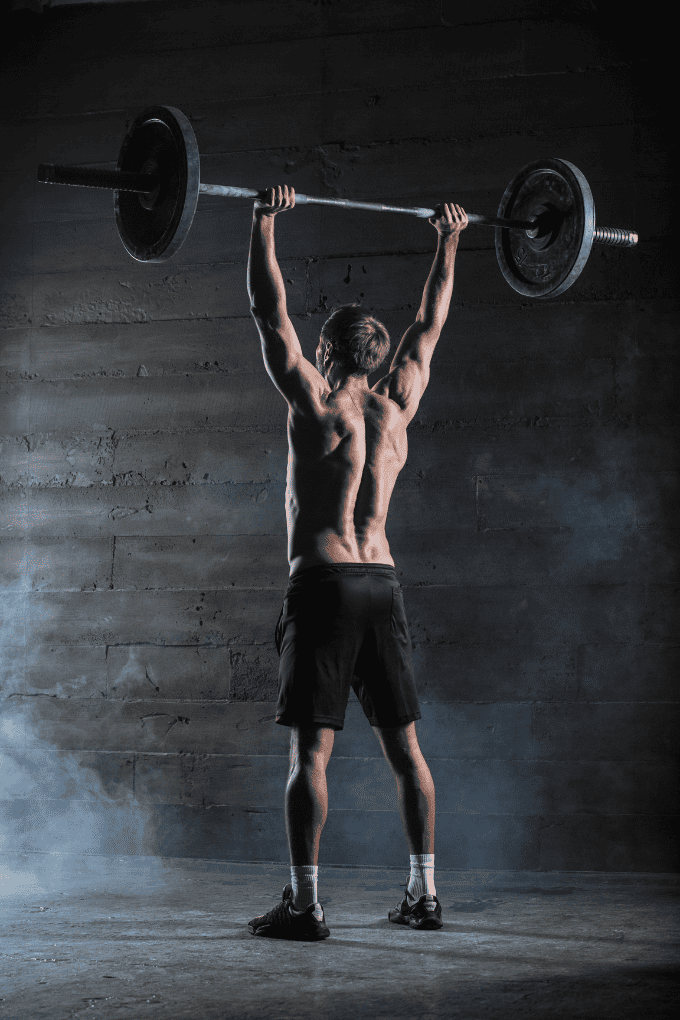
- As you extend the legs, push the barbell up. Be sure not to hit your chin. Lock the rep out by holding the barbell overhead for about 1 second.
- Some coaches use the queue “push your head through the arms” to help lock out the rep and stabilize the bar overhead.
- Slowly bring the barbell back down to prepare for the next repetition.
Coaching Points
Push Press is a great movement for field and court sport athletes that need overhead strength and power.
This movement should be trained and programmed according to goals, injury history, athlete readiness, and time of year.
Front Squat
Equipment Needed
- Squat Rack
- Barbell
- Bumper or Iron Plates
- Lifting Straps (optional / if needed)
Step-by-Step Instruction
- Set the height of the squat rack so that the barbell is about 1-2 inches below the flexed elbow (Elbow pointing toward the squat rack prior to taking the weight off the hooks).
- One of the first considerations you are going to want to make is what grip you want to use to perform the front squat.
- Later in the article, I will talk about different grips and the reasoning behind each grip.
- For now, I am going to assume you are using a two-finger clean grip. (Most commonly used by athletes).
- Walk closely to the barbell and place it very close to your neck.
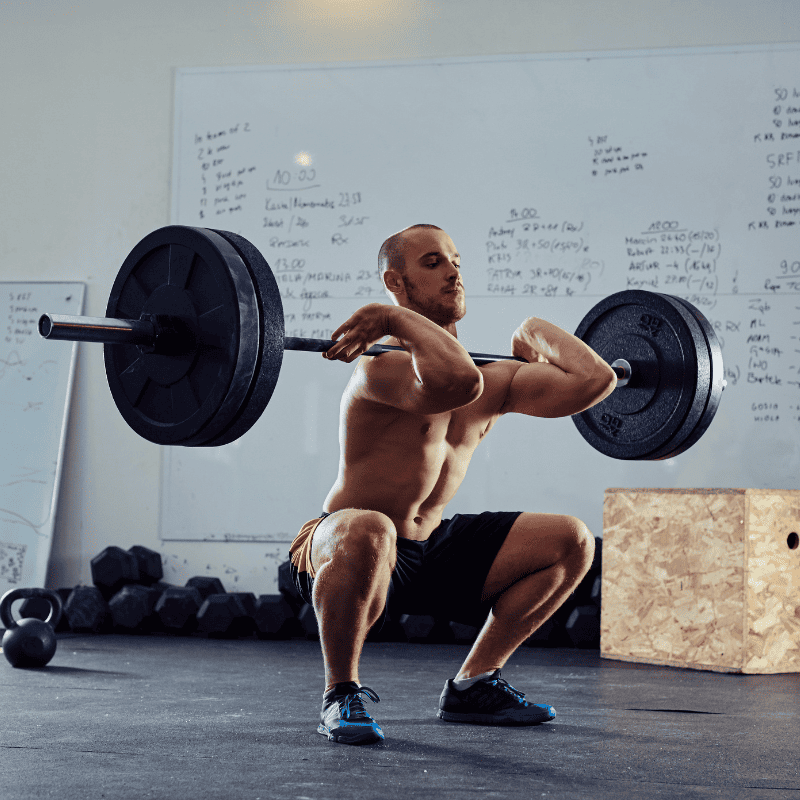
- Bring your elbows up and the barbell should be resting on the raised anterior deltoid muscles. You are now holding the bar with what’s called a “front rack position” (THERE SHOULD BE NO STRESS OR TENSION ON THE HAND OR WRIST TO HOLD THE BARBELL).
- With your front rack, lift the bar off the hooks. I recommend a staggered stance to lift the barbell off the rack.
- Take 2 steps back and set your feet slightly wider than shoulder width. Toes slightly pointed out.
- Maintaining a strong front rack, take a deep breath, and brace the core.
- Initiate the squat by hinging the hips back and bending the knees simultaneously.
- Descend into the squat with control until your hip crease is slightly below the knee. (Most professionals consider this to be parallel or just below parallel).
- At this point, the core should be braced, the front rack strong, elbows up, and the lifter is ready to drive out of the “hole” and stand the weight back up.
- Keep a balanced foot with a strong arch, drive through the heels, and drive the hips until you are back at the top of the movement and ready for the next rep.
Grips
- Clean grip with 1 or 2 fingers. This is the most common grip used by Olympic lifters and athletes. This trains the specific position the bar would be in at the catch of a clean and therefore very advantageous for these athletes.
- Crossed arms. This is a common grip for athletes that want all the benefits from the front squat but may not have the flexibility or need for a finger grip.
- Lifting Straps. This allows the lifter to get the front rack position, engaging the upper back musculature, and takes a lot of stress off the fingers and wrists.
Coaching Points
Be patient with your flexibility. Persistence and working hard on your flexibility will pay off with Front Squats. Remember to always warm up prior to any lifting session. Work on flexibility drills during warm-up sets as well.
Muscle Snatch
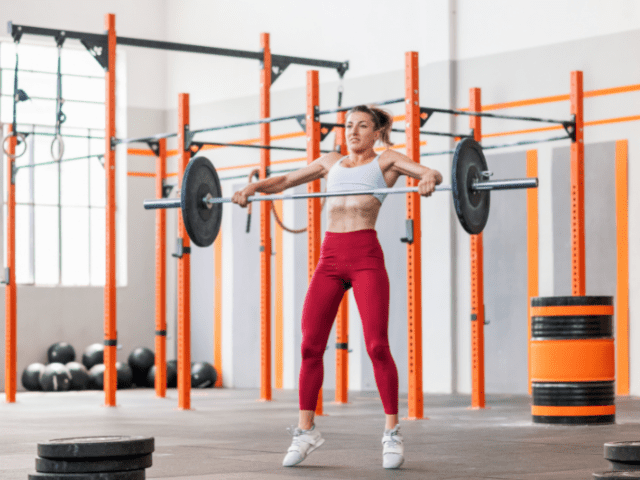
Equipment Needed
- Barbell
- Bumper Plates
Instructions
Starting Position
- Start with feet hip-width apart with the bar resting close to the shins (directly above the knot in the shoe lace is my favorite coaching cue)
- Use a wide grip. At minimum, hands should be placed outside the snatch rings on the barbell. (The outermost rings closest to the barbell sleeve)
- Hook grip is recommended, but not mandatory.
- Eyes should be focused straight ahead or slightly down.
- Back should be flat. Shoulders pulled back (chest out) and Lats engaged.
- Hips higher than knees. Shoulders higher than knees.
- Breathe in, brace the core.
Movement
- Initiate the first pull by driving the feet through the floor. Hips and shoulders should rise at relatively the same rate. Bar should stay close to the shins.
- Once the bar crosses the knees, explosively extend the hips.
- Pull the bar high once triple extension of the hips, knees and ankles has been achieved.
- Finish the movement by rotating the hands above the elbow.
- The finishing position should be with the lifter fully extended. This is much different than most other variations of the snatch where the lifter catches in a full or quarter squat.
Coaching Points
Once the weight gets heavy enough, the natural adjustment of the lifter will be to want to bend the legs to dip slightly under the bar in order to get full arm extension.
Resist this urge to want to dip the legs. If doing a proper Muscle Snatch isn’t possible without bending then lower the weight.
Single Arm Dumbbell Snatch
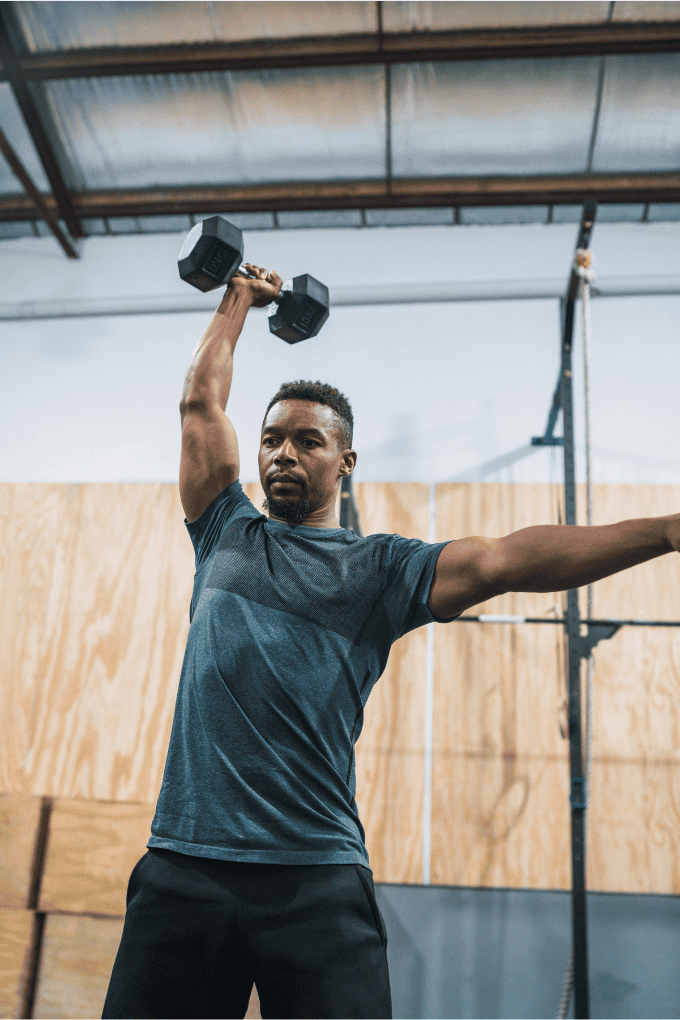
Equipment Needed
- Dumbbell
Step-by-Step Instructions
- Grab a dumbbell and stand with feet about shoulder-width apart.
- Put a slight bend in the knee, brace the core and set the back – shoulder blades pulled back, lats engaged, chest out.
- Hinge forward by pushing the hips back and let the dumbbell slide down right in between the knees, coming at a stop just below the knee.
- You are now in the ‘power position’.
- From here, drive the feet through the floor and aggressively extend the hips, driving the shoulders up and slightly back.
- As you reach triple extension of the hips, knees and ankles – use a quick, powerful shrug and allow the elbow to break and begin the pull with the arm.
- Keep the dumbbell close to the body as it travels up.
- Once the dumbbell reaches the highest point of the pull, rotate at the elbow to catch the dumbbell overhead while simultaneously dropping the hips into a quarter squat and shift the feet slightly out.
- Finish the rep by standing tall and lowering the dumbbell down to the shoulder first and then back to the starting position under control.
- Repeat until all reps are completed and then switch arms.
Coaching Points
The two biggest mistakes that I see with Single Arm Snatches are not keeping the dumbbell close to the body on the way up and letting the dumbbell ‘yank’ the shoulder down as it comes back to the starting point.
Kettlebell Swing
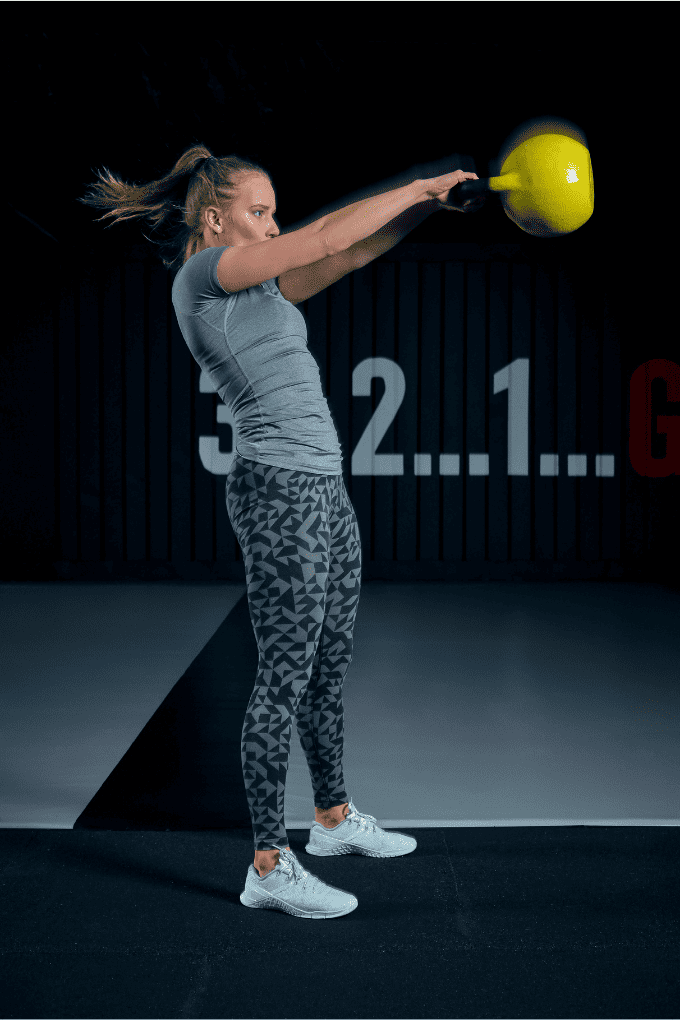
Equipment Needed
- Kettlebell (you can also use a dumbbell by grabbing the end of it)
Step-by-Step Instruction
- Approach the kettlebell with a stance slightly wider than shoulder width.
- Take a deep breath, slightly bend the knees, hinge at the waist, and squeeze the kettlebell with both hands.
- Maintain a neutral spine, eyes focused on something just in front of you.
- Initiate the movement by pulling the dumbbell off the ground and into the “power position”.
- The power position is where the hips are flexed (loaded), knees are slightly bent, and you are now going to drive the kettlebell forward.
- Extend the hips and knees, driving the kettlebell forward.
- The kettlebell will drift from the hip extension to about shoulder height but should not go any higher.
- Gravity will bring the kettlebell back down.
- Actively “pull” the kettlebell back to the power position. You should never feel loose or out of control as you swing.
- As you pull the kettlebell and prepare for the next rep, remember to keep a tight abdomen and upper back.
- This movement is fast and works on rapid force development via hip and knee extension.
Coaching Points
The Kettlebell Swing is a great movement to train rapid hip extension and flexion. Remember to always keep a neutral spine (DO NOT ROUND YOUR BACK).
Choosing the proper kettlebell weight is important. Heavier is not always better. Because of the rapid nature of the kettlebell swing, the emphasis should be on velocity, speed, and power.
Curl and Press
Equipment Needed
- Dumbbells
Step-by-Step Instruction
- Grab dumbbells that you can perform at least 8 perfect reps with here.
- Standing nice and tall, hammer curl the dumbbells up to shoulder height.
- From here, press the dumbbells straight up overhead to lockout.
- Slowly bring the dumbbells back and down to shoulder height.
- From here, slowly return the dumbbells to your side.
Coaching Points
Go slow! Time under tension is key here. Feel the burn, especially on the way back down.
It’s easy to get out of control and begin swinging dumbbells all over the place with Curl and Presses. Stay in control of the weight throughout.
Tire Flip
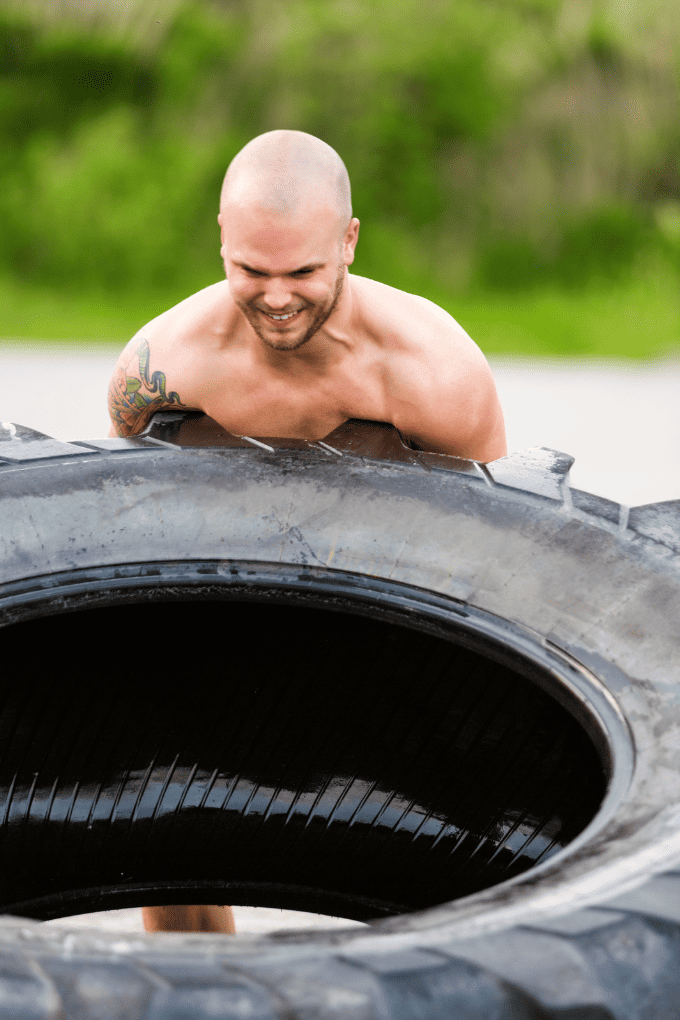
Equipment Needed
- Tire
How To
- Make sure you have plenty of space to be able to safely flip the tire.
- Start with the tire laying on the ground on its side.
- Stand with toes almost against the tire, feet roughly shoulder-width apart.
- Drop the hips and reach under the tire.
- Once you have a good grip under the tire flatten your back and brace your core.
- Drive the feet through the ground and aggressively begin to extend the hips.
- If the tire is heavy, you can slide one knee under the tire to help with leverage once the tire is high enough.
- When the tire gets above stomach height, flip your hands around so you can begin to push the tire.
- Push the tire forcefully forward – extending with both your arms and legs.
- The tire should land on its side. Repeat for the designated amount of distance or reps.
Coaching Points
The biggest key to Tire Flips is perhaps in finding the right tire.
Every school I’ve ever worked at had big tires that were used for Tire Flips.
However, the size and weight of these tires have all been drastically different. They’ve ranged from tires that were barely heavy enough to be worth using to tires that took two and sometimes even three football players to flip.
Just like with Deadlifts and Power Clean, it’s extremely important to drop the hips, use the legs and keep the back flat. Once fatigue starts to set in I generally see athletes resort to using more back than legs.
If form reaches this point then it’s time to stop flipping the tire.
Get Shredded… For Free
Get a free workout Monday through Friday, posted right here on Horton Barbell. These workouts are designed to help you get strong, in shape and look great at the beach!
Final Thoughts
Thrusters are an awesome exercise for working the entire body, but sometimes Thrusters are just not an option. Maybe you don’t have the proper equipment or maybe you’re just looking to add some variety to your workout.
In these situations, you’ll need a Thruster alternative and I hope that one of the exercises I’ve listed here fits what you were looking for.

