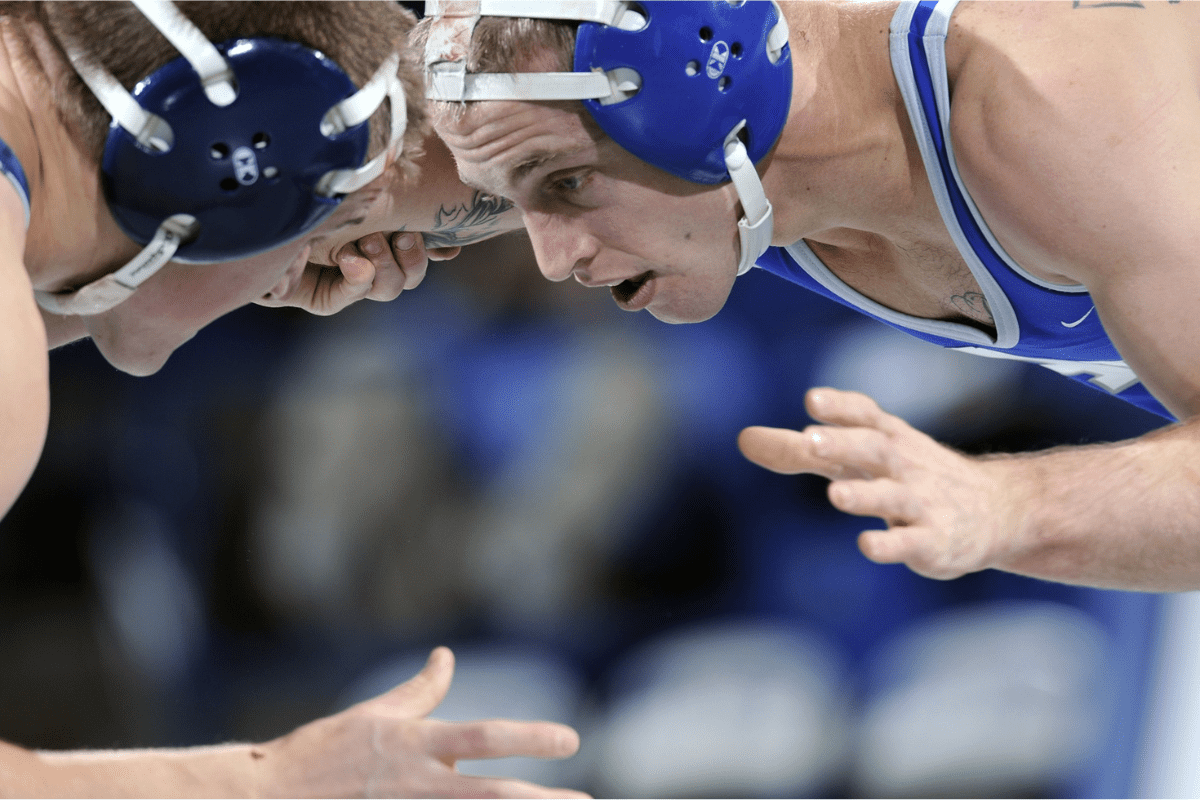
10 Best Exercises for Wrestling To Maximize Performance
When designing a wrestling strength and conditioning program, figuring out what the best exercises are to decrease the risk of injury and improve performance is critical. This is because we’re almost always limited by time.
For collegiate programs, the NCAA mandates how much time is allowed for training each week. But, even if there isn’t a time-limiting rule, we all have things in our life – school, work, family, etc that makes it hard to spend hours on end in the gym.
Figuring out the best exercises that absolutely should be in your wrestling strength program can help you maximize your time in the weight room and to make sure your efficiency matches your intensity.
So, which ten exercises do I think are the most important and why should you care? I’ve spent 20 years working as a sports performance coach and I’ve worked with multiple elite-level wrestlers. I may not know much, but I do know strength and conditioning.
Top Exercises for Wrestling
Power Clean
If I could only pick one exercise to train wrestlers it would be the Power Clean. Power Cleans are basically a total body movement that develops power, strength and coordination.
Want an explosive shoot? The explosive triple-extension of a Power Clean mimics a shoot more than any other movement in the weight room.
Equipment Needed
- Barbell
- Bumper Plates
How To
- Start with feet hip-width apart with toes straight ahead (or ever so slightly pointed out).
- The bar should be over the middle of the feet, almost touching the shins.
- Grip should be slightly wider than shoulder width.
- The grip is a pronated grip (both palms facing down) and the lifter can choose, although highly recommended, to use a hook grip.
- The wrists should be slightly curled so that the knuckles are pointed straight down to the ground.
- Shoulders slightly over the bar, arms straight, hips slightly higher than the knees.
- Back should be flat or have a slight arch. Shoulder blades should be pulled back and the upper back including the lats should be engaged.
- The last thing that should happen as the lifter is setting up in their starting stance is to take a deep breath in and engage, or brace, their core.
- Raise the bar off the floor at a constant speed using the legs by driving the feet through the ground.
- As the bar comes up, keep the bar close to the shins and the feet should remain flat, driving the feet hard into the floor.
- Once the bar crosses the knees, the bar is then pulled explosively, bringing the shoulders back and up.
- As the lifter continues to drive vertically, the shoulders will end up slightly behind the bar and the hips, knees slightly bent and the ankles will have just a bit of flexion left in them.
- The triple extension of the hip, knees and ankles is followed instantaneously by a quick, aggressive shrug.
- Elbows should break out to the side as the bar continues to rise.
- As the bar elevates from the shrug, the feet shift from hip width to shoulder width to prepare for the catch.
- Elbows rotate around the bar and ‘shoot through’ to help receive the bar in front of the shoulders. Triceps should be parallel to the floor in the finished catch position with the elbows forward.
Coaching Points
My biggest coaching point for Power Cleans is to just say if you don’t feel comfortable with your technique, then I would refrain from doing them. Wait until you can be properly coached on how to do them correctly so you do not injure yourself.
In the meantime, here are 9 Power Clean alternatives you may be able to try out instead. Some of the alternate exercises I list there are much more beginner-friendly.
Back Squat
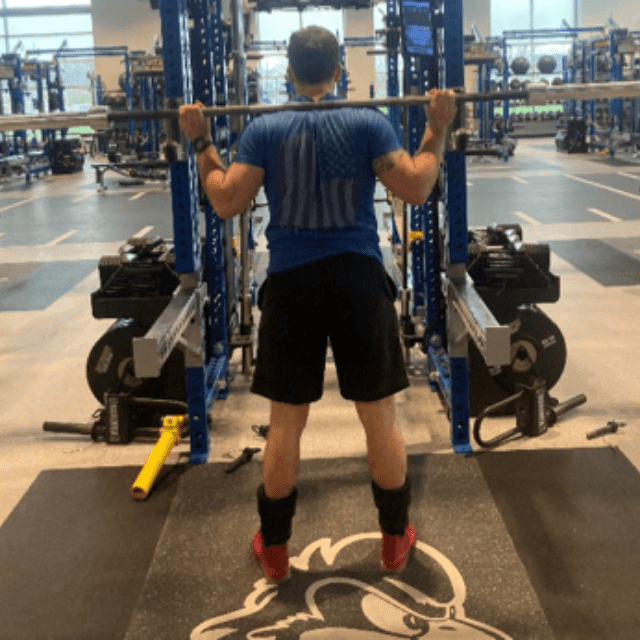
I would consider Back Squat the 1B to the Power Clean’s 1A. I think it falls behind the Power Clean, but not by much.
Having a strong lower body is critical to a wrestler’s success and no exercise is better equipped for building a strong lower body than Back Squats.
Yes, there are other effective forms of squatting (there is another on this list) and single-leg movements are very important too (there is one of those on this list as well). But, Back Squats should be one of the primary focal points of your training.
Equipment Needed
- Squat Rack
- Barbell
How To
Starting Position
- The athlete should actively pull their shoulders together and back in order to both create a shelf for the barbell to rest on.
- A good cue here is to have the athlete pin their elbows down by their sides, similar to the bottom position of a Lat pulldown, before placing the bar on their shoulders.
- Generally speaking, the athlete should place their hands as close together as comfortably possible, which helps maintain the aforementioned upper body tightness and shelf for the barbell to rest on.
- After setting up properly, the athlete un-racks the bar and walks it out of the uprights, takes a big breath in, braces their core, and initiates the eccentric portion of their squat.
Movement
- While maintaining a tight brace in their core and tension in their upper back (as mentioned in the setup paragraph), the athlete initiates downward motion of the bar via simultaneous hip and knee flexion until the crease of their hip goes below the knee.
- The especially important part of the range of motion is taking the muscle to its full eccentric length, demonstrating that athletes further benefit by taking their squats to the deepest depth that their mobility allows.
- Once the athlete reaches their lowest position in the squat, they transition from the eccentric to the concentric portion.
- The concentric portion of the squat involves the athlete rising out of the hole via a combination of knee and hip extension.
- Once the athlete completes the rep, they exhale, and either initiate the next rep or re-rack the bar.
Coaching Points
There are two bar position options for Back Squat, low-bar and high-bar. I recommend and teach the high bar position when working with athletes, including wrestlers.
The most important aspect to watch for when doing Back Squats is the potential rounding of the back. Immediately end any set where form begins to break down and the back begins to round. A rounded back is probably the most common cause of injury with squatting.
One of the most common mistakes is heels coming off the ground. Athletes who are having trouble due to poor ankle dorsiflexion, long femur length relative to their height, or a combination of both, can use a device to elevate their feet such as weightlifting squat shoes, an angled plate, or 2.5lb weights to help address the issue.
Pull-ups
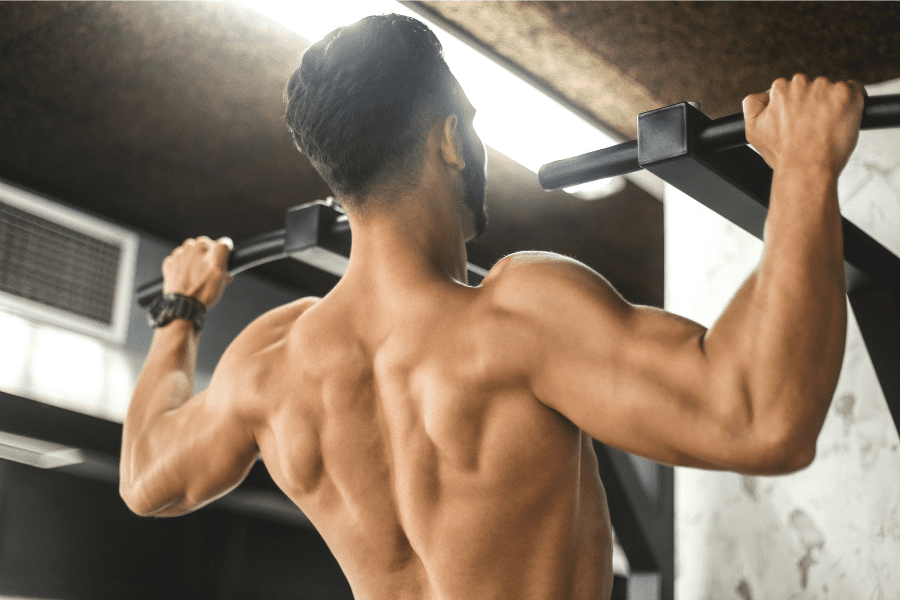
Pull-ups are my favorite upper body exercise for wrestlers.
For beginners, there are modifications that can be made while building the strength to be able to do Pull-ups. Doing Band-Assisted Pullups, Pull-up Holds and Eccentric Pull-ups are all variations that can be utilized until regular Pull-ups can be done.
Once you’ve mastered Pull-ups, it’s just as easy to modify Pull-ups to increase the challenge. Adding weight or controlling tempo are just two ways Pull-ups can be made as difficult as necessary.
Equipment Needed
- Pull Up Bar (Either as part of a rack or a wall-mounted bar)
Step-by-Step Instruction
- Approach the pull-up bar and grab the bar with a pronated grip (palms facing away).
- Use a bench to get to the bar if it is too high.
- Later in the article, I will talk about variations, alternatives, and modifications where the supinated (palms facing in) grip will be discussed.
- Squeeze the bar and engage the core muscles and do not cross your legs.
- Engage the upper back and pull up until your chin is over the bar.
- Pause for 1 second with your chin over the bar.
- Slowly lower yourself back to the starting position.
Coaching Points
Take your time and master the pull-up. The benefits of doing sound pull-ups will pay dividends for your shoulder health and the potential to maximize your upper body strength.
By far the biggest mistake I see in the pull-up is lifters not using a full range of motion. Hang all the way down and maintain great tension through the shoulders and abdomen.
Pistol Squat
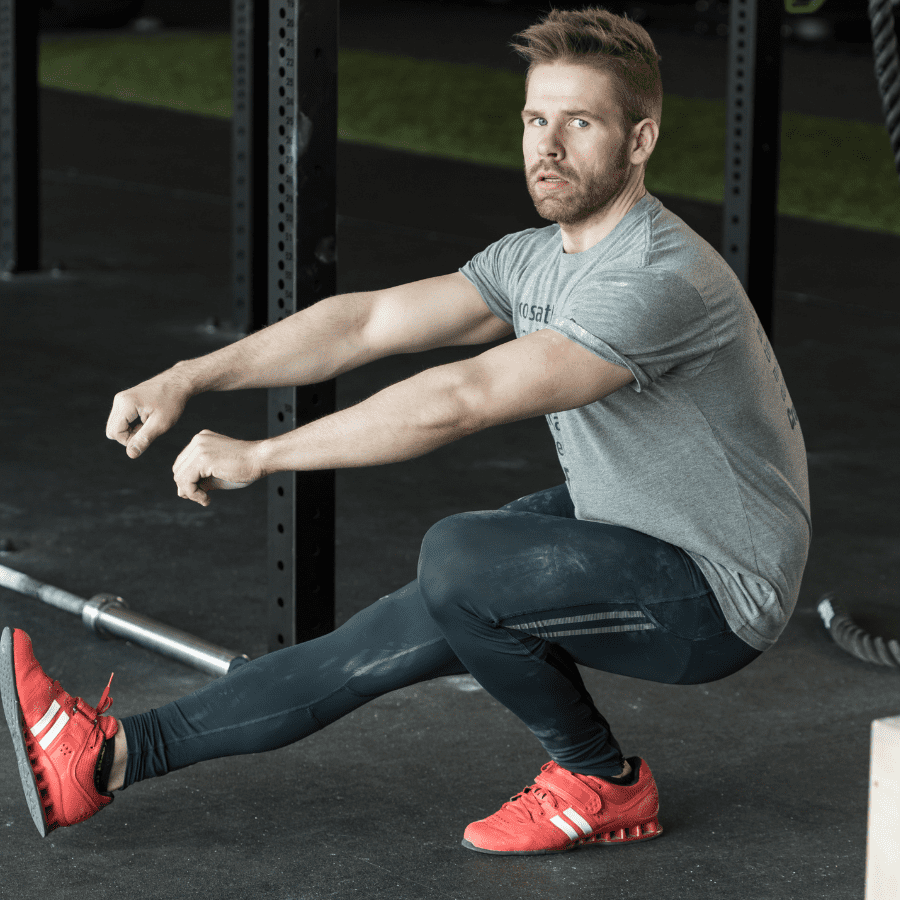
This was probably the exercise that I struggled with the most making a decision. Single leg work is a critical component of any wrestling strength training program. That’s not up for debate. However, I struggled with which single-leg exercise to pick.
I picked Pistol Squats for my single-leg movement for a few reasons.
First, Pistol Squats are literally done on one leg – no opposite leg to use for assistance whatsoever.
Second, I think you really have to be careful with how much posterior chain volume you place into any strength program. For instance, about half of the exercises on this very list are posterior chain movements. Too much posterior chain work can lead to tight low backs (or worse).
Pistol Squats allow athletes to focus on building true single-leg strength without added low back stress.
Equipment Needed
- None (If doing a modified Pistol Squat a box or bench to squat to will be needed)
How To
Pistol Squat On Air
- Stand on one leg with the opposite leg straight and slightly out in front of the body.
- Squat down on the single leg by hinging back at the hips first and then bending the knee and hips until the crease of the hip crosses below the knee.
- Keep the heel flat and your weight distributed between your heel and mid-foot.
- Keep your torso as vertical as possible while maintaining balance and a flat foot.
- The opposite leg should stay straight and extend out in front of you as you squat down (tight hamstrings will make this almost impossible!)
- Once you reach the bottom of the squat, drive the foot through the floor and stand tall.
Pistol Squat To Box
- Instructions are the same as above, except the athlete will squat down to a box (or bench) instead of freely in an open space.
- Make sure the foot is close enough to the box so that the box is not missed when squatting down to touch it. (I’ve seen it happen)
- Control the descent to the box and sit as softly as possible. A light touch-and-go is ideal if possible. My favorite cue for this was to “treat the box like a glass coffee table.”
Coaching Points
If you cannot do a Pistol Squat the first time trying, don’t worry, you’re not alone. Most athletes I’ve worked with have to start by using a bench for pistol squats. The first thing you need to do to start progressing is figure out where your real weakness is: strength or flexibility.
Some lifters simply don’t possess the strength at first to perform a full pistol squat on air. On the other hand, many of the athletes I’ve coached actually have the strength to do a pistol squat, but they lack the mobility to be able to go through the full range of motion without falling or their opposite foot crashing into the ground.
Single Arm Dumbbell Bench Press
For the record, I do have wrestlers Bench Press and think it’s a great exercise for building upper body strength. However, there is a Bench Press variation that I like for wrestling even more – Single Arm Dumbbell Bench Press.
The reason is that SA DB Bench is an anti-rotational exercise. That means that as you bench, the core has to work to keep you from rotating and literally falling off the bench. This utilization of the core is so beneficial for wrestlers who need to be able to maintain core stability while pulling and pushing.
Equipment Needed
- Dumbbell
- Bench
Step-by-Step Instruction
- Grab your dumbbell, sit on the edge of the bench, and sit the dumbbell on your thigh vertically.
- Take a deep breath, lie flat on your back on the bench, and get your dumbbell in position ready to press.
- Lay your free hand on your stomach. Placing your hand on your hip (as shown in the featured image above) will help balance you more is a more beginner-friendly hand placement.
- Keep your feet flat on the floor.
- Keep your butt on the bench.
- Pull your shoulder blades together and keep the back of your head on the bench. You will slightly arch your back. Keep your core tight and keep the shoulder blades pulled back tight.
- The dumbbells should be slightly angled at roughly a 45-degree angle to the torso. (representative of the path you are descending with your elbows).
- Press the dumbbell up.
- Control the dumbbell down during the eccentric movement and draw the dumbbell in, keeping the elbow at that 45-degree angle from the torso.
- The dumbbell will make contact with your torso right at the nipple line on the chest.
- Once contact is made, drive the dumbbell back up.
- Complete the designated number of reps and then switch sides.
- When your set is done, do not freely drop the dumbbell without checking your surroundings. You could drop the dumbbell and it might hit a person nearby. Or your could drop your dumbbell and crush your fingers on a dumbbell that was left next to your bench.
- The best way to finish a set is to bring the dumbbell back to your thigh and stand up with it.
Coaching Points
If you’re familiar with Dumbbell Bench Press but are new to this single-arm variation, you’ll probably be pretty surprised by just how much you need to brace your core to keep from literally rotating off the bench. For this reason, start light and then work your way up in weight.
This is a very shoulder-friendly pressing movement. Because the implement is a dumbbell, the range of motion is increased, the shear force on the shoulder is decreased, and the shoulder stabilizing muscles are engaged.
Overhead Squat

I absolutely love Overhead Squats for athletes, especially wrestlers.
First, it is the ultimate mobility assessment tool because it demands mobility from almost every part of the body. If there are issues with the shoulders, back, hips or ankles they are going to show up when trying to Overhead Squat.
Second, if you want to see a wrestler that has tremendous shoulder stability, watch a wrestler who can Overhead Squat their bodyweight. It also, by the way, takes a great deal of core strength and stability to do that as well.
Equipment Needed
- Barbell
- Bumper Plates (can technically be done with cast iron plates, but bumper plates are highly recommended)
Step-by-Step Instructions
- Grab a barbell with a snatch-width grip and raise it to full extension overhead.
- Set the feet shoulder-width apart with (optionally) toes pointed slightly out.
- Elevate the bar towards the ceiling and then create tension by ‘pulling the bar apart’.
- Set the eyes straight ahead, inhale and brace the core.
- Initiate the movement by pushing the hips back and then descending into a full squat position.
- Keep the feet flat on the ground, weight distributed through the heels and mid-foot.
- Keep knees pushed out and overtop the shoelaces.
- When you reach the bottom of the squat, push the feet through the floor and drive the hips up.
- Once you’ve completed all reps, drop the bar forward to the floor.
Coaching Points
If you find yourself struggling to keep the bar in the overhead position (it keeps falling forward), then you probably have a mobility issue in either the shoulders or thoracic (mid to upper back). Switch to a PVC Pipe until your mobility improves.
Single Arm Dumbbell Snatch
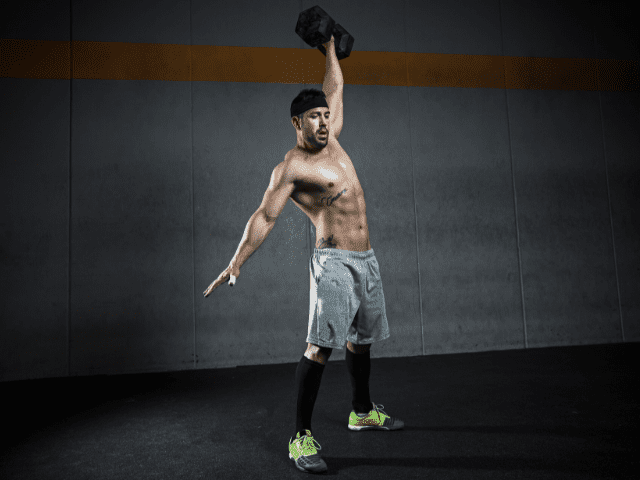
Another explosive exercise that I love for wrestlers is the Single Arm Dumbbell Snatch. It’s easy to learn, it’s unilateral (one side working at a time) and is a great Olympic lift variation to develop power. What’s not to love?
Equipment Needed
- Dumbbell
Step-by-Step Instructions
- Grab a dumbbell and stand with feet about shoulder-width apart.
- Stand with knees slightly bent, brace the core and set the back – shoulder blades pulled back, lats engaged, chest out.
- Hinge forward by pushing the hips back and let the dumbbell slide down right in between the knees, coming at a stop just below the knee.
- You are now in the ‘power position’.
- From here, drive the feet through the floor and aggressively extend the hips, driving the shoulders up and slightly back.
- As you reach triple extension of the hips, knees and ankles – use a quick, powerful shrug and allow the elbow to break and begin the pull with the arm.
- Keep the dumbbell close to the body as it travels up.
- Once the dumbbell reaches the highest point of the pull, rotate at the elbow to catch the dumbbell overhead while simultaneously dropping the hips into a quarter squat and shift the feet slightly out.
- Finish the rep by standing tall and lowering the dumbbell down to the shoulder first and then back to the starting position under control.
- Repeat until all reps are completed and then switch arms.
Coaching Points
The dumbbell should travel close to the body all the up until it gets about head height, then rotate the elbow, drop the hips and catch. Don’t allow it to swing forward out away from the body.
The second technique flaw is not staying braced through the return of the dumbbell to the starting position, oftentimes from being in too big of a hurry to knock out reps. Letting the dumbbell, especially the heavier you get, yank the shoulder down at the bottom of the rep is asking for trouble.
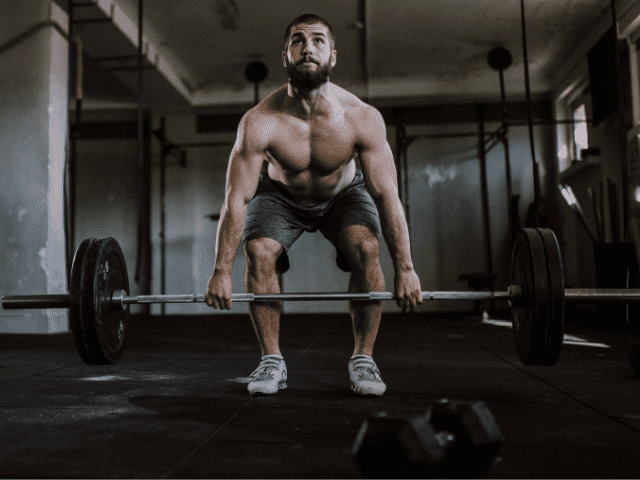
Trap Bar Deadlift
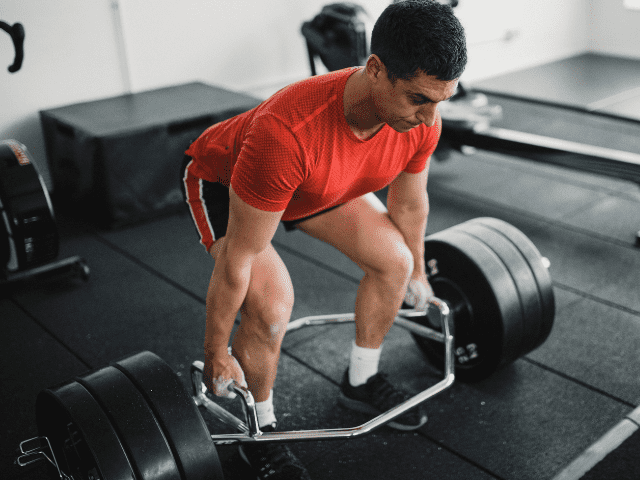
I like Trap Bar Deadlifts for wrestlers for a few reasons. First, they’re simply a great exercise for building lower body strength, especially for the posterior chain.
Being able to use a trap bar allows the weight to be shifted slightly more towards the hips which will take a bit of strain off the low back (compared to regular deadlifts).
Equipment Needed
- Trap Bar (also known as a hex bar)
- Plates (Preferably bumper plates, but iron plates can also be used if necessary.)
Step-by-Step Instructions
Setup
- Step inside the trap bar.
- Place feet roughly shoulder-width apart.
- Take a deep breath to brace the abdominal muscles.
- Hinge at the waist and bend at the knee simultaneously until you’re able to grab the bar handles.
- As you pull yourself down into the setup position, maintain a neutral head posture, with eyes fixed on something about 1-2 feet in front of you.
- In the final setup position, pull the chest up, and shoulder blades back, while still maintaining a brace in the abdominal muscles and get ready to lift.
Lift
- Start by pulling the “slack” out of the bar. This is where the lifter needs to create tension by slightly pulling into the bar and pushing their feet into the floor before maximal contraction/attempts.
- Once this tension is created, the lifter drives their feet through the floor, drives the hips forward, keeping tension in the abdomen and upper back, maintaining the hand position over the midfoot, the lifter stands tall with the barbell, and locks the repetition in.
- After locking in the repetition for about 1 second, the lifter is ready to lower the weight. Take in a big breath, maintaining a braced core and shoulder blades pulled together. The hips will push back and the knees will bend simultaneously.
- The weight should be maintained in a position over the midfoot. The athlete will continue to lower the barbell until the weights rest on the floor and prepare for the next repetition.
Coaching Points
Pro Tip: Don’t have a trap bar? Here are 10 alternatives for Trap Bar Deadlift that don’t need one.
Easily the most common mistake for deadlifts of any kind is allowing the back to round, placing unnecessary stress on the back. Keep the back flat throughout the movement and the core braced.
Do not bounce the bar off the floor between reps. Yes, bouncing the plates off the floor into the next rep may make the lift easier to do, but it’s also a good way to allow your technique to break down. Reset for each rep.
Battle Ropes
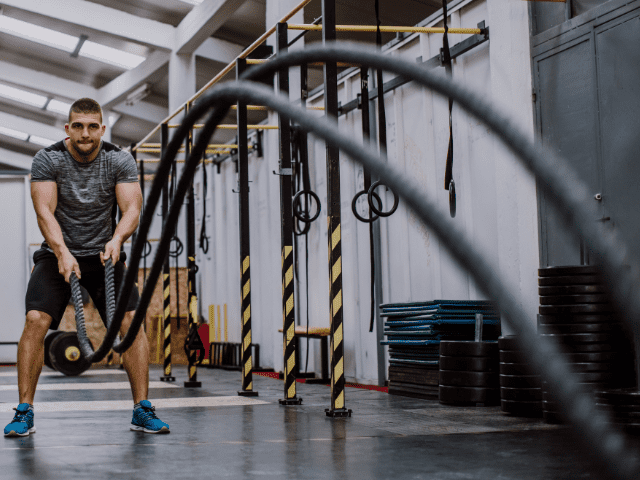
Upper-body muscular endurance is critical for wrestlers and nothing trains that better than Battle Ropes. Battle Rope Slams can train your upper body, core and conditioning – all wrapped up together.
Equipment Needed
- Battle Rope
Step-by-Step Instructions
- Wrap your battle rope around a solid, stable object. (A squat rack is often a good option)
- Extend the rope, removing the majority (but not all) of the slack out of the rope.
- Grab the two ends of the rope, one in each hand.
- Assume a good athletic position – knees bent, hips bent, flat back, core braced.
- Raise the ends of the rope above the head and then aggressively ‘slam’ them back towards the ground.
- This should create a ripple effect in the rope.
- Continue raising and slamming the rope in rhythm until all reps are completed.
Coaching Points
One of the keys to Battle Rope Slams is experimenting to find the optimal amount of slack to leave in the rope. You want enough slack that it doesn’t hinder the full range of motion, but not too much slack that it’s hard to develop a rhythm with the rope.
Make sure whatever you’re using as an anchor for the battle rope is secure. Battle rope movements generate a lot of power and momentum and can come loose easily if not secured in place.
Box Jumps

I couldn’t do an entire list of exercises for wrestlers and completely leave off plyometric training. The problem was which plyometric drill to pick.
I ended up going with probably the most popular and well-known plyometric training drill. Popular, but still extremely effective. Box Jumps.
Box Jumps will help develop explosiveness and take a lot of wear and tear off the joints by landing on a higher surface instead of all the way back to the ground each rep. Just focus on proper technique and avoid trying to jump on boxes too tall to do properly.
Equipment Needed
- Plyo Box
Step-by-Step Instructions
- Grab a box that is the proper height for your jumping ability
- Start just far enough away from the box so that your hands will not hit the box when you swing them.
- Once you’re in position, stand tall with feet hip-width apart.
- Now raise your arms overhead and extend up onto the balls of the feet.
- Start your countermovement by hinging at the hips, bending the knees and throwing the hands down and back behind the body.
- Immediately redirect by driving the feet through the floor, throwing the hands up and triple extending through the hips, knees and ankles.
- Land softly on the box by bending the knees upon landing and absorbing the force of impact.
- Step down off the box and repeat.
Coaching Points
Pick a box that is an appropriate height. You should land on the box in roughly a quarter-squat position. All too often I see athletes jump on a box that is way too high, causing them to have to land in a full squat position.
This is wrong for two reasons. First, picking your feet higher so you can land in a full squat doesn’t actually mean you jump any higher. Second, having to land in a full squat to make it onto the box eliminates any room for error. If you jump perhaps even an inch not high enough you could end up missing the box.
Final Thoughts
There is no shortage of quality exercises that you can utilize for wrestling workouts. However, in my opinion, those are the 10 most beneficial exercises that will help you increase your performance on the wrestling mat.
Want more ideas to incorporate into your wrestling strength and conditioning program? Here are my 10 favorite core exercises for wrestlers.