
10 Best Lower Body Exercises For Football Players
Jacked arms may look good in pre-game warm-ups, but lower body strength is what actually makes a difference after kickoff.
It’s also not enough anymore to just train and hope for the best if you truly want to maximize your ability. Picking the proper lower body exercises to build a strong and explosive lower body is key.
In this article, I’m going to highlight some of the best lower body exercises for football players. These are exercises I’ve used with athletes over the course of two decades working with elite college football players.
Lower Body Exercises For Football
Power Clean
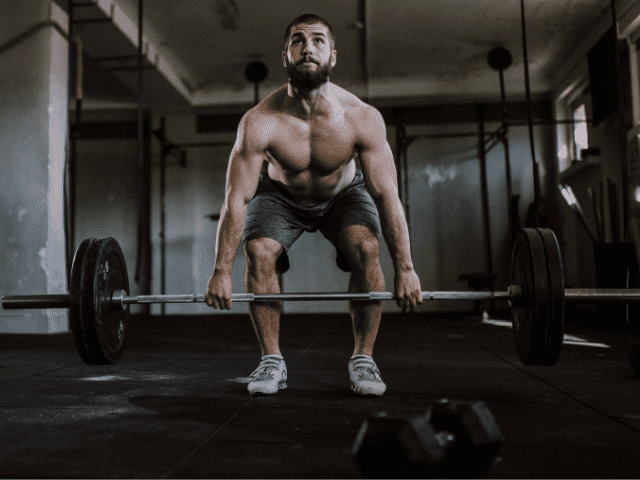
Football is a game of power and explosiveness and no exercise better trains for power and explosiveness than Power Cleans.
Power Clean trains football players to explosively extend through their hips, knees and ankles in a sequenced, coordinated manner. Catching the bar also teaches players how to receive and absorb force – something that is often overlooked, but an extremely important ability for both performance and injury prevention.
Power Cleans also teaches many intangibles that can carry over to the field. The ability to mentally lock in, focus, brace and have attention to detail is something you won’t find with many exercises. There is something about “winning” or “losing” each rep that I believe sets Power Cleans apart from almost anything else in the weight room.
I could literally go on and on about how important I think having Power Cleans as a staple within a training program is. In fact, I wrote an entire piece about how, not just football players, but all athletes should power clean.
How To
- Starting Position: Stand with feet shoulder-width apart, gripping the barbell wider than shoulder-width.
- Initial Pull: Slightly bend knees, keeping your chest up and back straight. Lift the bar off the ground by extending your legs.
- Mid-Pull: As the bar passes your knees, explosively extend your hips and knees while keeping the bar close to your body.
- High-Pull: Shrug your shoulders and pull the bar upward. Your elbows should point out to the sides.
- Catch Phase: Drop under the bar by bending your knees, and catch it on your front shoulders. Your elbows should be pointing forward.
- Stand Up: Straighten your legs to come to a full standing position.
Coaching Points
Power Cleans are a technical lift that requires proper coaching. While they are an amazing lift for developing power, they can lead to injury if done incorrectly.
If you do not feel comfortable with the proficiency of your power clean technique then you should avoid doing them. If that is the case, consider one of the following alternatives.
Back Squat
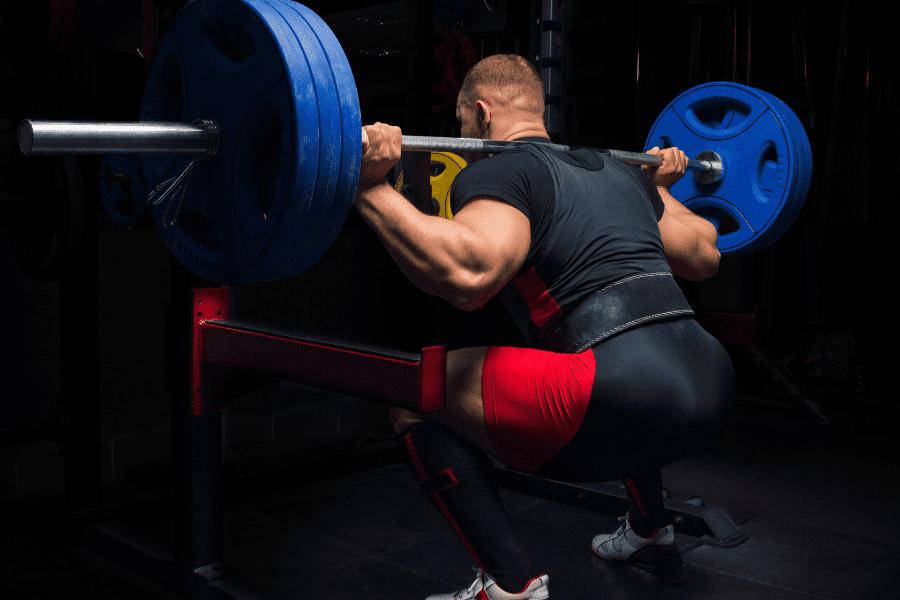
If you could only give me two exercises to train a football player, I would pick Power Cleans and Back Squats. (If I only had ten exercises, here are the 10 I would pick)
No other exercise is going to build strength as effectively as the Back Squat. I’m talking about strength where it’s most useful for a football player as well – in the legs and hips. Strong biceps are great, but it’s a strong and powerful lower body that will dominate the line of scrimmage and break tackles.
Not only will Back Squats build strong legs, but they’ll also help develop a strong core and a strong back which are also both pretty important for football athletes.
How To
- Bar Setup: Place the barbell on a squat rack at chest height. Stand facing the bar.
- Grip and Position: Grip the bar wider than shoulder-width apart and duck under it, placing it on your upper traps.
- Unrack: Stand up, lifting the bar off the rack. Take one or two steps back to clear the rack.
- Starting Position: Stand with feet shoulder-width apart, toes slightly pointing outward. Keep your chest up and eyes forward.
- Initiate Squat: Bend your knees and hips simultaneously, pushing your hips back and down.
- Descending Phase: Lower your body until your thighs are at least parallel to the ground, keeping your knees over your toes.
- Ascent: Push through your heels, extending your hips and knees to return to the starting position.
- Rack: Carefully walk the barbell back into the squat rack and lower it onto the rack.
Coaching Points
It is better to set the safeties one level too low vs one level too high, as the athlete can either let the bar off of their back or allow themselves to lean forward until the bar hits the safeties. In the event the safeties are too high, the barbell has a chance of colliding with them during the exercise.
Front Squat
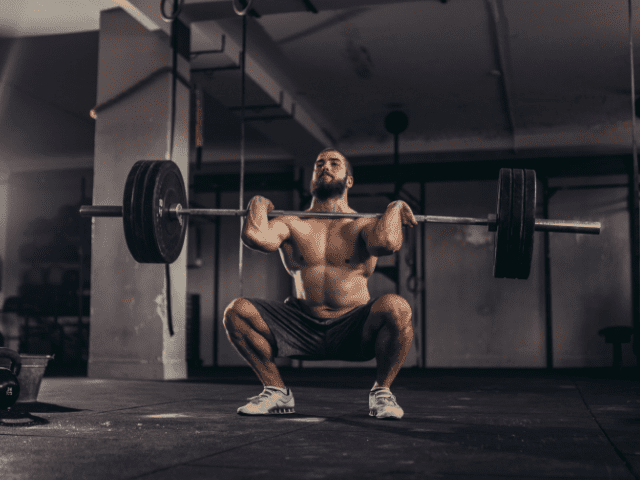
There seems to be a rift within Collegiate Strength and Conditioning about whether Back Squatting or Front Squatting is more beneficial for athletes. And it seems that everyone has chosen a side and you’re either a Back Squat proponent or a Front Squat advocate.
Which am I?
I think football players should be doing BOTH.
Back Squats and Front Squats both have their pros and cons and BOTH should have a place in a football strength and conditioning program. Why anyone would pick one and throw out the other I’ll never understand.
Step-by-Step Instruction
- Bar Setup: Set the barbell on a squat rack at chest height. Approach the bar, facing it.
- Grip and Position: Use a clean grip or cross-arm grip to hold the bar. Place the bar on your front deltoids, close to your neck.
- Unrack: Stand up to lift the bar off the rack. Take a step or two back to clear the rack.
- Starting Position: Stand with your feet shoulder-width apart, toes slightly out. Keep your elbows high and chest up.
- Initiate Squat: Begin by bending your knees and hips, lowering your body towards the ground.
- Descending Phase: Continue lowering until your thighs are at least parallel to the floor, keeping your elbows high.
- Ascent: Push through your heels to extend your knees and hips, returning to the starting position.
- Rack: Carefully walk the bar back to the squat rack and lower it onto the supports.
Coaching Points
Be patient with your wrist flexibility. Persistence and working hard on your flexibility will pay off with front squatting. Remember to always warm up prior to any lifting session. Work on flexibility drills during warm-up sets as well.
Need an alternative for Front Squats? Here are 12 Front Squat alternatives to develop lower body strength.
Hang Power Snatch
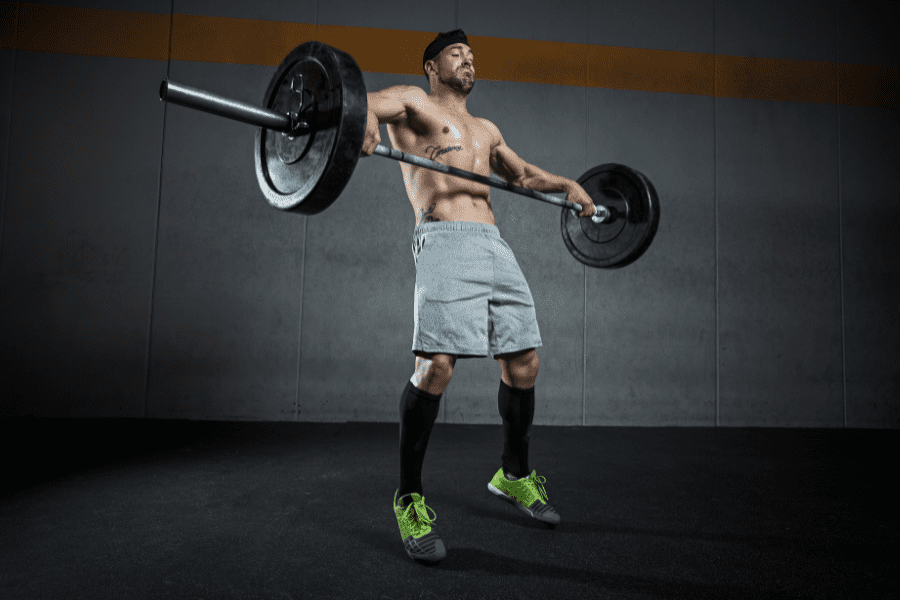
Hang Snatch, more specifically Hang Power Snatch, is the second Olympic Lift that I would put in my top ten.
Hang Snatches are a great lower body exercise for football for multiple reasons. First off, they’re extremely easy to teach. If an athlete understands how to set their back and brace their core then they can usually pick up how to Hang Snatch within a few sets.
Second, Hang Snatches help teach and develop raw power. The weights used with Hang Snatches are lighter than those used for Power Cleans and therefore the athlete can focus on moving the bar as fast as humanly possible (while maintaining proper technique of course).
It’s for this reason, the emphasis on the speed end of the speed/strength curve that I love Hang Snatches so much.
How To
- Starting Position: Stand with feet hip-width apart, holding the barbell at hip level using a wide overhand grip.
- Initial Bend: Slightly bend your knees while keeping your back straight and chest up.
- Explosive Pull: Quickly extend your hips and knees, pulling the bar upward. Engage your traps with a shrug.
- Pull Under: As the bar reaches its highest point, quickly drop under it by bending your knees.
- Catch Phase: Catch the bar overhead with arms fully extended. Make sure your feet are flat on the ground.
- Stand Up: Extend your knees to a full standing position, keeping the bar overhead.
- Reset: Lower the bar back to hip level, setting up for the next repetition.
Coaching Points
One of the biggest mistakes lifters make is to cut the pull short and not reach complete extension. Don’t be in a rush to pull with the arms as that will cut your power short on the movement.
Reverse Lunge
Now let’s jump into some single-leg movements. Single-Leg movements are critical for the physical development of football players because so much of the sport is actually done on one leg (even if it may not seem obvious). Jumping, sprinting, tackling, battling for position at the line of scrimmage is often done on one leg at a time.
Single-Leg exercises also help fight against any lower body asymmetries that may occur over time (one side being stronger than the other). Asymmetries often lead to compensations (or are caused by compensations in the first place) and eventually oftentimes injury.
Reverse Lunges are one of my favorite single-leg movements because stepping backward takes away forward momentum which can be stressful for the knees. It’s also easier for athletes in my experience to maintain a more upright torso while doing Reverse Lunges as opposed to regular Lunges.
Instructions
- Starting Position: Stand with feet hip-width apart, holding dumbbells in each hand at your sides or with a barbell across your upper back.
- Initiate Movement: Take a step back with one leg, keeping your torso upright.
- Descending Phase: Lower your body until both knees form 90-degree angles. The back knee should hover just above the floor.
- Ascent: Push through the front heel to return to the starting position.
- Switch Legs: Repeat the movement with the opposite leg.
- Reset: Come back to the starting position and prepare for the next repetition.
Coaching Points
When you step back, make sure to keep the feet shoulder-width apart. If you’re feeling very off-balance in your lunge there is a good chance that you are stepping the lead foot directly behind the front foot (essentially placing yourself on a tight rope).
Keep the front foot flat on the floor when in the lunge position. One of the most common mistakes is raising up onto the ball of the front foot. One of the reasons for this is often the next most common mistake that I see with Barbell Lunges…
Make sure to take a big enough step. Often times I see athletes take way too small of a step. This leads to lunge being extremely cramped and can lead to a whole host of other issues.
Pistol Squat
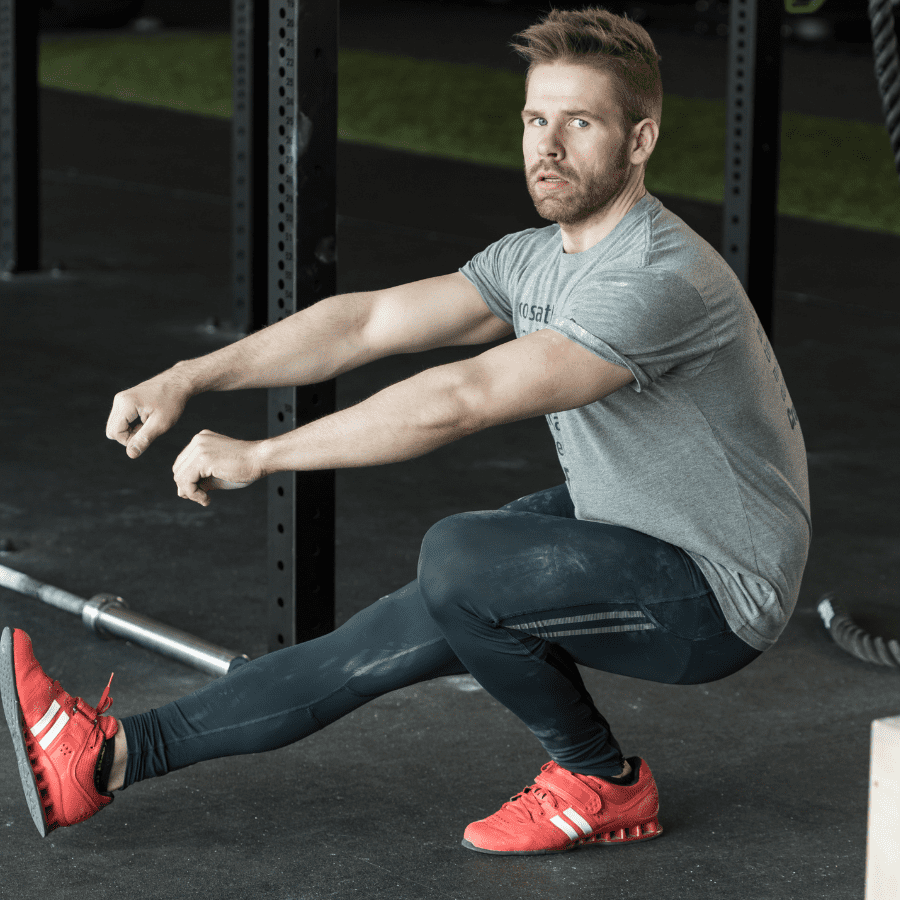
I love Pistol Squats. I love Pistol Squats because they’re a bodyweight movement that will absolutely smoke your legs without putting any added stress to the posterior chain.
If you’re designing a strength and conditioning program you have to be really careful with how much you are taxing the posterior chain. So many exercises – Olympic lifts, squats, hinging movements like RDLs and Bent Over Rows – all stress the posterior chain. This is part of what makes Pistol Squats truly special.
Pistol Squats are also a TRUE single-leg movement.
Many single-leg movements like lunges and step-ups can be ‘cheated’ and an athlete can still compensate for a weaker side. Pistol Squats are one leg and one leg only. No opposite leg to give you a little boost if you need it. Want to find out if one of your legs is actually stronger than the other? Do Pistol Squats.
Instructions
On Air
- Stand on one leg with the opposite leg straight and slightly out in front of the body.
- Squat down on the single leg by hinging back at the hips first and then bending the knee and hips until the crease of the hip crosses below the knee.
- Keep the heel flat and your weight distributed between your heel and mid-foot.
- Keep your torso as vertical as possible while maintaining balance and a flat foot.
- The opposite leg should stay straight and extend out in front of you as you squat down (tight hamstrings will make this almost impossible!)
- Once you reach the bottom of the squat, drive the foot through the floor and stand tall.
To Box
- Instructions are the same as above, except the athlete will squat down to a box (or bench) instead of freely in an open space.
- Make sure the foot is close enough to the box so that the box is not missed when squatting down to touch it. (I’ve seen it happen)
- Control the descent to the box and sit as softly as possible. A light touch-and-go is ideal if possible. My favorite cue for this was to “treat the box like a glass coffee table.”
Coaching Points
If you’re not able to do a Pistol Squat the first time trying, don’t worry, you’re not alone. Most athletes I’ve worked with have to start by using a bench for pistol squats. The first thing you need to do to start progressing is figuring out where your real weakness is: strength or flexibility.
Some lifters simply don’t possess the strength at first to perform a full pistol squat on air. On the other hand, many of the athletes I’ve coached actually have the strength to do a pistol squat, but they lack the mobility to be able to go through the full range of motion without falling or their opposite foot crashing into the ground.
Figuring out where to focus your energy is the first step toward improving your Pistol Squat.
Romanian Deadlift
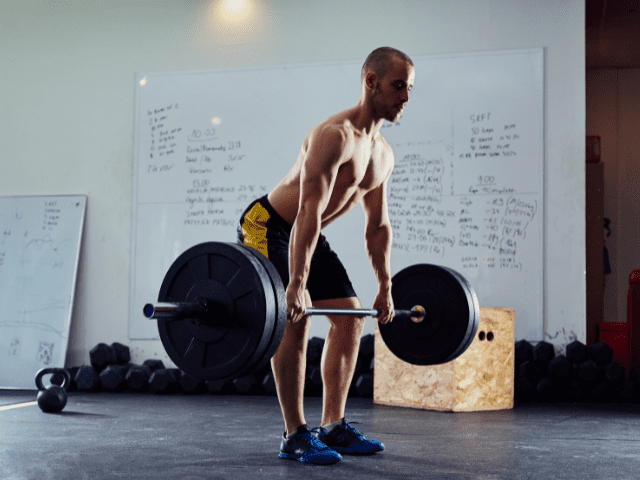
Speaking of the posterior chain, let’s shift gears to a couple of lower-body exercises that focus on the posterior chain. First is RDLs, or Romanian Deadlifts.
I really like RDLs because they do a tremendous job of building strength throughout the entire posterior chain, from the Erector Spinae muscles of the low back, through the glutes and finally the hamstrings. Even the upper body which has to stay engaged to maintain posture throughout the lift gets challenged.
It’s also a great supplemental exercise to almost every exercise listed above it on this list. You can’t get maximum benefit out of any of those exercises without the foundation of a strong posterior chain and Romanian Deadlifts will build just that.
How To
- Address the bar with feet shoulder-width apart, and toes straight ahead.
- Use a pronated grip about a thumb length from the start of the knurling.
- Now, with a good flat back, pick the bar up to a standing position.
- From here, put a slight bend in the knees and ‘set the back’ by squeezing the shoulder blades and engaging the lats.
- Brace the core and hinge forward by pushing the hips back.
- The bar should almost drag right down the legs, across the knees and straight down the shins. The whole foot should stay flat on the ground, but the weight should be on the mid-foot to heel.
- Maintain the neutral spine position throughout the descent and once you feel a good stretch in the hamstrings, drive the hips forward (hip extension) and return to the starting position.
Coaching Points
The ‘depth’ that each person gets will be different and absolutely solely dependent upon hamstring flexibility.
Do NOT try to ‘reach’ the barbell toward the ground because you believe the plates should touch the floor. If you have tight hamstrings you may be doing well to get the bar to mid-shin.
Trying to reach the bar to the floor will result in the lifter losing their neutral spine and rounding their back… which leads me right into common RDL mistakes.
Nordic Hamstring Curl
Nordic Hamstring Curls are by far my favorite hamstring exercise and it’s not even close.
Why?
Because they work. Scientific reviews like this one constantly prove that including Nordic Hamstring Curls in a training program helps reduce the risk of a hamstring injury.
They also happen to be a really tough bodyweight exercise that if you build it into your culture can become really competitive. Anything that can turn competitive in a weight room is something you want to have in the program.
How To
- Start on your knees with a partner holding your feet (dorsiflexed, toes in the ground).
- Hold your hands in front of your chest, brace your core and lock in your hips.
- Now, keep your body in a straight line (shoulders, hips and knees) and lean forward.
- Lower slowly and under control as long as possible.
- Touch your chest to the ground, using your hands if necessary (they will most likely be necessary)
- Finally, give yourself a little push to get started and then use your hamstrings to curl yourself back to the start.
Coaching Points
The ultimate goal is to be able to lower yourself to the floor, touch the ground with your chest, and then curl yourself up without using your hands. However, this takes practice and a ton of hamstring strength. Be patient and focus on your progress each time.
Don’t allow your hips to shoot out, breaking the straight line going through your shoulders, hips and knees.
Only use as much push with your arms coming off the ground as needed. How much is the right amount? Trust me, when you get it just right – you’ll know.
Prowler Sled

All the exercises up to this point have been pretty traditional up to this point, but there is no chance I’m leaving off Prowler Pushes. If you’re unfamiliar with what a Prowler is, it’s basically a sled that you can add weights to and then vertical handles that allow you to push it.
Keep the weight a bit lighter and you can work on power. Load it up and focus on building strength. It’s an amazing tool.
It will also, as anyone who has ever pushed a prowler for multiple sets will tell you, tax your anaerobic system to the max. Want to get in football shape? Try an exercise that requires total body exertion for 8 to 10 seconds at a time repeatedly.
Step-By-Step Instruction
- Set your prowler in an area where you can push it at least 20 yards without hitting anything.
- Load the prowler with weight.
- Get behind the prowler and grab the high handle position.
- Hinge at the waist, bend the knees and extend your arms.
- Drive your legs and push the sled forward.
Coaching Points
The prowler push is a full body movement. Keep the core tight, nice neutral spine, and keep those arms extended (Arms can be bent when focusing on heavier loads).
Focus on a strong knee drive and pushing through your feet to keep the prowler moving. Your body angle will be very similar to how you start a sprint. So the lower body action should be very similar to running.
A very important consideration here is the surface you are pushing on. Ideally, you are pushing the prowler on turf. This gives enough surface tension so that the prowler doesn’t glide or get stuck too easily. If you are pushing on a slicker surface like concrete or carpet, you may have to load more weight on the sled.
Sprint

You may not have expected to see sprinting on a list of lower body exercises, but that’s just how important I believe sprinting is for football players. This sprinting can be part of a full program complete with sprinting drills, but it can also be as simple as just getting out and sprinting.
I think too many football players have gotten away from actual sprinting. I see so many players lift, condition and do far too many ladder drills. However, going out, lining up and running as fast as possible is neglected far too much.
If you want to run fast, you need to run fast. Even more, if you want your hamstrings to be prepared (and not pull) to do a full sprint once you’re on the field – you better be doing that in your training.
Online Strength Programs
- 1-on-1 Online Coaching
- Sports Performance Programs for Football, Basketball, Soccer & More
- Programs for Former Athletes (Legends) Who Still Want to Train Like Athletes
- Programs for Adults Who Want to Get Healthy (and look great at the beach!)
- Use Code “HB10” to Get 10% Off Today
Final Thoughts
There are many great exercises that got left off the list. For example, there are no true plyometric exercises. I really struggled with whether Bounding, which I absolutely love for football players, fit on this list or not.
However, this list is a great starting point and I believe a sound football training program should include all (or at least most) of the exercises listed here.
